If you’ve ever wanted to bake bread but felt intimidated by the process, No-Knead Bread is the perfect recipe to start with. This simple and rustic loaf requires minimal effort and just a few basic ingredients, yet it yields a beautifully crusty and flavorful bread. Whether you’re a beginner or an experienced baker, No-Knead Bread is a game-changer that’s sure to impress. In this article, we’ll explore why you’ll love this recipe, provide a step-by-step guide to making it, and answer some frequently asked questions to ensure your bread turns out perfectly every time.
Why You’ll Love No-Knead Bread
No-Knead Bread is more than just a loaf—it’s a testament to the beauty of simplicity. Here’s why it deserves a spot in your recipe collection:
- Easy to Make: With no kneading required and just a few ingredients, this recipe is perfect for beginners.
- Minimal Hands-On Time: Most of the work is done by time and yeast, so you can let the dough do its thing.
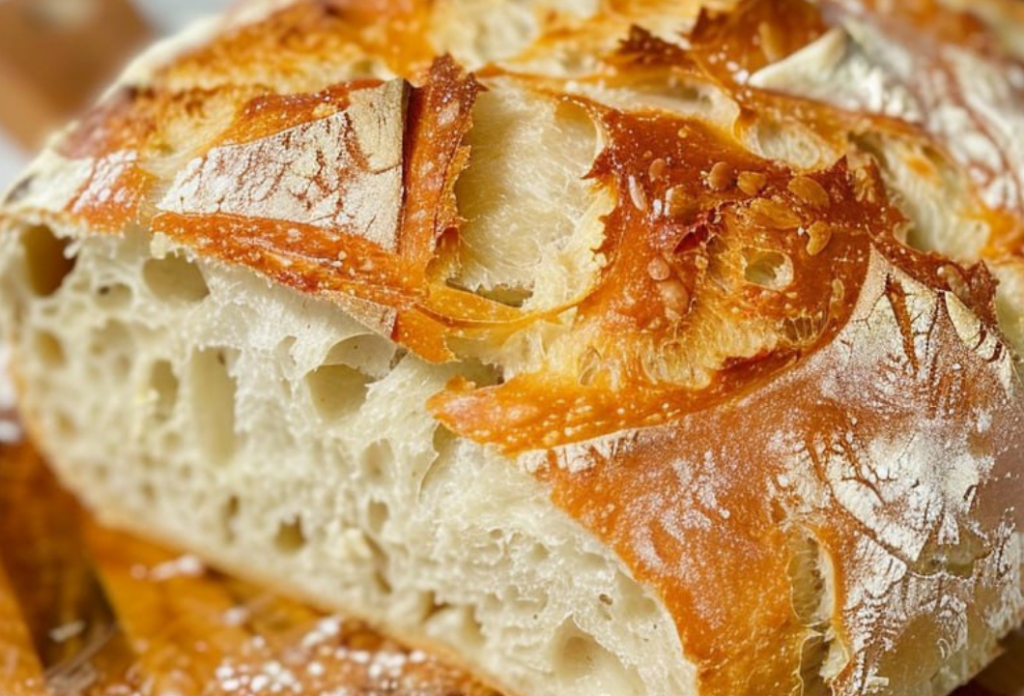
- Rustic and Delicious: The crusty exterior and soft, chewy interior make this bread a winner.
- Versatile: Enjoy it plain, with butter, or as a base for sandwiches and toast.
Moreover, this bread is a great way to enjoy homemade bread without the need for special equipment or advanced baking skills.
Step-by-Step Guide to Making No-Knead Bread
Follow this detailed guide to create the perfect No-Knead Bread.
Step 1: Preparation
Before diving into the recipe, gather all the necessary ingredients and tools. Here’s what you’ll need:
Ingredients:
- 3 cups (360g) all-purpose flour
- 1 1/2 tsp salt
- 1/2 tsp instant yeast (or active dry yeast)
- 1 1/2 cups (360ml) warm water
Tools:
- Large mixing bowl
- Wooden spoon or spatula
- Plastic wrap or kitchen towel
- Dutch oven or heavy oven-safe pot with a lid
- Parchment paper (optional)
Additionally, prepare your ingredients ahead of time to streamline the process.
Step 2: Mixing the Dough
Now that everything is ready, let’s start making the dough:
- Combine Dry Ingredients: In a large mixing bowl, whisk together the flour, salt, and yeast.
- Add Water: Gradually add the warm water, stirring with a wooden spoon or spatula until a shaggy dough forms.
- Mix Until Combined: The dough will be sticky and rough—this is normal. Mix just until there are no dry spots of flour.
Step 3: First Rise (H3)
Once the dough is mixed, it’s time to let it rise:
- Cover the Bowl: Cover the bowl with plastic wrap or a kitchen towel.
- Let It Rest: Let the dough rise at room temperature for 12–18 hours. The longer it rests, the more flavor it develops.
Step 4: Shaping the Dough
After the dough has risen, it’s time to shape it:
- Transfer to a Floured Surface: Turn the dough out onto a lightly floured surface.
- Shape the Dough: Gently shape the dough into a ball by folding the edges toward the center.
- Let It Rest Again: Place the dough on a piece of parchment paper (if using) and cover it with a towel. Let it rest for 30 minutes.
Step 5: Preheating the Oven
While the dough is resting, preheat your oven:
- Preheat the Dutch Oven: Place your Dutch oven or heavy pot with a lid in the oven and preheat to 450°F (230°C).
Step 6: Baking
Once the oven is hot, it’s time to bake the bread:
- Transfer the Dough: Carefully remove the hot Dutch oven from the oven. Lift the dough (using the parchment paper if needed) and place it into the pot.
- Cover and Bake: Cover the pot with the lid and bake for 30 minutes.
- Uncover and Finish Baking: Remove the lid and bake for another 10–15 minutes, or until the crust is deep golden brown.
Step 7: Cooling
Once the bread is baked, it’s time to cool and enjoy:
- Cool the Bread: Remove the bread from the pot and let it cool completely on a wire rack before slicing.
Tips for Making the Best No-Knead Bread
To ensure your No-Knead Bread turns out perfectly, keep these tips in mind:
- Use a Kitchen Scale: Weighing your ingredients ensures accuracy and consistency.
- Don’t Overmix: Mix the dough just until combined—overmixing can make the bread dense.
- Let It Cool Completely: Cutting into the bread too soon can make it gummy.
Common Mistakes to Avoid When Preparing No-Knead Bread
Even the best bakers can make mistakes. Here’s what to watch out for:
- Skipping the Long Rise: The long rise develops flavor and texture, so don’t rush it.
- Using Cold Water: Warm water helps activate the yeast and develop the dough.
- Overhandling the Dough: Be gentle when shaping the dough to preserve air pockets.
FAQs About No-Knead Bread
Q: Can I make No-Knead Bread ahead of time?
A: Yes! Prepare the dough and let it rise in the refrigerator for up to 24 hours. Let it come to room temperature before baking.
Q: Can I use whole wheat flour?
A: Yes, but you may need to adjust the water slightly, as whole wheat flour absorbs more liquid.
Q: How do I store leftovers?
A: Store leftovers in a paper bag or wrapped in a kitchen towel at room temperature for up to 2 days.
Q: Is this bread gluten-free?
A: No, this recipe uses all-purpose flour. For a gluten-free version, use a gluten-free flour blend.
Conclusion
No-Knead Bread is a simple, rustic, and delicious loaf that’s perfect for any occasion. With its crusty exterior, soft interior, and minimal effort, it’s a bread that will impress your family and guests. Whether you’re baking for a special meal or just for yourself, this recipe is sure to become a favorite.
So, grab your ingredients, follow the steps, and enjoy this delicious and wholesome bread. Don’t forget to share it with your loved ones—they’ll thank you for it!
Print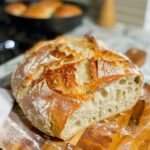
No-Knead Bread: A Simple and Rustic Loaf
- Total Time: 15 mins
Description
Enjoy the simplicity and deliciousness of homemade No-Knead Bread! This easy recipe yields a rustic, crusty loaf with a soft, airy interior. Perfect for beginners and seasoned bakers alike, this bread requires minimal effort and delivers maximum flavor. Enjoy it with butter, jams, or as a base for your favorite sandwiches.
Ingredients
3 cups all-purpose flour
1/2 teaspoon instant yeast
1 1/4 teaspoons salt
1 1/2 cups warm water (about 110°F)
Instructions
In a large bowl, whisk together all-purpose flour, instant yeast, and salt.
Add warm water to the dry ingredients and stir with a wooden spoon until a shaggy dough forms.
Cover the bowl with plastic wrap or a clean kitchen towel and let it sit at room temperature for 12-18 hours, or until the dough is bubbly and has doubled in size.
Preheat your oven to 450°F (230°C). Place a Dutch oven with its lid inside the oven to heat up for about 30 minutes.
Turn the dough out onto a well-floured surface. With floured hands, shape the dough into a ball. Be gentle to avoid deflating the dough too much.
Carefully remove the hot Dutch oven from the oven. Place a piece of parchment paper inside the Dutch oven, then gently transfer the dough ball onto the parchment paper.
Cover the Dutch oven with its lid and bake for 30 minutes.
Remove the lid and bake for an additional 15-20 minutes, or until the bread is golden brown and has a crusty exterior.
Carefully remove the bread from the Dutch oven and let it cool on a wire rack before slicing.
Serve the No-Knead Bread with your favorite toppings or alongside your favorite dishes.
Prep Time: 15 minutes (active), 12-18 hours (resting)
Kcal: 160 per slice
Notes
This No-Knead Bread recipe is perfect for those who love the taste of homemade bread without the hassle of kneading. With its crisp crust and soft interior, it’s a versatile loaf that’s great for any occasion. Give it a try and enjoy the simple pleasure of fresh, homemade bread!