Introduction
Craving a sweet treat that’s easy to make and impossible to resist? These Cherry Pie Bombs are the perfect solution! These bite-sized delights feature flaky crescent dough wrapped around sweet cherry pie filling, baked to golden perfection, and dusted with powdered sugar. Whether you need a quick dessert for a party or a fun baking project with kids, these mini cherry pies deliver big flavor with minimal effort.
Moreover, they’re incredibly versatile—swap the filling for apple, blueberry, or even Nutella! By the end of this guide, you’ll master the art of making Cherry Pie Bombs, along with pro tips, common mistakes to avoid, and answers to all your burning questions.
Why You’ll Love These Cherry Pie Bombs
These little desserts pack a punch—here’s why they’re a must-make:
- Quick & Easy – Ready in under 30 minutes with just 4 ingredients.
- Perfect Portions – No slicing needed; each bomb is a single, mess-free serving.
- Crowd-Pleasing – Ideal for parties, potlucks, or a sweet midnight snack.
- Kid-Friendly – Fun to assemble and even more fun to eat!
- Customizable – Use any pie filling or drizzle with glaze for extra decadence.
Additionally, Cherry Pie Bombs are a great way to satisfy pie cravings without baking a whole one.
Step-by-Step Guide to Perfect Cherry Pie Bombs
Step 1: Gather Your Ingredients & Tools
Keep it simple with these basics:
Ingredients Checklist:
- 1 can (8 oz) refrigerated crescent dough (or homemade dough)
- 1 can (21 oz) cherry pie filling (or homemade)
- ¼ cup melted butter
- ¼ cup granulated sugar (or cinnamon sugar for extra flavor)
- Powdered sugar (for dusting, optional)
Tools Needed:
- Muffin tin or baking sheet
- Mixing bowl
- Pastry brush (for butter)
Step 2: Assembling the Cherry Pie Bombs
Prep the Dough
Unroll the crescent dough and separate it into triangles (if using perforated dough). If using sheets, cut into squares.
Add the Filling
Place 1 tsp of cherry pie filling in the center of each dough piece. Be careful not to overfill—too much will cause leaks!
Seal the Bombs
Fold the dough around the filling, pinching edges tightly to seal. Roll into a ball and place seam-side down in a greased muffin tin or on a baking sheet.
Coat with Butter & Sugar
Brush each bomb with melted butter, then roll in granulated sugar for a sweet, crispy crust.
Step 3: Baking & Serving
Bake at 375°F (190°C) for 12–15 minutes until golden brown. Let cool slightly, then dust with powdered sugar. Serve warm for the best gooey center!
Tips for Making the Best Cherry Pie Bombs
Take your bombs to the next level with these tricks:
Prevent Leaks – Ensure edges are tightly sealed and don’t overfill.
Add Flavor Twists – Mix cinnamon into sugar or drizzle with vanilla glaze.
Air Fryer Option – Cook at 350°F (175°C) for 8–10 minutes for crispier results.
Make Ahead – Assemble unbaked bombs and refrigerate overnight before baking.
Avoid these common mistakes:
Using Cold Dough – Let it sit at room temp for 5–10 minutes for easier handling.
Skipping the Butter/Sugar Coating – This adds crunch and sweetness.
Overbaking – They’re done when golden; longer baking dries them out.
FAQs About Cherry Pie Bombs
Q: Can I use other fillings?
A: Absolutely! Try apple, blueberry, lemon curd, or even chocolate chips.
Q: Can I freeze them?
A: Yes! Freeze unbaked bombs on a tray, then transfer to a bag. Bake from frozen, adding 2–3 extra minutes.
Q: How do I keep them from bursting?
A: Seal edges well and avoid overfilling. A tiny slit on top also helps steam escape.
Q: Can I use puff pastry instead?
A: Yes, but adjust baking time (puff pastry may need longer).
Conclusion
These Cherry Pie Bombs are the ultimate easy dessert—simple, delicious, and endlessly adaptable. Perfect for last-minute cravings or entertaining, they’re guaranteed to disappear fast!
Print
Cherry Pie Bombs: Irresistible Bite-Sized Desserts in Minutes
- Total Time: 25 MINS
Description
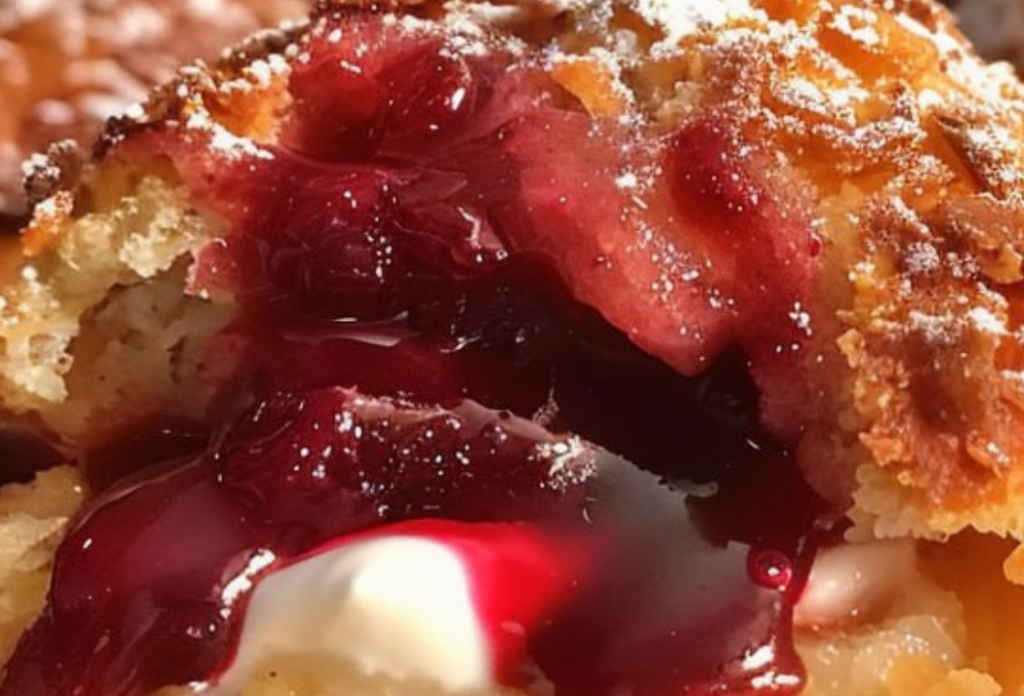
Treat yourself to these irresistible cherry pie bombs, featuring a warm, gooey cherry filling wrapped in a golden, flaky crust. They’re simple to make and perfect for satisfying your sweet tooth! 🍒
Ingredients
1 can (8 count) refrigerated biscuits
1 can (21 oz) cherry pie filling
1/2 cup granulated sugar
1 tsp cinnamon
1/4 cup unsalted butter, melted
Instructions
Preheat your oven to 375°F (190°C).
Flatten each biscuit into a 4-inch circle.
Spoon about 1 tablespoon of cherry pie filling into the center of each flattened biscuit.
Fold the edges of the biscuit dough over the filling and pinch to seal, forming a ball.
Place the sealed dough balls seam-side down on a greased baking sheet.
Bake in the preheated oven for 12-15 minutes, or until golden brown.
While the pie bombs are baking, mix the granulated sugar and cinnamon in a small bowl.
Once baked, brush each pie bomb with melted butter and roll in the cinnamon-sugar mixture.
Allow to cool slightly before serving. Enjoy warm!
Notes
These cherry pie bombs are a delightful and easy-to-make dessert that packs a delicious punch in every bite. Perfect for any occasion, they’re sure to become a family favorite!