Picture this: golden, crispy bread sizzling in hot oil, filling your kitchen with an irresistible aroma that instantly transports you to Native American gatherings and family celebrations. Indian fry bread represents more than just a delicious recipe—it’s a cherished tradition that has been passed down through generations, connecting us to rich cultural heritage and bringing families together around the dinner table.
Furthermore, this versatile bread serves as the perfect foundation for countless meals, from hearty Navajo tacos to sweet dessert treats. Additionally, its simple ingredients and straightforward preparation make it accessible to home cooks of all skill levels, ensuring that anyone can master this beloved recipe.
Why You’ll Love This Indian Fry Bread Recipe
Making Indian fry bread offers numerous benefits that make it a standout addition to your recipe collection. Moreover, its versatility and crowd-pleasing nature ensure it will become a household favorite in no time.
Easy to Master:
- Simple ingredients you likely have in your pantry
- Straightforward technique perfect for beginners
- Minimal equipment required for preparation
Incredibly Versatile:
- Perfect base for savory Navajo tacos
- Delicious when topped with honey or powdered sugar
- Great for sopping up stews and soups
Family-Friendly:
- Kids love helping with the preparation process
- Appeals to all age groups and taste preferences
- Creates memorable cooking experiences together
Budget-Conscious:
- Uses affordable, basic pantry staples
- Feeds a crowd without breaking the bank
- Stretches other ingredients when used as a base
Culturally Significant:
- Connects you to Native American traditions
- Teaches respect for indigenous cooking methods
- Preserves important culinary heritage
Additionally, the texture combination of crispy exterior and soft, pillowy interior creates an irresistible eating experience. Furthermore, the bread stays fresh for several days when stored properly, making it perfect for meal prep and quick weeknight dinners.
Essential Ingredients for Perfect Indian Fry Bread
Creating authentic Indian fry bread requires just a handful of simple ingredients. However, the quality of these basic components significantly impacts the final result.
Core Ingredients:
- 2 cups all-purpose flour (provides structure and texture)
- 1 tablespoon baking powder (creates the perfect rise)
- 1/2 teaspoon salt (enhances flavor and balances sweetness)
- 3/4 cup warm water (activates ingredients and forms dough)
- Oil for frying (ensures golden, crispy exterior)
Moreover, using room temperature ingredients helps create smoother dough that’s easier to work with. Additionally, measuring ingredients accurately ensures consistent results every time you make this traditional bread.
Flour Selection Tips: All-purpose flour works best for this recipe because it provides the right balance of protein and starch. Furthermore, sifting the flour before measuring creates lighter, more tender bread. However, you can substitute up to 25% of the all-purpose flour with whole wheat flour for added nutrition.
Water Temperature Matters: The water should feel warm to the touch but not hot enough to kill the baking powder’s effectiveness. Additionally, starting with slightly warm water helps the dough come together more easily and creates better texture.
Step-by-Step Guide to Making Indian Fry Bread
Step 1: Preparation and Dough Formation
Begin by gathering all your ingredients and ensuring your workspace is clean and organized. Additionally, having everything ready before you start makes the process smoother and more enjoyable.
Mixing the Dry Ingredients:
- Combine flour, baking powder, and salt in a large mixing bowl
- Whisk together thoroughly to distribute ingredients evenly
- Create a well in the center for adding liquid ingredients
Forming the Dough:
- Gradually pour warm water into the flour mixture
- Stir with a wooden spoon until rough dough forms
- Continue mixing until most flour is incorporated
Moreover, avoid adding all the water at once, as this can create lumpy dough. Instead, add it slowly while stirring continuously for best results.
Step 2: Kneading and Resting the Dough
Transfer the dough to a lightly floured surface for kneading. Additionally, this step develops the gluten structure that gives the bread its characteristic texture.
Proper Kneading Technique:
- Push the dough away from you with the heel of your hand
- Fold it back over itself and turn 90 degrees
- Repeat for 8-10 minutes until smooth and elastic
Furthermore, the dough should feel soft and slightly tacky but not sticky. If it’s too wet, add flour one tablespoon at a time. Conversely, if it’s too dry, add water one teaspoon at a time.
Resting Period: Cover the kneaded dough with a damp towel and let it rest for 30 minutes. Additionally, this resting time allows the gluten to relax, making the dough easier to roll and shape.
Step 3: Shaping and Frying the Indian Fry Bread
Dividing the Dough:
- Cut the rested dough into 8 equal portions
- Roll each piece into a smooth ball
- Cover with a towel to prevent drying out
Rolling Technique: Roll each ball into a circle approximately 6-7 inches in diameter and 1/4 inch thick. Moreover, try to maintain even thickness throughout for consistent cooking. Additionally, let the shaped circles rest for 5 minutes before frying.
Frying Process: Heat oil to 375°F (190°C) in a heavy-bottomed skillet or deep fryer. Furthermore, maintaining proper temperature ensures crispy exterior without greasy results.
- Carefully slide one dough circle into hot oil
- Fry for 2-3 minutes until golden brown on first side
- Flip gently and cook another 2-3 minutes
- Remove and drain on paper towels immediately
Additionally, avoid overcrowding the pan, as this lowers oil temperature and creates soggy bread. Instead, fry one or two pieces at a time for best results.
Tips for Making the Best Indian Fry Bread
Achieving perfect Indian fry bread requires attention to several key details. Moreover, these professional tips will help you create restaurant-quality results at home.
Dough Consistency Tips:
- The dough should be soft but not sticky to the touch
- Add liquid gradually to avoid overmixing
- Let the dough rest adequately for easier handling
Temperature Control: Use a thermometer to maintain oil temperature between 365-375°F. Additionally, temperature that’s too low creates greasy bread, while too high burns the exterior before cooking the interior.
Timing Considerations: Watch for visual cues rather than relying solely on time. Furthermore, the bread should puff slightly and turn golden brown before flipping.
Storage and Reheating: Store leftover fry bread in an airtight container for up to 3 days. Additionally, reheat in a 350°F oven for 5-7 minutes to restore crispness.
Common Mistakes to Avoid When Preparing Indian Fry Bread
Even experienced cooks can encounter challenges when making Indian fry bread. However, understanding these common pitfalls helps ensure success every time.
Dough-Related Issues:
- Overworking the dough creates tough, chewy texture
- Adding too much flour makes the bread dense and heavy
- Insufficient resting time results in difficult-to-roll dough
Frying Problems:
- Oil that’s too cool creates greasy, soggy bread
- Overcrowding the pan causes uneven cooking
- Flipping too early can cause the bread to fall apart
Temperature Mistakes: Monitor oil temperature consistently throughout the frying process. Additionally, adjust heat as needed to maintain proper temperature between batches.
Timing Errors: Rushing the process often leads to disappointing results. Instead, allow adequate time for each step, especially dough resting and proper frying.
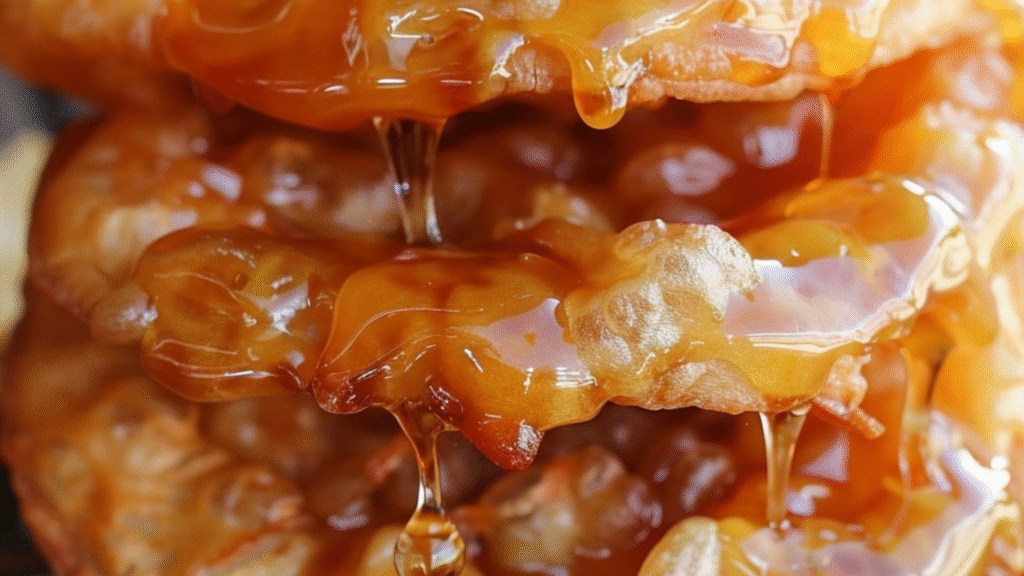
Delicious Ways to Serve Indian Fry Bread
Indian fry bread serves as an incredibly versatile base for numerous meal options. Moreover, its neutral flavor profile complements both sweet and savory toppings beautifully.
Savory Applications:
- Navajo Tacos: Top with seasoned ground beef, lettuce, tomatoes, cheese, and sour cream
- Indian Tacos: Layer with traditional Native American ingredients like wild rice and venison
- Breakfast Base: Add scrambled eggs, bacon, and cheese for hearty morning meals
Sweet Variations:
- Drizzle with honey and sprinkle with cinnamon
- Dust with powdered sugar for simple dessert
- Top with fresh berries and whipped cream
Creative Serving Ideas: Furthermore, use fry bread as a unique pizza base or sandwich wrap. Additionally, it pairs wonderfully with hearty stews and chilis as a bread accompaniment.
Nutritional Information and Healthier Alternatives
Each serving of traditional Indian fry bread contains approximately 250 calories. Additionally, understanding the nutritional profile helps you make informed dietary choices.
Basic Nutritional Breakdown:
- Calories: 250 per piece
- Carbohydrates: 35-40 grams
- Fat: 8-10 grams (primarily from frying oil)
- Protein: 5-6 grams
Healthier Preparation Methods: Consider these alternatives to reduce calories and increase nutritional value:
- Oven-Baked Version: Brush with oil and bake at 450°F for 10-12 minutes
- Air Fryer Option: Cook at 375°F for 8-10 minutes, flipping halfway
- Whole Grain Flour: Substitute 25-50% of all-purpose flour with whole wheat
Moreover, adding seeds or herbs to the dough increases fiber and flavor without significantly impacting calories.
Cultural Significance of Indian Fry Bread
Understanding the cultural importance of Indian fry bread adds depth and respect to your cooking experience. Furthermore, this bread represents resilience and adaptation within Native American communities.
Historical Context: Originally created from government-issued white flour and lard, fry bread emerged during difficult periods of Native American history. Additionally, it represents both survival and the preservation of community traditions.
Modern Significance: Today, Indian fry bread serves as a symbol of cultural identity and family connection. Moreover, sharing this bread creates bonds between generations and preserves important traditions.
Respectful Preparation: Approach making this bread with respect for its cultural origins. Additionally, take time to learn about and appreciate the communities that created and preserved this recipe.
FAQs About Indian Fry Bread
Q: How do I make Indian fry bread healthier? A: Substitute whole wheat flour for up to half the all-purpose flour, bake instead of frying, or use an air fryer to reduce oil content. Additionally, top with fresh vegetables and lean proteins for balanced nutrition.
Q: Can I make the dough ahead of time? A: Yes, prepare the dough up to 24 hours in advance and refrigerate covered. However, bring it to room temperature before shaping and frying for best results.
Q: What’s the best oil for frying Indian fry bread? A: Use neutral oils with high smoke points like vegetable oil, canola oil, or peanut oil. Moreover, avoid olive oil as its lower smoke point can create bitter flavors.
Q: Why is my fry bread tough and chewy? A: Overworking the dough or using too much flour typically causes tough texture. Additionally, ensure your baking powder is fresh and active for proper rise.
Q: Can I freeze Indian fry bread? A: Absolutely! Cool completely, wrap individually in plastic wrap, and freeze for up to 3 months. Furthermore, thaw at room temperature and reheat in the oven to restore texture.
Q: What size should I make each piece of fry bread? A: Aim for 6-7 inch circles that are about 1/4 inch thick. Additionally, consistent sizing ensures even cooking and professional presentation.
Q: How do I know when the oil is ready for frying? A: Use a thermometer to check for 375°F, or test with a small piece of dough – it should sizzle immediately and float to the surface.
Troubleshooting Common Indian Fry Bread Problems
Even experienced cooks sometimes encounter challenges when making Indian fry bread. However, most issues have simple solutions that can save your batch.
Dough Won’t Come Together: If your dough seems too dry and crumbly, add warm water one teaspoon at a time. Additionally, make sure your flour measurement is accurate – too much flour creates dry dough.
Bread Turns Out Greasy: This usually indicates oil temperature that’s too low. Moreover, make sure to drain fried bread on paper towels immediately after cooking to remove excess oil.
Uneven Browning: Maintain consistent oil temperature and avoid moving the bread unnecessarily while frying. Furthermore, ensure your dough circles are evenly rolled for uniform cooking.
Bread Falls Apart During Frying: This often results from dough that’s too wet or hasn’t rested adequately. Additionally, handle the shaped dough gently when transferring to hot oil.
Conclusion
Creating authentic Indian fry bread connects you to centuries of tradition while providing your family with a delicious, versatile meal foundation. Moreover, this simple yet satisfying recipe offers endless possibilities for customization and creativity in your kitchen.
The combination of crispy exterior and tender interior makes this bread irresistible to people of all ages. Additionally, its budget-friendly ingredients and straightforward preparation method ensure you can enjoy this traditional treat whenever the craving strikes.
Print
The Ultimate Guide to Making Authentic Indian Fry Bread: A Traditional Recipe That Brings Families Together
- Total Time: 1H 20
Description
Experience the rich and delicious flavors of Indian Fry Bread, perfect for making Navajo Tacos! This versatile bread is crispy on the outside and soft on the inside, making it an ideal base for all your favorite toppings.
Ingredients
2 cups all-purpose flour
1 tbsp baking powder
1/2 tsp salt
3/4 cup warm water
Oil for frying
Instructions
In a large bowl, combine the flour, baking powder, and salt.
Gradually add the warm water to the flour mixture, stirring until a dough forms.
Knead the dough on a lightly floured surface until smooth. Let it rest for 30 minutes.
Divide the dough into 8 equal pieces and roll each piece into a ball.
Flatten each ball into a circle about 1/4 inch thick.
Heat oil in a deep skillet over medium-high heat. Fry each dough circle until golden brown on both sides, about 2-3 minutes per side. Drain on paper towels.
Serve the fry bread topped with your favorite taco ingredients such as seasoned ground beef, lettuce, tomatoes, cheese, and sour cream.
Prep Time: 40 minutes

