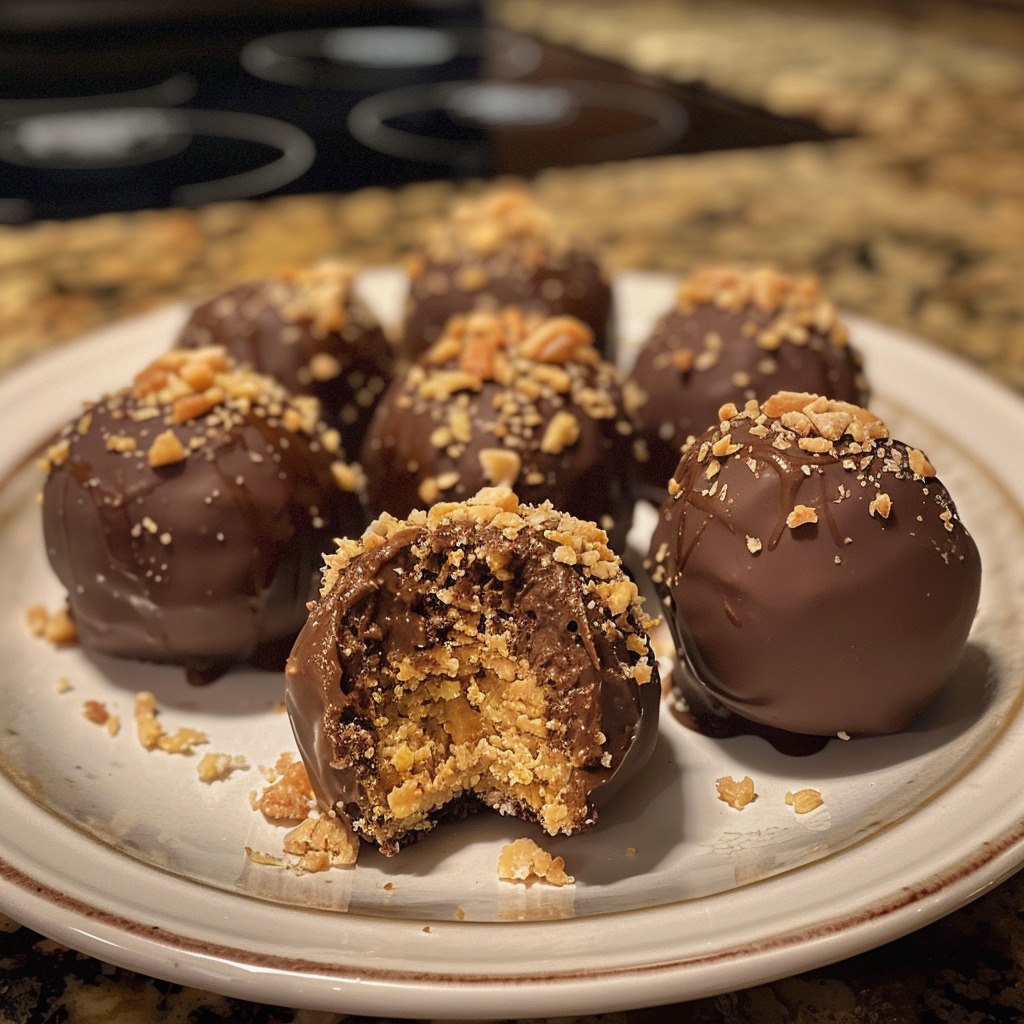
Few treats capture the essence of childhood nostalgia quite like homemade peanut butter balls. These delectable bite-sized confections combine the rich, creamy satisfaction of peanut butter with the luxurious coating of smooth chocolate. Moreover, they represent the perfect marriage of convenience and indulgence – requiring no baking while delivering bakery-quality results.
Additionally, peanut butter balls have become a beloved tradition in countless households across America. Furthermore, their simple preparation method makes them accessible to bakers of all skill levels. Whether you’re preparing for holiday gatherings, bake sales, or simply craving a homemade treat, these irresistible confections deliver maximum satisfaction with minimal effort.
Print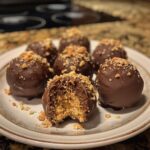
The Ultimate Peanut Butter Balls: Your Complete No-Bake Dessert Guide
- Total Time: 1 hour 10 minutes
- Yield: 30 peanut butter balls 1x
Description
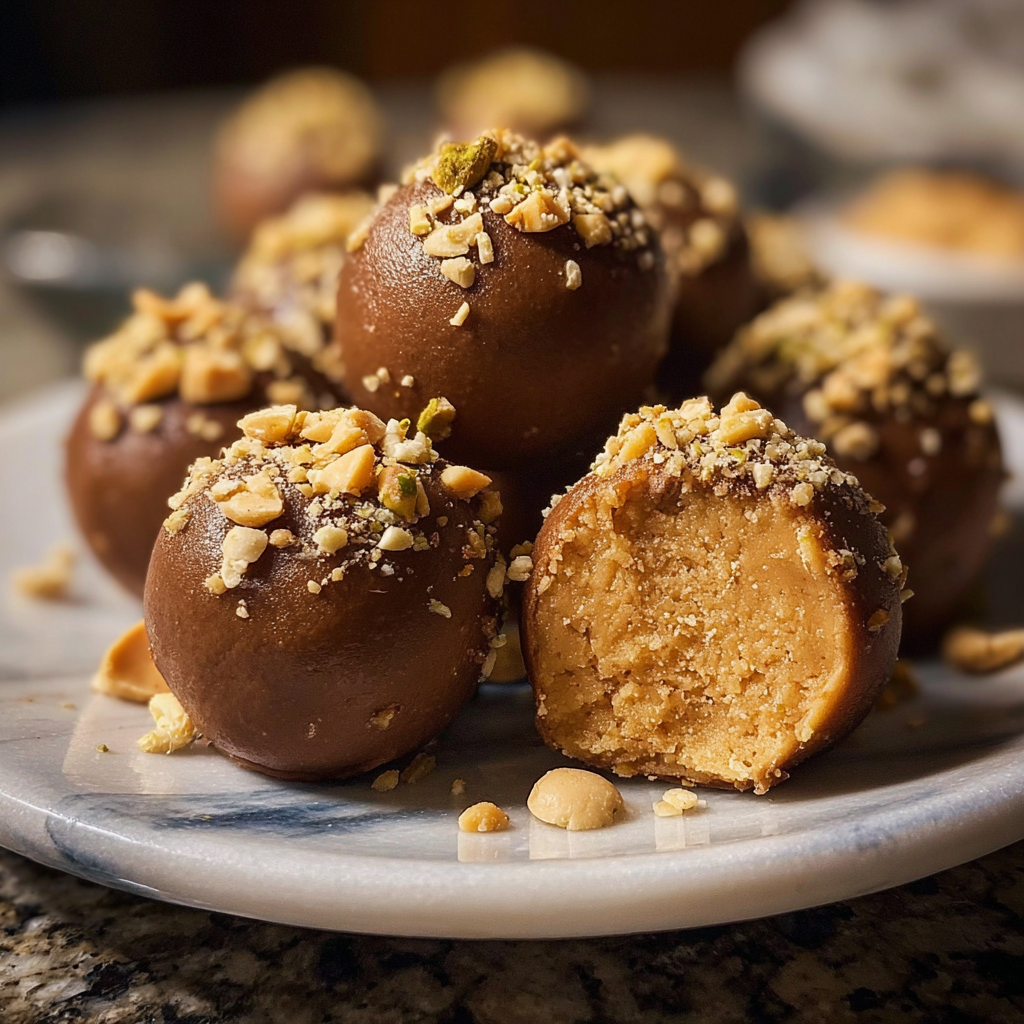
These no-bake Peanut Butter Balls are rich, creamy, and coated in smooth chocolate—perfect for holidays, parties, or anytime you need a quick, sweet treat!
Ingredients
- 1 cup creamy peanut butter
- 1/4 cup unsalted butter, softened
- 2 cups powdered sugar
- 1 teaspoon vanilla extract
- 1/4 teaspoon salt
- 2 cups semi-sweet chocolate chips
- 1 tablespoon vegetable shortening or coconut oil (optional)
Instructions
- Mix peanut butter base: In a mixing bowl, combine peanut butter, softened butter, powdered sugar, vanilla, and salt. Mix until smooth and thick.
- Shape and chill: Roll mixture into 1-inch balls and place on a parchment-lined baking sheet. Freeze for 30 minutes.
- Melt chocolate: Melt chocolate chips in the microwave in 30-second intervals, stirring between each. Add shortening or coconut oil if desired for a smoother coating.
- Dip and coat: Dip each chilled ball into melted chocolate using a fork or toothpick. Let excess drip off and return to baking sheet.
- Chill again: Refrigerate for 15–20 minutes until chocolate is set.
- Serve: Enjoy chilled or at room temperature. Store leftovers in an airtight container in the refrigerator.
Notes
- Use crunchy peanut butter for added texture.
- Freeze extras: Peanut butter balls freeze well for up to 2 months.
- Customize: Top with sprinkles or drizzle with white chocolate for decoration.
- Prep Time: 20 minutes
- Cook Time: undefined
- Category: Dessert
- Method: No-Bake
- Cuisine: American
Nutrition
- Serving Size: 1 ball
- Calories: 120 kcal
- Sugar: 11 g
- Sodium: 45 mg
- Fat: 7 g
- Saturated Fat: undefined
- Unsaturated Fat: undefined
- Trans Fat: undefined
- Carbohydrates: 13 g
- Fiber: 1 g
- Protein: 2 g
- Cholesterol: 5 mg
Keywords: peanut butter balls, no bake dessert, holiday treats, chocolate peanut butter, easy candy recipe
Why You’ll Love These Peanut Butter Balls
Creating perfect peanut butter balls offers numerous advantages that make them an essential addition to your dessert repertoire. Here’s why these delightful confections deserve a permanent place in your recipe collection:
They require absolutely no baking: Perfect for hot summer days when you want to avoid using the oven. Additionally, no-bake preparation makes them accessible even in kitchens without full baking equipment.
They’re incredibly budget-friendly: Most ingredients are pantry staples that cost significantly less than store-bought chocolates. Furthermore, homemade versions taste fresher and more luxurious than commercial alternatives.
They’re completely customizable: You can adjust sweetness levels, add mix-ins, or experiment with different coatings. Moreover, dietary modifications accommodate various preferences and restrictions easily.
They make excellent gifts: Beautiful presentation and long shelf life make them perfect for holiday giving. Additionally, homemade treats show thoughtfulness and care that recipients truly appreciate.
They’re freezer-friendly: Large batches can be prepared ahead and frozen for convenient entertaining. Furthermore, frozen peanut butter balls maintain quality for several months when properly stored.
They satisfy multiple cravings: The combination of sweet, salty, and rich flavors appeals to diverse taste preferences. Moreover, the protein from peanut butter provides more satisfaction than pure sugar confections.
They’re party-perfect: Bite-sized portions eliminate the need for cutting or serving utensils. Additionally, their elegant appearance elevates any dessert table or gathering.
Essential Ingredients for Perfect Peanut Butter Balls
Choosing the Right Peanut Butter
The foundation of exceptional peanut butter balls begins with selecting high-quality peanut butter. Creamy varieties work best for smooth, uniform texture throughout the filling. Additionally, natural peanut butters with minimal additives provide more authentic, intense peanut flavor.
Moreover, avoid peanut butters with excessive oil separation, which can affect the mixture’s consistency. Furthermore, well-mixed peanut butter incorporates more easily with other ingredients. Additionally, room temperature peanut butter blends more smoothly than cold varieties.
Consider the salt content when selecting peanut butter brands. Furthermore, lightly salted varieties enhance the overall flavor balance without overwhelming the sweetness. Moreover, the salt content affects how much additional salt you’ll need in the recipe.
Powdered Sugar Selection
Quality powdered sugar significantly impacts the final texture and appearance of peanut butter balls. Choose brands without cornstarch additives when possible for smoother mixing. Additionally, sift powdered sugar before use to eliminate lumps and ensure uniform consistency.
Moreover, the fineness of powdered sugar affects how well it incorporates into the peanut butter mixture. Furthermore, ultra-fine varieties blend more smoothly and create better texture. Additionally, proper powdered sugar creates the ideal binding consistency for rolling.
Store powdered sugar in airtight containers to prevent moisture absorption and clumping. Furthermore, humid conditions can cause powdered sugar to become lumpy and difficult to work with. Moreover, fresh, dry powdered sugar produces the best mixing results.
Chocolate Coating Options
Semi-sweet chocolate chips provide the classic coating that most people expect from peanut butter balls. Additionally, their balanced sweetness complements the rich peanut butter filling perfectly. Moreover, high-quality chocolate chips melt more smoothly and create better coatings.
Furthermore, consider mixing different chocolate types for more complex flavors. Dark chocolate adds sophisticated depth while milk chocolate provides creamier sweetness. Additionally, white chocolate creates elegant visual contrast and milder flavor profiles.
Chocolate quality dramatically affects the final product’s taste and appearance. Furthermore, premium brands contain more cocoa butter, which creates smoother melting and better coating consistency. Moreover, avoid chocolate chips with excessive stabilizers that can affect melting properties.
Step-by-Step Guide to Making Peanut Butter Balls
Step 1: Preparing the Peanut Butter Mixture
Begin by ensuring all ingredients reach room temperature for optimal mixing results. Additionally, softened butter incorporates more easily and creates smoother texture throughout the mixture. Moreover, room temperature ingredients blend more uniformly than cold components.
Combine creamy peanut butter and softened butter in a large mixing bowl. Furthermore, cream these ingredients together until light and fluffy using an electric mixer. Additionally, proper creaming incorporates air and creates better texture in the final product.
Gradually add powdered sugar, vanilla extract, and salt to the peanut butter mixture. Moreover, adding dry ingredients slowly prevents clumping and ensures even distribution. Additionally, scrape down bowl sides regularly to incorporate all ingredients thoroughly.
Mix until the combination reaches a thick, moldable consistency that holds together when pressed. Furthermore, the mixture should feel slightly firm but not crumbly or too soft. Additionally, proper consistency allows easy rolling without sticking to hands excessively.
Step 2: Forming Perfect Balls
Prepare a baking sheet by lining it with parchment paper for easy removal and cleanup. Additionally, parchment prevents sticking and makes transfer easier after coating. Moreover, properly prepared surfaces streamline the entire process.
Using clean hands or a small cookie scoop, portion the mixture into uniform, 1-inch balls. Furthermore, consistent sizing ensures even coating and professional appearance. Additionally, rolling between palms creates smooth, round shapes.
Work efficiently to prevent the mixture from becoming too warm and sticky. Moreover, slightly cool hands make rolling easier and produce better shapes. Additionally, chill your hands with cold water if the mixture becomes difficult to handle.
Place formed balls on the prepared baking sheet, leaving space between each piece. Furthermore, proper spacing prevents them from sticking together during chilling. Additionally, organized placement makes coating easier later.
Step 3: Chilling for Optimal Texture
Transfer the baking sheet to the freezer for approximately 30 minutes until balls feel firm to the touch. Additionally, proper chilling prevents the balls from falling apart during coating. Moreover, cold filling creates better contrast with warm chocolate coating.
Furthermore, avoid over-chilling, which can make the balls too hard and difficult to coat evenly. Additionally, properly chilled balls maintain their shape while allowing smooth chocolate adhesion. Moreover, the ideal texture feels firm but not frozen solid.
Consider chilling in the refrigerator for longer periods if your schedule requires flexibility. Furthermore, refrigerated balls remain workable for several hours without becoming too hard. Additionally, this method provides more control over timing.
Step 4: Melting Chocolate Coating
Use a microwave-safe bowl to melt chocolate chips in 30-second intervals, stirring between each heating. Additionally, gradual heating prevents burning and ensures smooth, workable consistency. Moreover, overheated chocolate becomes grainy and difficult to work with.
Furthermore, add vegetable shortening or coconut oil if the melted chocolate seems too thick for easy dipping. Additionally, these additions create smoother consistency without affecting flavor significantly. Moreover, properly thinned chocolate coats more evenly and drips less.
Stir melted chocolate thoroughly until completely smooth and glossy. Furthermore, any remaining lumps will create uneven coating and poor appearance. Additionally, properly melted chocolate should flow smoothly off a spoon.
Test the chocolate temperature on your wrist – it should feel warm but not hot. Moreover, excessively hot chocolate can melt the peanut butter filling and create messy results. Additionally, proper temperature ensures clean coating without damaging the filling.
Step 5: Coating and Final Presentation
Remove chilled peanut butter balls from the freezer and work quickly while chocolate remains workable. Additionally, cold balls help set the chocolate coating faster and prevent melting. Moreover, efficient coating prevents the chocolate from cooling and thickening excessively.
Using a fork or toothpick, carefully dip each ball into melted chocolate, ensuring complete coverage. Furthermore, allow excess chocolate to drip back into the bowl before placing on parchment. Additionally, gentle tapping helps remove excess coating for cleaner appearance.
Place coated balls back on the parchment-lined baking sheet, ensuring they don’t touch each other. Moreover, proper spacing prevents them from sticking together as chocolate sets. Additionally, organized placement creates more professional presentation.
Refrigerate coated peanut butter balls for 15-20 minutes until chocolate coating feels firm and set. Furthermore, properly set chocolate won’t smudge when handled gently. Additionally, chilled confections maintain better shape during storage and serving.
Advanced Techniques for the Best Peanut Butter Balls
Temperature Control Mastery
Maintaining optimal temperatures throughout the process ensures professional-quality results. Monitor chocolate temperature carefully to prevent overheating and graininess. Additionally, use a candy thermometer for precise temperature control when making large batches.
Moreover, work in a cool kitchen environment when possible to prevent premature melting. Furthermore, air conditioning or fans help maintain ideal working conditions. Additionally, cool surfaces help chocolate set faster and create better finishes.
Consider tempering chocolate for the most professional results and longest shelf life. Furthermore, properly tempered chocolate creates glossy finishes and stable coatings. Moreover, this advanced technique produces bakery-quality appearance and texture.
Texture Enhancement Strategies
Elevate your peanut butter balls through strategic texture additions and modifications. Consider adding finely chopped nuts for crunch and flavor complexity. Additionally, toasted nuts provide enhanced flavor and appealing textural contrast.
Moreover, incorporate mini chocolate chips into the peanut butter mixture for surprise bursts of chocolate. Furthermore, these additions create more complex eating experiences without complicating preparation. Additionally, mix-ins add visual interest when balls are cut or bitten.
Experiment with different coating textures by rolling in chopped nuts, coconut, or sprinkles before chocolate sets. Furthermore, these additions create unique presentations and flavor combinations. Moreover, textured coatings add visual appeal and eating interest.
Flavor Variation Techniques
Transform basic peanut butter balls using creative flavor additions and modifications. Consider adding cocoa powder to create chocolate-peanut butter combinations. Additionally, espresso powder enhances chocolate notes and adds sophisticated depth.
Moreover, experiment with different extracts like almond, rum, or coconut for unique flavor profiles. Furthermore, these additions create signature variations that distinguish your confections. Additionally, small amounts of extract provide significant flavor impact.
Incorporate spices like cinnamon, cardamom, or chili powder for unexpected complexity. Furthermore, warm spices complement peanut butter beautifully and create memorable taste experiences. Moreover, subtle spice additions intrigue without overwhelming the base flavors.
Creative Variations of Classic Peanut Butter Balls
Alternative Nut Butter Options
While peanut butter remains the classic choice, other nut and seed butters create exciting variations. Almond butter provides milder, more sophisticated flavors that appeal to refined palates. Additionally, almond butter contains different nutritional profiles and accommodates some tree nut allergies.
Moreover, cashew butter creates incredibly smooth, creamy textures with subtle, sweet flavors. Furthermore, its neutral taste pairs well with various coating options and mix-ins. Additionally, cashew butter produces pale-colored fillings that showcase colorful coatings beautifully.
Sunflower seed butter accommodates nut allergies while providing similar textures and satisfaction. Furthermore, this option allows everyone to enjoy these treats regardless of dietary restrictions. Moreover, seed butters often cost less than premium nut alternatives.
Coating Alternatives
Beyond traditional chocolate, numerous coating options create unique presentations and flavors. White chocolate provides elegant appearance and milder taste that highlights the filling. Additionally, colored melting wafers create festive, holiday-appropriate presentations.
Moreover, rolling in powdered sugar creates classic, old-fashioned appearances reminiscent of traditional confections. Furthermore, this technique reduces sweetness slightly and provides different textural experiences. Additionally, powdered sugar coatings cost less than chocolate alternatives.
Consider coconut flakes for tropical flavors and appealing textures. Furthermore, toasted coconut adds nutty depth while untoasted provides milder sweetness. Moreover, coconut coatings accommodate various dietary preferences including dairy-free options.
Seasonal and Holiday Adaptations
Transform peanut butter balls for specific seasons and holidays through strategic modifications. Halloween versions might include orange and black coatings with spooky decorations. Additionally, seasonal sprinkles and colored chocolates create appropriate festive appearances.
Moreover, Christmas adaptations could feature red and green coatings with holiday-themed decorations. Furthermore, peppermint extract additions create seasonal flavors that complement traditional holiday menus. Additionally, gift-worthy presentations make them perfect for holiday giving.
Valentine’s Day versions might incorporate pink and red coatings with romantic decorations. Furthermore, heart-shaped molds create special presentations for loved ones. Moreover, premium chocolate coatings elevate them to gourmet gift status.
Common Mistakes to Avoid When Making Peanut Butter Balls
Mixture Consistency Problems
The most common error involves incorrect mixture consistency that affects rolling and coating. Too-soft mixtures won’t hold their shape during rolling or coating processes. Additionally, excessive moisture creates sticky, unworkable textures that frustrate beginners.
Moreover, too-dry mixtures crumble during rolling and create uneven, unattractive shapes. Furthermore, insufficient moisture prevents proper binding and cohesion. Additionally, dry mixtures often result from excessive powdered sugar additions.
Avoid making mixture adjustments too quickly without allowing ingredients to fully incorporate. Furthermore, patience during mixing often resolves apparent consistency issues. Moreover, gradual adjustments prevent overcorrection and mixture problems.
Chocolate Coating Issues
Overheated chocolate becomes grainy, thick, and difficult to work with effectively. Additionally, burned chocolate develops bitter flavors that overpower the sweet peanut butter filling. Moreover, proper temperature control prevents these common chocolate problems.
Furthermore, adding liquid-based flavorings can cause chocolate to seize and become unworkable. Additionally, water-based ingredients create immediate texture problems in melted chocolate. Moreover, use oil-based flavorings or extracts specifically designed for chocolate work.
Avoid coating warm peanut butter balls, which melt and create messy, uneven results. Furthermore, insufficient chilling prevents proper chocolate adhesion and setting. Additionally, proper temperature contrast ensures clean, professional-looking coatings.
Storage and Handling Errors
Storing peanut butter balls at incorrect temperatures affects texture and shelf life significantly. Room temperature storage can cause chocolate bloom and soft textures. Additionally, excessive heat melts coatings and creates unappetizing appearances.
Moreover, inadequate packaging allows moisture absorption and flavor transfer from other foods. Furthermore, proper airtight storage maintains freshness and prevents contamination. Additionally, appropriate containers prevent crushing and maintain attractive presentations.
Avoid freezing coated peanut butter balls without proper packaging, which causes condensation and coating damage. Furthermore, frozen treats require gradual thawing to prevent texture problems. Moreover, proper freezing techniques maintain quality for extended storage periods.
Nutritional Considerations for Peanut Butter Ball Enthusiasts
Caloric and Macronutrient Breakdown
Understanding the nutritional content helps make informed choices about portion sizes and frequency. Each peanut butter ball contains approximately 120 calories, primarily from fats and carbohydrates. Additionally, the protein content from peanut butter provides some nutritional value beyond pure indulgence.
Moreover, the fat content comes primarily from healthy monounsaturated fats in peanut butter. Furthermore, these fats provide satiety and support various bodily functions. Additionally, moderate consumption fits into balanced eating patterns without significant health concerns.
The carbohydrate content comes mainly from powdered sugar and chocolate coating. Furthermore, these simple carbohydrates provide quick energy but should be consumed mindfully. Moreover, pairing with protein-rich foods can help moderate blood sugar responses.
Allergen Information and Modifications
Peanut butter balls contain common allergens including peanuts, dairy, and potentially eggs depending on chocolate choices. Additionally, cross-contamination during manufacturing can introduce additional allergens. Moreover, careful label reading ensures safe consumption for sensitive individuals.
Furthermore, numerous modifications accommodate various allergies and dietary restrictions. Seed butter substitutions eliminate tree nut and peanut concerns. Additionally, dairy-free chocolate options support lactose intolerance and vegan preferences.
Consider using certified allergen-free facilities and ingredients when preparing for sensitive individuals. Furthermore, dedicated equipment and workspace prevent cross-contamination. Moreover, clear labeling helps guests make informed consumption decisions.
Portion Control Strategies
The rich, satisfying nature of peanut butter balls naturally promotes smaller portion sizes than many desserts. Additionally, their intense flavors provide satisfaction with fewer pieces. Moreover, mindful eating practices enhance enjoyment while supporting healthy consumption patterns.
Furthermore, pre-portioning into small containers supports appropriate serving sizes. Additionally, this technique prevents overconsumption and maintains freshness longer. Moreover, individual portions work well for lunch boxes and snack planning.
Consider making smaller-sized balls for parties and gatherings where multiple desserts are available. Furthermore, bite-sized portions allow guests to sample various treats without overindulging. Additionally, smaller sizes often appear more elegant and sophisticated.
Storage and Gift-Giving Tips for Peanut Butter Balls
Optimal Storage Conditions
Proper storage maintains quality, safety, and appearance for maximum enjoyment periods. Refrigerate peanut butter balls in airtight containers for up to two weeks without quality loss. Additionally, cool temperatures prevent chocolate bloom and maintain proper textures.
Moreover, layer balls between parchment paper to prevent sticking and coating damage. Furthermore, proper cushioning protects decorative elements and maintains attractive presentations. Additionally, organized storage makes serving and gift-giving easier.
Avoid storing near strong-scented foods that can transfer flavors to the delicate confections. Furthermore, airtight containers provide the best protection against odor absorption. Moreover, proper storage maintains the intended flavor profiles.
Freezing and Long-Term Storage
Freeze peanut butter balls for up to three months when properly packaged and stored. Additionally, flash-freeze on baking sheets before transferring to freezer containers. Moreover, this technique prevents clumping and maintains individual piece integrity.
Furthermore, wrap containers tightly with plastic wrap and aluminum foil for maximum protection against freezer burn. Additionally, label with dates and contents for easy identification and rotation. Moreover, proper packaging maintains quality throughout extended storage periods.
Thaw frozen peanut butter balls gradually in the refrigerator to prevent condensation and coating damage. Furthermore, avoid room temperature thawing, which can cause texture problems. Additionally, properly thawed confections taste as fresh as newly made ones.
Gift Presentation Ideas
Beautiful packaging transforms homemade peanut butter balls into memorable, thoughtful gifts. Additionally, decorative boxes, tins, or bags create professional presentations that recipients treasure. Moreover, attractive packaging shows care and attention to detail.
Furthermore, include ingredient lists and storage instructions for recipient convenience and safety. Additionally, clear labeling helps people with allergies make informed decisions. Moreover, professional presentation elevates homemade treats to gourmet gift status.
Consider creating themed presentations for holidays, birthdays, or special occasions. Furthermore, coordinated colors and decorations create cohesive, impressive gift presentations. Additionally, personalized touches make gifts feel special and unique.
FAQs About Peanut Butter Balls
Q: Can I use crunchy peanut butter instead of creamy for this recipe?
Absolutely! Crunchy peanut butter creates delightful textural variety and adds visual interest to the filling. Additionally, the nuts provide extra crunch that many people prefer over smooth textures. Moreover, crunchy versions often have more intense peanut flavors.
Furthermore, you may need to adjust the powdered sugar slightly when using crunchy peanut butter. Additionally, the nut pieces can affect the mixture’s binding properties. Moreover, start with the recommended amount and adjust as needed for proper consistency.
Consider chopping the nuts in crunchy peanut butter smaller if you prefer more uniform textures. Furthermore, this technique maintains crunch while preventing large, awkward pieces. Additionally, smaller nut pieces distribute more evenly throughout the mixture.
Q: How long do homemade peanut butter balls keep fresh?
Properly stored peanut butter balls maintain excellent quality for up to two weeks in the refrigerator. Additionally, airtight containers prevent moisture loss and maintain optimal textures. Moreover, cool temperatures preserve both flavor and appearance effectively.
Furthermore, frozen peanut butter balls keep for up to three months without significant quality loss. Additionally, proper packaging prevents freezer burn and maintains fresh taste. Moreover, frozen treats provide convenient make-ahead options for entertaining.
Room temperature storage is not recommended beyond a few hours, especially in warm climates. Furthermore, chocolate coatings can bloom and textures can soften unacceptably. Additionally, refrigeration ensures food safety and optimal eating experiences.
Q: What’s the best way to melt chocolate for coating?
Microwave melting in 30-second intervals provides the most control and prevents overheating. Additionally, stirring between intervals ensures even heating and smooth consistency. Moreover, this method works well for small to medium batches.
Furthermore, double boiler methods offer gentler heating for large quantities or temperature-sensitive chocolates. Additionally, indirect heat prevents scorching and provides better control. Moreover, this technique works especially well for tempering processes.
Avoid adding water-based liquids to melted chocolate, which causes seizing and unworkable textures. Furthermore, use oil-based additions like shortening or coconut oil for thinning. Additionally, these modifications maintain workability without compromising quality.
Q: Can I make peanut butter balls without butter?
Yes, several alternatives can replace butter while maintaining proper texture and flavor. Additionally, coconut oil provides similar binding properties with subtle tropical notes. Moreover, room temperature coconut oil incorporates easily into the mixture.
Furthermore, additional peanut butter can replace some or all of the butter requirement. Additionally, this substitution intensifies peanut flavor while maintaining proper consistency. Moreover, natural peanut butter oils provide necessary binding properties.
Cream cheese offers another alternative that creates slightly tangier flavors and smooth textures. Furthermore, this substitution works particularly well with chocolate coatings. Additionally, cream cheese provides richness without butter’s specific flavor profile.
Q: How can I prevent the chocolate coating from cracking?
Proper tempering and temperature control prevent most cracking issues in chocolate coatings. Additionally, avoid extreme temperature changes that shock the chocolate structure. Moreover, gradual cooling allows chocolate to set properly without stress fractures.
Furthermore, ensure peanut butter balls are properly chilled but not frozen solid before coating. Additionally, extreme temperature differences between filling and coating can cause cracking. Moreover, slightly softened balls allow better chocolate adhesion.
Consider adding small amounts of shortening or coconut oil to melted chocolate for more flexible coatings. Furthermore, these additions create slightly softer chocolates less prone to cracking. Additionally, flexible coatings handle temperature changes better than pure chocolate.
Conclusion: Mastering the Art of Perfect Peanut Butter Balls
Peanut butter balls represent the perfect combination of nostalgic comfort and sophisticated confectionery technique, proving that simple ingredients can create extraordinary results when handled with care and attention to detail. Throughout this comprehensive guide, we’ve explored every aspect of creating these beloved treats that bring joy to both makers and recipients.
Moreover, this versatile recipe adapts to countless variations and dietary preferences while maintaining its essential satisfying character. Whether you’re preparing for holidays, special occasions, or simply craving homemade sweets, peanut butter balls deliver consistent success and universal appeal. Additionally, their no-bake nature makes them accessible to cooks of all skill levels and kitchen setups.