Introduction
Transform your ordinary zucchini into an extraordinary snack with this amazing Crispy Zucchini recipe! Moreover, these golden, crunchy rounds deliver all the satisfaction of fried food without the guilt. Additionally, they’re packed with nutrients and flavor that will make you forget you’re eating vegetables.
Whether you’re looking for a healthy appetizer or a satisfying side dish, these baked zucchini rounds hit the mark perfectly. Furthermore, they’re incredibly easy to make and require just a few simple ingredients. Therefore, even beginner cooks can master this recipe with confidence.
Why You’ll Love This Crispy Zucchini Recipe
These Crispy Zucchini rounds offer countless benefits that make them a standout addition to your recipe collection. Moreover, they combine health and taste in a way that appeals to everyone.
• Incredibly Healthy: Zucchini is low in calories but high in nutrients like vitamin C and potassium. Additionally, baking instead of frying reduces unnecessary oil and calories.
• Kid-Friendly: Even picky eaters love these crispy rounds. Furthermore, they’re a sneaky way to get more vegetables into your family’s diet.
• Budget-Friendly: Zucchini is affordable and available year-round in most grocery stores. Moreover, the other ingredients are pantry staples you likely already have.
• Quick and Easy: With just 15 minutes of prep time, these make a perfect weeknight side dish. Additionally, they’re ready in under 45 minutes from start to finish.
• Versatile: Serve them as appetizers, side dishes, or even as a healthy snack. Furthermore, they pair well with various dipping sauces and main courses.
• Make-Ahead Friendly: You can prep these in advance and bake when needed. Additionally, they reheat beautifully for meal prep purposes.
Essential Ingredients for Perfect Crispy Zucchini
Creating the ultimate Crispy Zucchini starts with selecting the right ingredients. Moreover, each component plays a crucial role in achieving that perfect golden crunch.
Core Ingredients:
- 2 medium zucchinis, sliced into rounds (choose firm, fresh zucchini)
- 1 cup breadcrumbs (panko works best for extra crispiness)
- 1/2 cup grated Parmesan cheese (adds savory flavor)
- 1 tsp garlic powder (essential for taste)
- 1 tsp Italian seasoning (herbs enhance flavor)
- Salt and pepper to taste (brings out natural flavors)
- 2 large eggs, beaten (helps coating stick)
Ingredient Selection Tips: Choose zucchini that feels heavy for its size and has smooth, unblemished skin. Additionally, medium-sized zucchini work best because they’re not too watery or seedy. Furthermore, avoid overly large zucchini as they can be bitter and soggy.
For the breadcrumbs, panko creates the crispiest texture. However, regular breadcrumbs work fine if that’s what you have. Moreover, you can make your own breadcrumbs from stale bread for extra freshness.
Step-by-Step Guide to Making Crispy Zucchini
Step 1: Preparation and Setup
Proper preparation is key to achieving perfectly Crispy Zucchini every time. Moreover, having everything ready before you start ensures smooth cooking process.
Preparation Steps:
- Preheat your oven to 425°F (220°C)
- Line a large baking sheet with parchment paper
- Wash and dry the zucchini thoroughly
- Slice zucchini into 1/4-inch thick rounds
- Set up your breading station with three shallow dishes
Pro Tips: Cut the zucchini rounds evenly for consistent cooking. Additionally, pat them dry with paper towels to remove excess moisture. Furthermore, uniform slices ensure even browning and crispiness.
Step 2: Creating the Perfect Coating
The coating is what transforms ordinary zucchini into Crispy Zucchini magic. Therefore, mixing it properly ensures every bite is perfectly seasoned.
Coating Instructions:
- In a shallow bowl, combine breadcrumbs and grated Parmesan cheese
- Add garlic powder and Italian seasoning to the mixture
- Season with salt and pepper to taste
- Mix thoroughly until all ingredients are evenly distributed
- Beat the eggs in a separate shallow dish
Important Notes: Taste the coating mixture and adjust seasonings as needed. Additionally, make sure the Parmesan cheese is finely grated for even distribution. Furthermore, fresh herbs can replace dried Italian seasoning for extra flavor.
Step 3: Coating the Zucchini Rounds
This step requires patience to ensure each piece of Crispy Zucchini gets properly coated. Moreover, proper technique prevents the coating from falling off during baking.
Coating Process:
- Dip each zucchini slice into the beaten eggs
- Let excess egg drip off before moving to breadcrumbs
- Press the slice into the breadcrumb mixture
- Flip and coat the other side thoroughly
- Gently press the coating to help it adhere
- Place coated slices on the prepared baking sheet
Pro Tips: Don’t overcrowd the baking sheet, as this prevents proper browning. Additionally, leave space between each piece for air circulation. Furthermore, work with one hand for wet ingredients and one for dry to prevent messy fingers.
Step 4: Baking to Golden Perfection
The final step transforms your coated zucchini into perfectly Crispy Zucchini rounds. Moreover, proper baking technique ensures they’re golden and crunchy on the outside while tender inside.
Baking Instructions:
- Place the baking sheet in the preheated oven
- Bake for 20-25 minutes until golden brown
- Flip the rounds halfway through for even browning
- Check for doneness by looking for golden color and crispy edges
- Remove from oven and let cool for 2-3 minutes
Baking Tips: Don’t open the oven door too frequently, as this causes temperature fluctuations. Additionally, if some pieces brown faster than others, remove them earlier. Furthermore, the rounds should sound crispy when tapped with a fork.

Tips for Making the Best Crispy Zucchini
Achieving restaurant-quality Crispy Zucchini at home requires attention to detail. Moreover, these professional tips will help you avoid common pitfalls and ensure success every time.
Moisture Control: Removing excess moisture is crucial for crispiness. Additionally, salt the zucchini slices and let them sit for 10 minutes before coating. Furthermore, pat them completely dry with paper towels before breading.
Coating Adhesion: Make sure your breadcrumb mixture sticks properly to prevent bare spots. Moreover, press the coating firmly but gently onto each slice. Additionally, let the coated pieces rest for 5 minutes before baking.
Oven Temperature: High heat is essential for achieving crispy exteriors. However, if your oven runs hot, reduce the temperature by 25 degrees. Furthermore, use an oven thermometer to ensure accuracy.
Spacing and Airflow: Don’t overcrowd the baking sheet, as this creates steam and prevents crisping. Additionally, use two baking sheets if necessary. Moreover, rotate the pans halfway through baking for even results.
Seasoning Variations for Crispy Zucchini
One of the best aspects of Crispy Zucchini is how easily you can customize the flavors. Moreover, different seasoning combinations create entirely new taste experiences.
Mediterranean Style:
- Add dried oregano and basil to the breadcrumbs
- Include lemon zest for brightness
- Use feta cheese instead of Parmesan
- Serve with tzatziki sauce
Spicy Kick:
- Mix in cayenne pepper or paprika
- Add chili powder for heat
- Include dried chipotle for smokiness
- Serve with spicy ranch dressing
Asian-Inspired:
- Use panko breadcrumbs with sesame seeds
- Add ginger powder and garlic
- Include a touch of soy sauce powder
- Serve with sweet and sour sauce
Herb Garden:
- Mix in fresh chopped herbs like rosemary and thyme
- Add dried sage for earthy flavor
- Include fresh parsley in the coating
- Serve with herb aioli
Common Mistakes to Avoid When Making Crispy Zucchini
Even experienced cooks can encounter challenges when making Crispy Zucchini. However, knowing these common mistakes helps you avoid them and achieve better results.
Not Removing Enough Moisture: Wet zucchini creates soggy coating instead of crispy texture. Additionally, always pat the slices completely dry before coating. Moreover, salting them beforehand draws out excess water.
Incorrect Oven Temperature: Too low temperature results in soggy, pale rounds. Furthermore, too high heat burns the coating before the zucchini cooks through. Therefore, 425°F is the sweet spot for perfect results.
Overcrowding the Pan: Too many pieces on one pan prevents proper air circulation. Additionally, overcrowding creates steam that makes coating soggy. Moreover, use multiple pans if necessary for best results.
Skipping the Resting Period: Coating needs time to set before baking. Additionally, letting coated pieces rest for 5 minutes improves adhesion. Furthermore, this prevents coating from falling off during baking.
Serving Suggestions and Dipping Sauces
Crispy Zucchini rounds are versatile enough to work in various serving contexts. Moreover, the right accompaniments can elevate them from simple snacks to impressive appetizers.
Classic Dipping Sauces:
- Ranch dressing (the most popular choice)
- Marinara sauce for Italian flair
- Honey mustard for sweet and tangy
- Garlic aioli for sophisticated taste
Creative Serving Ideas:
- Stack them in a tower with different sauces
- Serve on a platter with other baked vegetables
- Use as a side dish with grilled meats
- Add to salads for extra crunch
Main Dish Pairings:
- Grilled chicken or fish
- Pasta dishes with light sauces
- Roasted vegetables and quinoa
- Mediterranean-style meals
Storage and Reheating Instructions
Proper storage ensures your Crispy Zucchini maintains quality and safety. Additionally, knowing the best reheating methods helps you enjoy leftovers without losing texture.
Refrigerator Storage: Store leftover rounds in an airtight container for up to 3 days. Moreover, place parchment paper between layers to prevent sticking. Furthermore, cool completely before refrigerating to avoid condensation.
Freezer Storage: These rounds freeze well for up to 2 months. Additionally, flash-freeze them on a baking sheet before transferring to bags. Moreover, label with the date for easy identification.
Reheating Methods:
- Oven: 400°F for 5-7 minutes (best for crispiness)
- Air fryer: 375°F for 3-4 minutes (restores crunch perfectly)
- Toaster oven: 400°F for 4-5 minutes (convenient option)
Make-Ahead Tips: You can bread the zucchini rounds and refrigerate them for up to 24 hours before baking. Additionally, this makes them perfect for entertaining. Furthermore, add 2-3 extra minutes to the baking time if cooking from cold.
Nutritional Benefits of Crispy Zucchini
Understanding the nutritional profile of Crispy Zucchini helps you appreciate why this recipe is so health-conscious. Moreover, zucchini offers numerous health benefits while remaining low in calories.
Per Serving (approximate):
- Calories: 80
- Protein: 4g
- Carbohydrates: 8g
- Fat: 3g
- Fiber: 2g
- Vitamin C: 20% daily value
Health Benefits: Zucchini is rich in antioxidants that support immune function. Additionally, it contains potassium for heart health and folate for cell function. Furthermore, the high water content helps with hydration.
Low-Calorie Option: Compared to traditional fried zucchini, this baked version contains significantly fewer calories. Moreover, it provides the same satisfying crunch without excess oil. Additionally, the Parmesan cheese adds protein and calcium.
Troubleshooting Common Issues
Even with careful preparation, you might encounter challenges when making Crispy Zucchini. However, most problems have simple solutions that can save your batch.
Coating Falls Off: This usually happens when the zucchini is too wet or eggs aren’t fresh. Additionally, make sure to press the coating firmly onto each piece. Moreover, letting them rest before baking helps the coating adhere.
Soggy Texture: Excess moisture is the main culprit for soggy rounds. Furthermore, make sure your oven is fully preheated before baking. Additionally, don’t overcrowd the baking sheet.
Uneven Browning: This occurs when pieces are different sizes or the oven has hot spots. Moreover, rotate the baking sheet halfway through cooking. Additionally, flip the rounds for even browning on both sides.
Burnt Coating: If the coating browns too quickly, reduce the oven temperature by 25 degrees. Additionally, you can tent with foil for the remaining baking time. Furthermore, check your oven’s accuracy with a thermometer.
Creative Recipe Variations
Crispy Zucchini serves as a base for numerous creative variations. Moreover, these alternatives can satisfy different dietary preferences and flavor profiles.
Stuffed Zucchini Rounds:
- Hollow out the center slightly
- Fill with cream cheese mixture
- Bread and bake as usual
- Creates a more substantial appetizer
Zucchini Chips:
- Slice zucchini thinner (1/8 inch)
- Reduce baking time to 15-20 minutes
- Perfect for snacking and meal prep
- Store in airtight containers
Cheesy Zucchini Bites:
- Add extra cheese to the coating
- Include mozzarella for melty texture
- Serve immediately while cheese is warm
- Great for parties and gatherings
Protein-Packed Version:
- Add protein powder to the breadcrumb mixture
- Include ground nuts for extra nutrition
- Perfect for post-workout snacks
- Provides sustained energy
FAQs About Crispy Zucchini
Q: How do I make Crispy Zucchini healthier? A: Use whole wheat breadcrumbs and reduce the amount of cheese. Additionally, you can spray the rounds with cooking spray instead of using eggs. Moreover, serve with homemade dips made from Greek yogurt.
Q: Can I make these without eggs? A: Yes, you can use buttermilk, milk, or even water as a substitute. Additionally, some people use aquafaba (chickpea liquid) for vegan options. However, eggs provide the best adhesion for the coating.
Q: Why do my zucchini rounds turn out soggy? A: Excess moisture is usually the culprit. Additionally, make sure to salt the zucchini and pat it dry thoroughly. Furthermore, don’t overcrowd the baking sheet, as this creates steam.
Q: Can I use frozen zucchini for this recipe? A: Fresh zucchini works best for optimal texture and crispiness. However, if using frozen, thaw completely and remove as much moisture as possible. Moreover, expect slightly different texture results.
Q: How thin should I slice the zucchini? A: Aim for 1/4-inch thick slices for the best balance of crispy exterior and tender interior. Additionally, thinner slices cook faster but may become too crispy. Furthermore, thicker slices may not cook through properly.
Q: Can I use different types of breadcrumbs? A: Absolutely! Panko breadcrumbs create the crispiest texture. However, regular breadcrumbs, crushed crackers, or even crushed cornflakes work well. Moreover, you can mix different types for unique textures.
Q: How do I know when the zucchini is done? A: Look for golden brown color and crispy edges. Additionally, they should sound crispy when tapped with a fork. Furthermore, the coating should be set and not move when gently touched.
Conclusion
Crispy Zucchini represents the perfect balance between healthy eating and indulgent flavors. Moreover, this recipe proves that nutritious food doesn’t have to sacrifice taste or satisfaction. Additionally, the simple preparation makes it accessible to cooks of all skill levels.
Furthermore, the versatility of this recipe means you can adapt it to suit any occasion or dietary preference. Whether you’re serving them as appetizers at a party or as a healthy snack for the family, these golden rounds deliver every time.
Print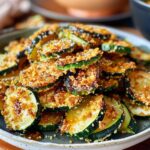
Crispy Zucchini: The Perfect Healthy Snack Recipe
- Total Time: 40 mins
Description
Enjoy a healthy and delicious snack with these Crispy Zucchini rounds! Perfectly seasoned and baked to golden perfection, they make a great appetizer or side dish.
Ingredients
2 medium zucchinis, sliced into rounds
1 cup breadcrumbs
1/2 cup grated Parmesan cheese
1 tsp garlic powder
1 tsp Italian seasoning
Salt and pepper to taste
2 large eggs, beaten
Instructions
Preheat your oven to 425°F (220°C). Line a baking sheet with parchment paper.
In a bowl, mix together the breadcrumbs, Parmesan cheese, garlic powder, Italian seasoning, salt, and pepper.
Dip each zucchini slice into the beaten eggs, then coat with the breadcrumb mixture, pressing gently to adhere.
Place the coated zucchini slices on the prepared baking sheet.
Bake for 20-25 minutes, or until golden brown and crispy.
Serve with your favorite dipping sauce and enjoy!
Prep Time: 15 minutes
Kcal: Approximately 80 per serving

