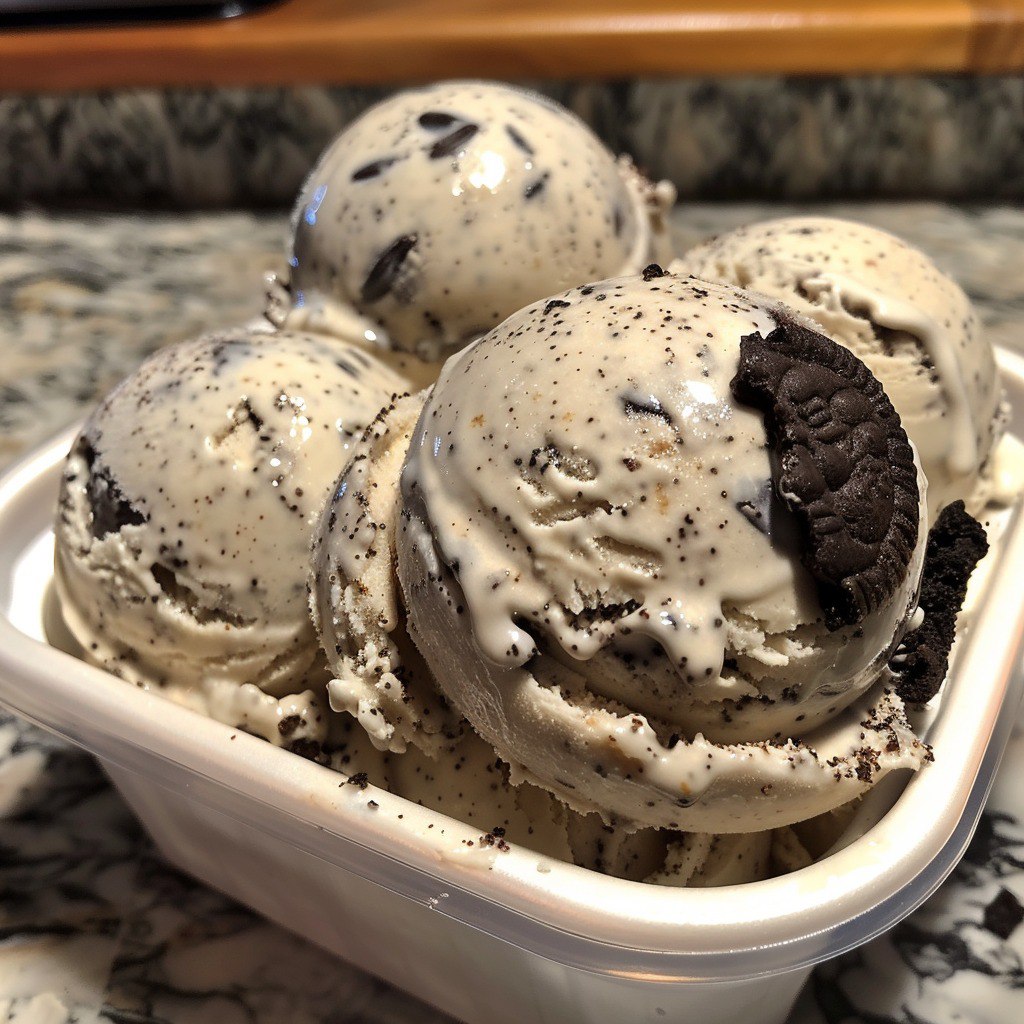
Nothing beats the satisfaction of creating your own homemade cookies and cream ice cream from scratch. This beloved frozen dessert combines rich, velvety vanilla ice cream with chunks of chocolate sandwich cookies for the perfect texture contrast. Moreover, making it at home allows you to control every ingredient and customize the flavor to your heart’s content.
Additionally, homemade ice cream tastes infinitely better than store-bought versions. Furthermore, the process is surprisingly simple and requires only basic kitchen equipment. Whether you’re looking to impress guests or simply treat yourself, this recipe delivers restaurant-quality results every time.
Print
Homemade Cookies and Cream Ice Cream: The Ultimate Guide to Creating Your Own Creamy Paradise
- Total Time: 4 hrs (including freezing)
- Yield: 6 servings 1x
- Diet: Vegetarian
Description
Homemade Cookies and Cream Ice Cream is a creamy, dreamy dessert loaded with crushed chocolate sandwich cookies in a rich vanilla base. Whether you make it with or without egg yolks, this classic treat is easy to whip up and perfect for warm days or midnight cravings.
Ingredients
- 2 cups heavy cream
- 1 cup whole milk
- 3/4 cup granulated sugar
- 1 teaspoon vanilla extract
- 1/2 cup crushed chocolate sandwich cookies (like Oreos)
- 4 large egg yolks (optional, for a custard base)
Instructions
- Prepare the custard base (optional): Heat milk in a medium saucepan over medium heat until hot but not boiling. In a separate bowl, whisk together egg yolks and sugar until light and creamy. Slowly whisk hot milk into the yolks, then return the mixture to the pan. Cook over medium heat, stirring constantly, until it thickens slightly and coats the back of a spoon (5–7 minutes). Remove from heat and let cool.
- Mix the base: In a large bowl, whisk heavy cream, milk, and vanilla extract. If using the custard base, stir it in until smooth. If not using eggs, just mix cream, milk, sugar, and vanilla until sugar dissolves.
- Churn: Pour the mixture into an ice cream maker and churn according to manufacturer’s instructions (usually 20–25 minutes) until soft-serve consistency is reached.
- Add cookies: Gently fold in crushed cookies until evenly distributed.
- Freeze: Transfer to an airtight container and freeze for at least 2 hours or until firm.
- Serve: Scoop and enjoy!
Notes
- For extra texture, stir in more crushed cookies just before serving.
- If you don’t have an ice cream maker, pour the mixture into a shallow pan, freeze, and stir every 30 minutes for 3–4 hours.
- Chill your base overnight for a deeper vanilla flavor and better churning results.
- Prep Time: 20 mins
- Cook Time: 5–7 mins (if using custard base)
- Category: Dessert
- Method: Churn + Freeze
- Cuisine: American
Nutrition
- Serving Size: 1/2 cup
- Calories: 300 kcal
- Sugar: 24 g
- Sodium: 70 mg
- Fat: 22 g
- Saturated Fat: undefined
- Unsaturated Fat: undefined
- Trans Fat: undefined
- Carbohydrates: 26 g
- Fiber: 0 g
- Protein: 4 g
- Cholesterol: 120 mg
Keywords: cookies and cream ice cream, homemade ice cream, Oreo ice cream, vanilla base ice cream, summer dessert
Why You’ll Love This Cookies and Cream Ice Cream Recipe
Creating your own frozen dessert offers countless advantages over purchasing commercial alternatives. Moreover, this particular recipe stands out for several compelling reasons.
• Rich and Creamy Texture: The combination of heavy cream and whole milk creates an incredibly smooth base • Perfect Cookie Distribution: Every spoonful contains the ideal balance of cream and cookie chunks • Customizable Sweetness: Adjust sugar levels to match your taste preferences perfectly • No Artificial Additives: Control every ingredient for a pure, natural flavor experience • Cost-Effective: Make premium ice cream at a fraction of restaurant prices • Impressive Results: Create dessert that rivals the best ice cream shops • Flexible Recipe: Easily double or triple the batch for larger gatherings
Furthermore, this recipe works beautifully with or without egg yolks. Additionally, the custard-based version creates an even richer texture, while the simple version offers convenience without sacrificing flavor. Moreover, both methods produce exceptional results that will delight your family and friends.
The versatility of this recipe also makes it perfect for experimentation. For instance, you can substitute different cookie varieties or add extra mix-ins. Similarly, adjusting the vanilla extract allows you to create your signature flavor profile.
Essential Ingredients for Perfect Cookies and Cream Ice Cream
Success begins with selecting high-quality ingredients that work together harmoniously. Each component plays a crucial role in creating the perfect frozen dessert experience.
Heavy Cream: This provides the rich, luxurious mouthfeel that defines premium ice cream. Moreover, heavy cream with at least 36% fat content works best for optimal texture. Additionally, avoid light cream or half-and-half as substitutes, since they won’t create the same creamy consistency.
Whole Milk: Balances the richness of heavy cream while adding necessary liquid volume. Furthermore, whole milk’s fat content contributes to the smooth texture without making the ice cream too heavy. However, you can substitute with 2% milk if needed, though the result will be slightly less creamy.
Granulated Sugar: Sweetens the base while also affecting texture and freezing properties. Moreover, sugar prevents ice crystals from forming, ensuring smooth consistency. Additionally, you can substitute with superfine sugar for even better dissolution.
Vanilla Extract: Pure vanilla extract provides the classic flavor foundation that complements the cookies perfectly. Furthermore, avoid artificial vanilla, which can taste harsh when frozen. Moreover, high-quality vanilla makes a noticeable difference in the final product.
Chocolate Sandwich Cookies: The star ingredient that transforms plain vanilla into cookies and cream paradise. Additionally, Oreos work exceptionally well, but any chocolate sandwich cookie will suffice. Moreover, crushing them to various sizes creates interesting texture contrasts.
Egg Yolks (Optional): Create a custard base for extra richness and professional-quality texture. However, this step is entirely optional and beginners can skip it without compromising results. Furthermore, pasteurized eggs provide an extra safety margin if you’re concerned.
Step-by-Step Guide to Making Cookies and Cream Ice Cream
Creating perfect homemade ice cream involves careful attention to temperature, timing, and technique. Moreover, following these detailed steps ensures consistent results every time.
Step 1: Preparation and Setup
Begin by gathering all ingredients and equipment before starting the process. Additionally, ensure your ice cream maker bowl has been frozen for at least 24 hours if required by your model. Moreover, having everything ready streamlines the entire process significantly.
Next, crush your chocolate sandwich cookies into varied sizes for optimal texture. Furthermore, aim for pieces ranging from fine crumbs to quarter-sized chunks. Additionally, this variety creates an interesting mouthfeel that enhances every bite.
If making the custard version, prepare a fine-mesh strainer and set up an ice bath. Moreover, these tools help create the smoothest possible base. Additionally, having them ready prevents scrambling when working with hot custard.
Step 2: Creating the Ice Cream Base (Custard Method)
Heat the milk in a heavy-bottomed saucepan over medium heat until steaming. Meanwhile, whisk egg yolks with sugar in a separate bowl until the mixture becomes pale and thick. Additionally, this process incorporates air and creates a lighter texture.
Slowly pour the hot milk into the egg mixture while whisking constantly. Furthermore, this tempering process prevents the eggs from scrambling. Moreover, add the milk in a thin, steady stream while whisking vigorously.
Return the mixture to the saucepan and cook over medium-low heat, stirring constantly. Additionally, the custard is ready when it coats the back of a spoon and reaches 170°F. Furthermore, never let the mixture boil, as this will curdle the eggs.
Immediately strain the custard through a fine-mesh sieve to remove any lumps. Moreover, stir in the vanilla extract while the custard is still warm. Additionally, cool the custard completely before proceeding to churning.
Step 3: Simple Base Method (No Eggs)
For those preferring a quicker approach, combine heavy cream, milk, and sugar in a large bowl. Additionally, whisk until the sugar completely dissolves. Moreover, this usually takes 2-3 minutes of vigorous whisking.
Add vanilla extract and whisk until everything is perfectly combined. Furthermore, taste and adjust sweetness if desired. Additionally, this method produces excellent results with minimal effort.
Chill the mixture in the refrigerator for at least 2 hours before churning. Moreover, cold mixtures churn more efficiently and produce better texture. Additionally, overnight chilling works even better if you have time.
Step 4: Churning Process
Pour the chilled mixture into your ice cream maker and churn according to manufacturer instructions. Additionally, most machines require 20-25 minutes for proper consistency. Moreover, the ice cream is ready when it resembles thick soft-serve.
During the final 2-3 minutes of churning, add the crushed cookies gradually. Furthermore, this timing ensures even distribution without over-mixing. Additionally, reserve some cookie pieces for garnishing if desired.
Avoid over-churning, which can cause the mixture to become grainy or butter-like. Moreover, stop the machine as soon as the ice cream pulls away from the sides cleanly. Additionally, properly churned ice cream should hold its shape when scooped.
Step 5: Final Freezing and Storage
Transfer the freshly churned ice cream to an airtight container immediately. Additionally, press plastic wrap directly onto the surface to prevent ice crystals from forming. Moreover, this step is crucial for maintaining smooth texture.
Freeze for at least 2 hours before serving for optimal scooping consistency. Furthermore, homemade ice cream is best consumed within one week of making. Additionally, let it soften for 5-10 minutes at room temperature before scooping if frozen solid.
Label your container with the date and flavor for easy identification. Moreover, store in the main freezer compartment rather than the door for consistent temperature. Additionally, avoid storing near strong-smelling foods that might affect the flavor.

Creative Variations for Cookies and Cream Ice Cream
This versatile base recipe adapts beautifully to countless flavor combinations and dietary preferences. Moreover, experimenting with variations keeps dessert time exciting and fresh.
Double Chocolate Cookies and Cream: Add 2 tablespoons of cocoa powder to create a chocolate base. Additionally, use chocolate cookies and white chocolate chips for contrast. Furthermore, this variation appeals to serious chocolate lovers.
Birthday Cake Cookies and Cream: Substitute vanilla wafers and add colorful sprinkles throughout. Moreover, include a touch of almond extract for cake-like flavor. Additionally, this version is perfect for celebrations.
Peanut Butter Cookies and Cream: Incorporate peanut butter sandwich cookies and swirl in melted peanut butter. Furthermore, add chopped peanuts for extra crunch. Additionally, this combination satisfies peanut butter enthusiasts.
Mint Cookies and Cream: Add peppermint extract and green food coloring to the base. Moreover, use chocolate mint cookies for complementary flavors. Additionally, this refreshing variation is perfect for summer.
Coffee Cookies and Cream: Dissolve instant espresso in the milk for coffee flavor. Furthermore, use coffee-flavored cookies or biscotti pieces. Additionally, this adult version pairs perfectly with dinner parties.
Expert Tips for Perfect Cookies and Cream Ice Cream
Professional techniques can elevate your homemade ice cream from good to extraordinary. Moreover, these insider secrets ensure consistent, restaurant-quality results every time.
Temperature Control: Keep all ingredients properly chilled before churning begins. Additionally, warm mixtures won’t churn properly and may not freeze correctly. Furthermore, pre-chill your mixing bowls and utensils for best results.
Sugar Balance: Don’t reduce sugar too dramatically, as it affects both flavor and texture. Moreover, sugar prevents excessive ice crystal formation during freezing. Additionally, taste the base before churning and adjust as needed.
Cookie Preparation: Crush cookies to varied sizes for optimal texture contrast. Furthermore, very fine pieces distribute flavor, while larger chunks provide satisfying bites. Additionally, pat cookies dry if they seem oily before adding.
Churning Timing: Watch the ice cream carefully during the final minutes of churning. Moreover, over-churning can cause the mixture to become grainy or separate. Additionally, stop immediately when it reaches soft-serve consistency.
Storage Technique: Press plastic wrap directly onto the ice cream surface before covering. Furthermore, this prevents freezer burn and ice crystal formation. Additionally, use airtight containers designed for freezer use.
Common Mistakes to Avoid When Making Cookies and Cream Ice Cream
Learning from common errors saves time, ingredients, and frustration during your ice cream making journey. Moreover, understanding these pitfalls helps ensure successful results from your first attempt.
Using Warm Ingredients: Room temperature or warm mixtures won’t churn properly and may damage your ice cream maker. Additionally, they can cause the machine to work harder and potentially overheat. Furthermore, always chill ingredients thoroughly before beginning.
Adding Cookies Too Early: Incorporating cookies at the beginning of churning breaks them down too much and creates muddy flavors. Moreover, they can interfere with proper churning action. Additionally, wait until the final minutes for optimal texture.
Over-Sweetening: Too much sugar creates an overly soft ice cream that won’t freeze properly. Furthermore, excessive sweetness can mask the vanilla and cookie flavors. Additionally, remember that cold temperatures dull sweetness perception.
Skipping the Chill Time: Rushing the process by using warm base mixture results in poor texture and longer churning times. Moreover, properly chilled mixtures churn more efficiently. Additionally, overnight chilling produces the best results.
Improper Storage: Leaving ice cream uncovered or poorly sealed leads to ice crystals and freezer burn. Furthermore, strong freezer odors can penetrate and affect flavor. Additionally, store in the main freezer compartment for consistent temperature.
Troubleshooting Your Cookies and Cream Ice Cream
Even experienced home cooks occasionally encounter challenges when making ice cream. However, most issues have simple solutions that can salvage your batch or improve future attempts.
Ice Cream Won’t Thicken: This usually indicates the base wasn’t cold enough before churning. Additionally, check that your ice cream maker bowl was properly frozen. Furthermore, some machines require longer churning times than others.
Grainy Texture: Over-churning or too much sugar can cause this problem. Moreover, using low-fat dairy products may also contribute to graininess. Additionally, ensure your custard base was properly strained if using eggs.
Too Soft to Scoop: Insufficient freezing time or too much sugar can prevent proper firming. Furthermore, alcohol-based extracts in large quantities can inhibit freezing. Additionally, give it more time in the freezer before serving.
Ice Crystals Forming: Poor storage technique or temperature fluctuations cause this issue. Moreover, opening the freezer frequently can contribute to crystal formation. Additionally, ensure your freezer maintains consistent temperature.
Cookies Turning Soggy: Adding cookies too early or using fresh-baked cookies can cause softness. Furthermore, store-bought cookies generally hold up better than homemade. Additionally, pat cookies dry before incorporating if they seem moist.
Health Benefits and Nutritional Information
While ice cream is primarily a treat, homemade versions offer some advantages over commercial alternatives. Moreover, controlling ingredients allows you to make healthier choices when desired.
Calcium Content: Dairy ingredients provide significant calcium for bone health. Additionally, this mineral supports muscle function and nerve transmission. Furthermore, homemade versions often contain more real dairy than commercial alternatives.
Protein Power: Milk, cream, and eggs contribute valuable protein to your diet. Moreover, protein helps maintain stable blood sugar levels after sweet treats. Additionally, this macronutrient promotes satiety and prevents overeating.
No Artificial Additives: Homemade ice cream eliminates artificial colors, flavors, and preservatives. Furthermore, you control every ingredient that goes into your dessert. Additionally, this transparency benefits those with food sensitivities.
Portion Control: Making individual servings easier to control helps with moderation. Moreover, the satisfaction of homemade treats often means smaller portions satisfy cravings. Additionally, you can adjust serving sizes to fit your dietary goals.
Quality Ingredients: Using premium dairy and real vanilla creates better nutrition profiles. Furthermore, choosing organic ingredients further enhances nutritional value. Additionally, fresh ingredients provide better vitamin and mineral content.
Equipment Needed for Making Cookies and Cream Ice Cream
Having the right tools makes ice cream making significantly easier and more enjoyable. Moreover, most equipment pays for itself quickly when you consider the cost of premium ice cream.
Ice Cream Maker: Essential for proper churning and texture development. Additionally, electric models are more convenient than manual versions. Furthermore, bowl-style makers are perfect for home use and produce excellent results.
Heavy-Bottom Saucepan: Necessary for custard-based versions to prevent scorching. Moreover, even heat distribution is crucial for smooth custard development. Additionally, stainless steel or enameled options work best.
Fine-Mesh Strainer: Removes lumps from custard and creates silky smooth texture. Furthermore, this tool is invaluable for professional-quality results. Additionally, it can double as a flour sifter for other baking needs.
Digital Thermometer: Ensures proper custard temperature without guesswork. Moreover, this prevents overcooking that can curdle eggs. Additionally, instant-read models are most convenient for ice cream making.
Airtight Storage Containers: Proper storage prevents freezer burn and flavor contamination. Furthermore, containers designed for freezer use maintain quality longer. Additionally, clear containers allow you to monitor your ice cream easily.
Serving Suggestions for Cookies and Cream Ice Cream
Presentation and accompaniments can transform simple ice cream into an impressive dessert experience. Moreover, thoughtful serving ideas create memorable moments for family and guests.
Classic Presentations: Serve in chilled bowls with a crisp wafer cookie on the side. Additionally, drizzle with chocolate or caramel sauce for extra indulgence. Furthermore, fresh berries add color and slight tartness that balances richness.
Sundae Creations: Build elaborate sundaes with whipped cream, nuts, and cherries. Moreover, offer various toppings so guests can customize their desserts. Additionally, warm fudge sauce creates delightful temperature contrast.
Sandwich Solutions: Use your homemade ice cream to create gourmet ice cream sandwiches. Furthermore, chocolate chip cookies or brownies make excellent sandwich bases. Additionally, roll edges in mini chocolate chips for professional appearance.
Milkshake Magic: Blend with milk to create thick, luxurious milkshakes. Moreover, add malt powder for old-fashioned soda fountain flavor. Additionally, top with whipped cream and a whole cookie for presentation.
Elegant Plating: Serve scoops alongside warm desserts like brownies or fruit crisps. Furthermore, garnish plates with cookie crumbs and mint leaves. Additionally, drizzle plates with chocolate sauce for restaurant-style presentation.
FAQs About Homemade Cookies and Cream Ice Cream
Q: Can I make cookies and cream ice cream without an ice cream maker? A: Yes, you can use the freeze-and-stir method, though results won’t be as smooth. Additionally, pour the mixture into a shallow container and stir every 30 minutes while freezing. Furthermore, this process takes 3-4 hours but produces decent results.
Q: How long does homemade cookies and cream ice cream last? A: Properly stored homemade ice cream maintains quality for up to one week. Moreover, it’s safe to eat for up to one month but texture may deteriorate. Additionally, always check for off odors or freezer burn before serving.
Q: Can I use different types of cookies in this recipe? A: Absolutely! Try chocolate chip cookies, graham crackers, or even gingersnaps. Furthermore, each cookie type creates a unique flavor profile. Additionally, mixing different cookies can create interesting combinations.
Q: Why is my homemade ice cream harder than store-bought? A: Homemade ice cream lacks commercial stabilizers and has lower overrun (air content). Moreover, let it soften at room temperature for 10-15 minutes before scooping. Additionally, storing in shallow containers makes scooping easier.
Q: Can I make this recipe dairy-free? A: Yes, substitute coconut cream and cashew milk for dairy ingredients. Furthermore, ensure your cookies are also dairy-free. Additionally, the texture will be slightly different but still delicious.
Q: What’s the best way to crush cookies for ice cream? A: Place cookies in a sealed plastic bag and gently crush with a rolling pin. Moreover, aim for varied sizes from fine crumbs to quarter-sized pieces. Additionally, don’t over-crush, as some larger pieces provide nice texture contrast.
Q: Can I add alcohol to my cookies and cream ice cream? A: Small amounts of alcohol can enhance flavor but too much prevents proper freezing. Furthermore, limit additions to 2-3 tablespoons maximum. Additionally, alcohol-based extracts are safer choices for consistent results.
Storage and Serving Tips for Optimal Quality
Proper handling after making ensures your homemade ice cream maintains quality and safety. Moreover, following these guidelines maximizes your investment in time and ingredients.
Immediate Storage: Transfer freshly churned ice cream to containers immediately to prevent melting. Additionally, work quickly to minimize temperature changes. Furthermore, pre-chill containers in the freezer for best results.
Freezer Placement: Store in the main freezer compartment where temperature remains most consistent. Moreover, avoid the freezer door where temperature fluctuates frequently. Additionally, place containers toward the back for most stable conditions.
Serving Preparation: Remove ice cream from freezer 10-15 minutes before serving for easier scooping. Furthermore, dip ice cream scoop in warm water between servings. Additionally, this prevents ice cream from sticking and creates neater scoops.
Leftover Management: Re-cover partially used containers immediately after serving. Moreover, press plastic wrap directly onto the remaining ice cream surface. Additionally, this prevents ice crystal formation and maintains smooth texture.
Quality Indicators: Fresh homemade ice cream should have consistent color and smooth texture. Furthermore, ice crystals or off odors indicate quality deterioration. Additionally, when in doubt, make a fresh batch for best results.
Conclusion
Creating homemade cookies and cream ice cream transforms a simple dessert into an extraordinary experience that delights every sense. Moreover, the process connects you with traditional culinary arts while allowing complete control over ingredients and flavors.
This comprehensive guide provides everything needed to master this beloved frozen treat. Additionally, the techniques and tips shared here apply to countless other ice cream flavors and variations. Furthermore, the satisfaction of creating restaurant-quality dessert at home is truly incomparable.

