
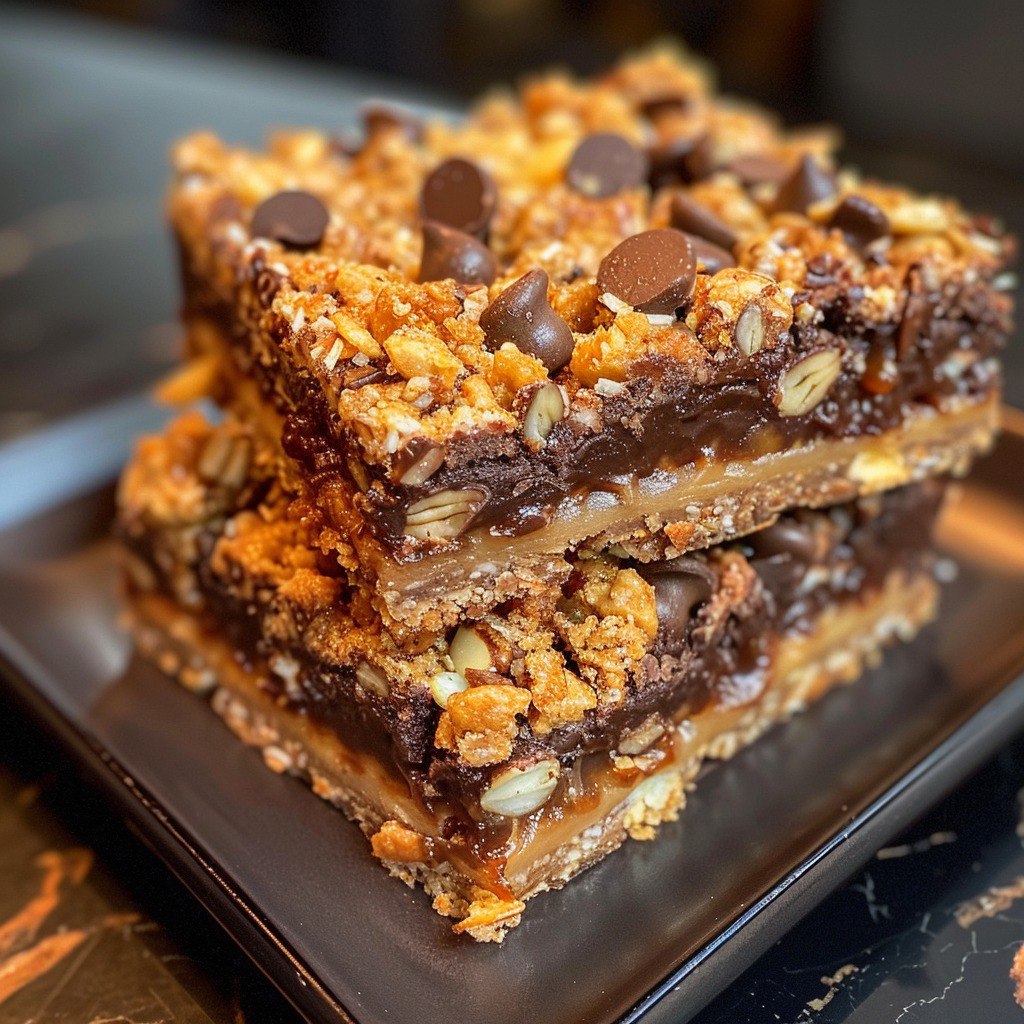
Imagine biting into a dessert that combines every flavor and texture you love in one incredible bar. Millionaire Magic Bars deliver exactly that experience with their irresistible layers of graham cracker crust, coconut, chocolate chips, butterscotch chips, and pecans. Furthermore, these heavenly treats are bound together with sweetened condensed milk that creates the perfect gooey consistency.
These magical bars have earned their name through their incredibly rich taste and luxurious appearance. Additionally, they’re surprisingly simple to make despite their sophisticated flavor profile. Moreover, once you try these bars, you’ll understand why they’ve become a beloved dessert for generations of home bakers.
Print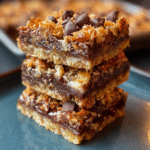
Millionaire Magic Bars: The Ultimate Decadent Layered Dessert
- Total Time: 40–45 mins
- Yield: 24 bars 1x
- Diet: Vegetarian
Description
Millionaire Magic Bars are a rich and irresistible dessert layered with buttery graham cracker crust, coconut, chocolate, butterscotch, pecans, and sweetened condensed milk. Easy to make and perfect for parties or potlucks, these bars are pure indulgence in every bite!
Ingredients
- 1 1/2 cups graham cracker crumbs
- 1/2 cup unsalted butter, melted
- 1 cup sweetened shredded coconut
- 1 cup semi-sweet chocolate chips
- 1 cup butterscotch chips
- 1 cup chopped pecans
- 1 (14 oz) can sweetened condensed milk
Instructions
- Preheat oven to 350°F (175°C). Grease a 9×13-inch baking pan.
- In a bowl, mix graham cracker crumbs and melted butter. Press into the bottom of the pan to form the crust.
- Sprinkle coconut evenly over the crust.
- Layer chocolate chips, butterscotch chips, and chopped pecans on top of the coconut.
- Pour sweetened condensed milk evenly over all the layers.
- Bake for 25–30 minutes, or until the top is golden brown.
- Let cool completely before cutting into bars and serving.
Notes
- For extra richness, drizzle with caramel sauce after baking.
- Store in an airtight container at room temperature for up to 5 days.
- You can substitute pecans with walnuts or almonds if preferred.
- Prep Time: 15 mins
- Cook Time: 25–30 mins
- Category: Dessert
- Method: Baking
- Cuisine: American
Nutrition
- Serving Size: 1 bar
- Calories: 240 kcal
- Sugar: 20 g
- Sodium: 90 mg
- Fat: 15 g
- Saturated Fat: 8 g
- Unsaturated Fat: 6 g
- Trans Fat: 0 g
- Carbohydrates: 25 g
- Fiber: 1 g
- Protein: 3 g
- Cholesterol: 10 mg
Keywords: millionaire magic bars, magic bars, layered dessert, butterscotch chocolate bars, coconut bars, easy dessert recipe, pecan bars, sweetened condensed milk bars
Why You’ll Love These Millionaire Magic Bars
These incredible layered bars offer numerous benefits that make them absolutely irresistible. Here’s what makes them so special:
• They’re incredibly easy to make: Perfect for beginners with no special skills required • They’re completely customizable: Swap ingredients to match your preferences • They’re crowd-pleasers: Appeals to all ages and taste preferences • They’re make-ahead friendly: Taste even better after sitting overnight • They’re budget-friendly: Made with affordable pantry staples • They’re perfect for sharing: One batch serves a large group • They’re no-fail recipe: Virtually impossible to mess up
Furthermore, the combination of textures creates an unforgettable eating experience. The crunchy graham cracker base provides structure, while the gooey middle layers deliver pure indulgence. Additionally, the sweetened condensed milk acts as the perfect binding agent that holds everything together beautifully.
Most importantly, these bars transport well and maintain their quality for days. Therefore, they’re ideal for potlucks, bake sales, and gift-giving occasions.
Essential Ingredients for Perfect Magic Bars
Creating the ultimate Millionaire Magic Bars starts with selecting quality ingredients. Moreover, each component plays a crucial role in achieving those signature layers and flavors:
• 1 1/2 cups graham cracker crumbs: Forms the sturdy foundation for all other layers • 1/2 cup unsalted butter, melted: Binds the crust and adds rich flavor • 1 cup sweetened shredded coconut: Provides tropical sweetness and chewy texture • 1 cup semi-sweet chocolate chips: Delivers classic chocolate flavor in every bite • 1 cup butterscotch chips: Adds caramel-like sweetness and golden color • 1 cup chopped pecans: Contributes satisfying crunch and nutty richness • 1 (14 oz) can sweetened condensed milk: Creates the magical binding that holds everything together
Additionally, using high-quality ingredients makes a noticeable difference in the final result. Furthermore, fresh nuts and premium chocolate chips elevate these bars from good to absolutely spectacular.
The beauty of this recipe lies in its flexibility. Moreover, you can easily substitute ingredients based on dietary needs or personal preferences without compromising the overall structure.
Step-by-Step Guide to Making Millionaire Magic Bars
Step 1: Preparation and Pan Setup
Proper preparation ensures smooth assembly and perfect results. First, preheat your oven to 350°F (175°C) for optimal baking temperature. Additionally, grease a 9×13 inch baking pan thoroughly to prevent sticking.
Using parchment paper creates an extra layer of protection and makes removal easier. Furthermore, leave some overhang on the sides for simple lifting once the bars are cooled. Moreover, this technique helps create clean, professional-looking edges.
Gather all your ingredients and have them measured and ready. Additionally, this prevents any rushed moments during assembly that could affect the layering process.
Step 2: Creating the Perfect Graham Cracker Crust
The foundation layer is crucial for supporting all the delicious toppings. In a medium bowl, combine graham cracker crumbs with melted butter thoroughly. Additionally, mix until the crumbs are evenly moistened and hold together when pressed.
Press the mixture firmly into the bottom of your prepared pan. Moreover, use the bottom of a measuring cup to ensure even distribution and proper compaction. Furthermore, pay special attention to the corners and edges for consistent thickness throughout.
The crust should feel solid and well-packed before adding other layers. Additionally, this step prevents the bars from falling apart when cut and served.
Step 3: Building the Magical Layers
Layering technique is essential for achieving the signature look of these bars. Start by sprinkling the sweetened shredded coconut evenly over the graham cracker crust. Additionally, distribute it to the edges for complete coverage.
Next, sprinkle the semi-sweet chocolate chips in an even layer. Moreover, gently press them into the coconut to help them stay in place. Furthermore, this prevents chips from rolling around during baking.
Add the butterscotch chips as your third layer, again distributing evenly. Additionally, the contrast between chocolate and butterscotch creates beautiful visual appeal. Finally, top with chopped pecans, pressing them lightly into the other ingredients.
Step 4: The Magic Touch with Condensed Milk
The sweetened condensed milk is what transforms these ingredients into magical bars. Pour it slowly and evenly over the entire surface, ensuring it reaches all corners. Additionally, use a spoon to guide the milk into any areas that seem to need more coverage.
The milk will seep down through the layers, binding everything together during baking. Moreover, this creates the characteristic gooey texture that makes these bars so irresistible. Furthermore, don’t worry if it doesn’t cover every single piece initially – it will spread during baking.
Allow the milk to settle for a minute before placing in the oven. Additionally, this brief waiting period helps ensure even distribution throughout the pan.
Step 5: Baking to Golden Perfection
Proper baking technique ensures perfectly set bars with golden tops. Place the pan in your preheated oven and bake for 25-30 minutes. Additionally, watch for the top to become lightly golden brown, which indicates doneness.
The edges should appear set, and the center should no longer look wet or jiggly. Moreover, slight bubbling around the edges is normal and indicates proper baking. Furthermore, avoid overbaking as this can make the bars tough and dry.
Remove from the oven when the top is golden and the center appears set. Additionally, the bars will continue cooking slightly from residual heat, so don’t worry if they seem slightly soft.
Tips for Making the Best Millionaire Magic Bars
Achieving bakery-quality results requires attention to detail. Furthermore, these expert tips will help you create perfect bars every time:
Ingredient Temperature: Use room temperature ingredients for better mixing and layering. Additionally, slightly warm condensed milk spreads more easily over the layers.
Even Distribution: Take time to distribute each layer evenly for consistent flavor in every bite. Moreover, use a spoon to guide ingredients to corners and edges.
Proper Pressing: Press each layer gently but firmly to help ingredients adhere. Furthermore, this prevents layers from separating during cutting and serving.
Cooling Patience: Allow bars to cool completely before cutting for clean edges. Additionally, refrigerating for an hour makes cutting even easier.
Sharp Knife: Use a sharp knife and wipe it clean between cuts. Moreover, this technique prevents dragging and creates professional-looking squares.
Common Mistakes to Avoid When Making Magic Bars
Learning from common pitfalls helps ensure success on your first attempt. Furthermore, avoiding these mistakes will save you time and disappointment:
Insufficient Crust Pressing: A loose crust won’t support the layers properly. Additionally, the bars may fall apart when cut and served.
Uneven Layer Distribution: Clumpy areas create inconsistent flavor and texture. Moreover, some bites will be overwhelming while others lack certain elements.
Overbaking: Too much time in the oven creates tough, dry bars. Furthermore, the condensed milk can become rubbery instead of pleasantly chewy.
Cutting Too Soon: Warm bars will be messy and fall apart easily. Additionally, the layers need time to set and bind together properly.
Using Stale Ingredients: Old nuts or expired chips affect both flavor and texture. Moreover, fresh ingredients ensure the best possible results.
Creative Variations of Millionaire Magic Bars
Tropical Paradise Magic Bars
Transform your bars into a tropical treat with simple substitutions. Replace pecans with macadamia nuts and add dried pineapple pieces. Additionally, use white chocolate chips instead of butterscotch for extra coconut flavor enhancement.
Furthermore, a sprinkle of toasted coconut flakes on top before baking adds beautiful presentation. Moreover, this variation transports you to a tropical paradise with every bite.
Double Chocolate Magic Bars
Chocolate lovers will adore this rich variation that maximizes cocoa flavor. Use chocolate graham crackers for the crust and add both dark and white chocolate chips. Additionally, substitute chopped almonds for pecans to complement the chocolate perfectly.
Furthermore, a drizzle of melted chocolate over the cooled bars creates an elegant finishing touch. Moreover, this version satisfies even the most intense chocolate cravings.
Peanut Butter Magic Bars
Peanut butter enthusiasts will love this nutty twist on the classic recipe. Add peanut butter chips alongside the chocolate chips and use chopped peanuts instead of pecans. Additionally, mix a tablespoon of peanut butter into the melted butter for the crust.
Furthermore, this variation creates an irresistible combination of salty and sweet flavors. Moreover, it appeals to both kids and adults who love peanut butter treats.
Storage and Serving Tips for Magic Bars
Proper storage maintains quality and extends the enjoyment of your bars. Furthermore, knowing the right serving techniques enhances the overall experience:
Room Temperature Storage: Store covered bars at room temperature for up to one week. Additionally, use plastic wrap or an airtight container to maintain freshness.
Refrigerator Storage: Cold storage extends shelf life up to two weeks. Moreover, chilled bars are easier to cut cleanly and hold their shape better.
Freezer Storage: Wrap individual bars in plastic and freeze for up to three months. Furthermore, thaw at room temperature for 30 minutes before serving.
Serving Suggestions: Present bars on decorative plates with small forks for easy eating. Additionally, dust with powdered sugar for elegant presentation at special occasions.
Nutritional Information and Dietary Modifications
Understanding the nutritional aspects helps you make informed choices. Furthermore, these modifications can accommodate various dietary needs:
Calorie Content: Each bar contains approximately 280-320 calories depending on size. Additionally, the high calorie density makes them perfect for special treats rather than everyday snacks.
Gluten-Free Option: Use gluten-free graham crackers for the crust layer. Moreover, ensure all other ingredients are certified gluten-free for complete dietary compliance.
Dairy-Free Alternative: Substitute coconut condensed milk and dairy-free chocolate chips. Furthermore, use coconut oil instead of butter for a completely dairy-free version.
Nut-Free Version: Replace pecans with sunflower seeds or omit nuts entirely. Additionally, ensure chocolate chips are processed in nut-free facilities for allergy safety.
Perfect Occasions for Millionaire Magic Bars
These versatile bars suit numerous occasions and celebrations. Moreover, their impressive appearance and crowd-pleasing flavor make them ideal for various events:
Holiday Gatherings: Perfect for Christmas, Thanksgiving, and Easter celebrations. Additionally, their rich flavors complement traditional holiday menus beautifully.
Potluck Dinners: Easy to transport and serve, making them potluck favorites. Furthermore, they typically disappear quickly, earning compliments from fellow guests.
Bake Sales: High-profit margin treats that always sell quickly. Moreover, their professional appearance commands premium prices at fundraising events.
Birthday Parties: Appeal to both children and adults with their sweet, indulgent nature. Additionally, they’re easier to serve than traditional cake for large groups.
Troubleshooting Common Magic Bar Issues
Even experienced bakers occasionally encounter challenges. Furthermore, these solutions help address common problems and ensure success:
Bars Fall Apart When Cut: Usually indicates insufficient cooling time or loose crust. Additionally, refrigerate bars for firmer cutting consistency.
Soggy Bottom Crust: Often caused by inadequate pressing or too much liquid. Moreover, ensure proper crust compression before adding other layers.
Uneven Browning: Results from uneven oven temperature or poor layer distribution. Furthermore, rotate the pan halfway through baking for more consistent results.
Overly Sweet Bars: Balance sweetness by adding a pinch of salt to each layer. Additionally, use unsweetened coconut to reduce overall sugar content.
FAQs About Millionaire Magic Bars
Q: Can I make these bars without coconut? A: Absolutely! Replace coconut with additional nuts or chocolate chips. Additionally, rolled oats create interesting texture and reduce sweetness slightly.
Q: How do I prevent the bars from sticking to the pan? A: Thoroughly grease the pan and consider using parchment paper. Moreover, allow complete cooling before attempting to remove or cut the bars.
Q: Can I double this recipe for a larger crowd? A: Yes, use a large sheet pan and extend baking time by 5-10 minutes. Furthermore, watch carefully for golden browning to avoid overbaking.
Q: What’s the best way to cut clean squares? A: Use a sharp knife and wipe it clean between cuts. Additionally, refrigerate bars for easier cutting and cleaner edges.
Q: Can I add other ingredients to the bars? A: Certainly! Try dried fruit, different nuts, or various chocolate chips. However, maintain similar total quantities to ensure proper baking.
Q: How far in advance can I make these bars? A: Make them up to one week ahead for best quality. Additionally, they actually improve in flavor after sitting overnight as ingredients meld together.
Q: Why do my bars taste too sweet? A: Try using unsweetened coconut or adding a pinch of salt. Moreover, balance sweetness with slightly bitter dark chocolate chips instead of semi-sweet.
Advanced Techniques for Magic Bar Mastery
Elevate your bars from good to extraordinary with these professional techniques. Furthermore, these methods help create bakery-quality results consistently:
Temperature Control: Use an oven thermometer to ensure accurate baking temperature. Additionally, even slight temperature variations affect texture and browning.
Ingredient Preparation: Toast nuts before adding for enhanced flavor depth. Moreover, roughly chop larger chocolate pieces for better distribution throughout layers.
Pan Selection: Use light-colored metal pans for even browning. Furthermore, dark pans may cause over-browning on the bottom before the top is done.
Cooling Method: Cool bars on a wire rack for air circulation underneath. Additionally, this prevents soggy bottoms from trapped steam.
The Science Behind Magic Bar Success
Understanding the science helps explain why these bars work so well. Furthermore, this knowledge helps you troubleshoot issues and make successful modifications:
Condensed Milk Chemistry: The concentrated sugars caramelize during baking, creating rich flavor. Additionally, the proteins help bind all ingredients together into cohesive bars.
Fat Distribution: Butter in the crust and oils from nuts create moisture barriers. Moreover, this prevents the bars from becoming too dry or crumbly.
Heat Transfer: Layering creates different textures through varied heat exposure. Furthermore, bottom layers crisp while top layers remain chewy and gooey.
Sugar Crystallization: Multiple sugar sources prevent excessive crystallization. Additionally, this ensures smooth, pleasant texture rather than grainy or sandy bars.
Conclusion: Master the Magic of Millionaire Bars
Millionaire Magic Bars represent the perfect combination of simplicity and sophistication in dessert making. Furthermore, these incredible layered treats transform basic pantry ingredients into something truly extraordinary that will impress everyone who tries them.
The beauty of this recipe lies in its foolproof nature and endless customization possibilities. Moreover, whether you stick to the classic version or experiment with creative variations, success is virtually guaranteed. Additionally, these bars have the remarkable ability to make any occasion feel more special and memorable.


