Introduction
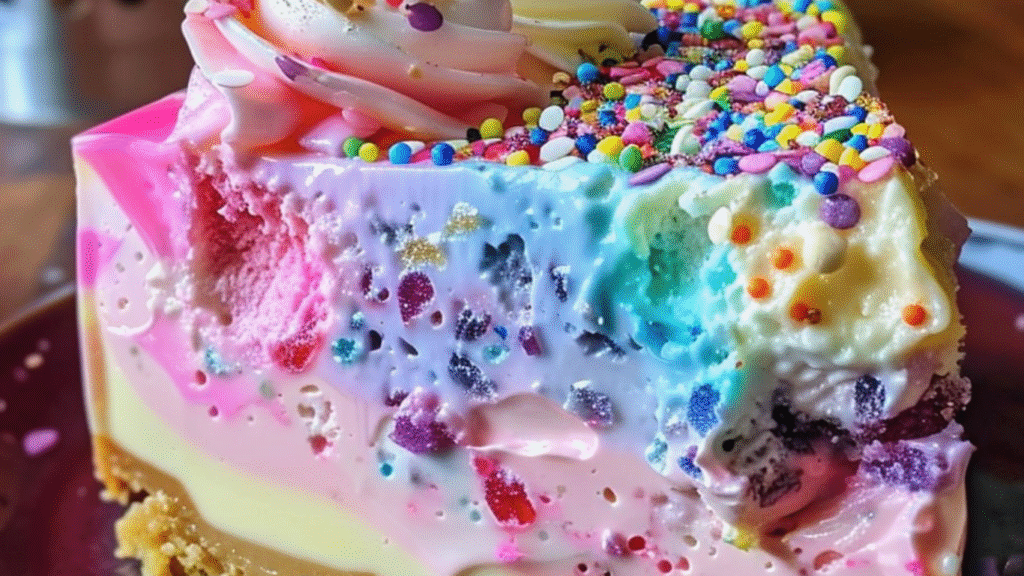
Bring a touch of whimsy and magic to your dessert table with this No-Bake Unicorn Cheesecake! This enchanting treat features a creamy, pastel-colored cheesecake layered in a buttery graham cracker crust and topped with rainbow sprinkles, whipped cream, and edible glitter. Perfect for birthdays, parties, or just adding a little joy to your day, this cheesecake is as fun to make as it is to eat!
Best of all, it requires no baking—just mix, chill, and decorate. Kids and adults alike will adore this dreamy, colorful dessert that’s sure to steal the spotlight.
Why You’ll Love This Unicorn Cheesecake
No Oven Needed – Easy, foolproof, and perfect for hot days.
Magical & Vibrant – Pastel layers make it Insta-worthy.
Customizable Colors – Use any shades you love!
Great for Parties – A showstopper for birthdays and celebrations.
Step-by-Step Guide to a Magical Cheesecake
Step 1: Gather Your Ingredients & Tools
For the Crust:
- 2 cups graham cracker crumbs (or digestive biscuits)
- 1/2 cup melted butter
- 2 tbsp sugar
For the Cheesecake Filling:
- 16 oz (2 blocks) cream cheese, softened
- 1 cup powdered sugar
- 1 tsp vanilla extract
- 1 1/2 cups heavy whipping cream, chilled
- Gel food coloring (pink, purple, blue, yellow)
For Decorating:
- Rainbow sprinkles
- Edible glitter
- Whipped cream
- Mini marshmallows (optional)
- White chocolate curls (optional)
Tools Needed:
- 8-inch springform pan
- Electric mixer
- Spatula
- Piping bag (for whipped cream)
Step 2: Making the No-Bake Unicorn Cheesecake
- Prepare the Crust – Mix graham cracker crumbs, melted butter, and sugar. Press firmly into the bottom of the pan. Chill for 15 minutes.
- Make the Filling – Beat cream cheese, powdered sugar, and vanilla until smooth. In another bowl, whip the heavy cream to stiff peaks. Gently fold into the cream cheese mixture.
- Color the Batter – Divide the filling into 4 bowls. Tint each with different pastel colors (pink, purple, blue, yellow).
- Layer the Cheesecake – Spoon colored batters randomly over the crust. Swirl gently with a knife for a marbled effect.
- Chill & Set – Refrigerate for at least 4 hours (or overnight).
Step 3: Decorating Like a Unicorn Dream
- Pipe whipped cream rosettes on top.
- Add sprinkles, glitter, and marshmallows.
- Dust with edible gold or silver for extra magic.
Tips for the Best Unicorn Cheesecake
Use Gel Food Coloring – More vibrant than liquid.
Chill the Bowl & Whisk – Helps whip cream faster.
Don’t Overmix – Keep the filling light and fluffy.
Make Ahead – Perfect for preparing the day before.
For a gluten-free version, use gluten-free graham crackers.
Common Mistakes to Avoid
Soft Cream Cheese – Must be room temperature for smooth mixing.
Runny Whipped Cream – Whip until stiff peaks form.
Skipping Chill Time – Needs at least 4 hours to set.
Too Much Food Coloring – Start with a drop, then add more as needed.
FAQs About No-Bake Unicorn Cheesecake
Q: Can I use Cool Whip instead of whipped cream?
A: Yes! Substitute 3 cups Cool Whip for the heavy cream.
Q: How long does it last in the fridge?
A: Up to 3 days (best eaten fresh).
Q: Can I freeze this cheesecake?
A: Yes! Freeze (undecorated) for up to 1 month. Thaw in the fridge before decorating.
Q: What if I don’t have a springform pan?
A: Use a regular pie dish—just slice carefully.
Conclusion
This No-Bake Unicorn Cheesecake is a whimsical, delicious, and easy dessert that brings a little magic to any occasion. With its pastel swirls and festive toppings, it’s guaranteed to make everyone smile.
Print
No-Bake Unicorn Cheesecake: A Magical, Colorful Dessert
- Total Time: 40 mins
Description
Dive into a whimsical dessert experience with this vibrant and magical no-bake cheesecake!
Ingredients
For the Crust:
2 cups digestive cookie crumbs
113g (½ cup) melted butter
1 tablespoon powdered sugar
½ teaspoon fine sea salt
For the Filling:
16 oz cream cheese, room temperature (two 8 oz packages)
½ cup sugar
Zest and juice of 1 lemon
1 tablespoon pure vanilla extract
½ teaspoon salt
¼ cup sour cream or labneh
1 cup heavy cream
Food coloring (Purple, Fuchsia, Teal) as needed
Edible glitter for garnish
Instructions
Prepare the Crust:
Combine cookie crumbs, melted butter, powdered sugar, and salt. Press into the bottom and sides of a tart pan. Freeze until set.
Make the Filling:
Beat cream cheese, sugar, lemon zest and juice, vanilla, and salt until smooth. Mix in sour cream.
In a separate bowl, whip the heavy cream, then fold into the cream cheese mixture. Divide and tint with food coloring.
Assemble the Cheesecake:
Layer the tinted fillings into the crust. Swirl gently with a knife. Chill overnight.
Garnish and Serve:
Before serving, sprinkle with edible glitter.
Notes
Swirling: Use a butter knife or toothpick to create intricate swirls without overmixing the filling.
Setting: Ensure the cheesecake is fully set to enhance its texture and make it easier to slice.
Serving: Serve chilled and pair with fresh berries or whipped cream for extra decadence.