
Picture this: the rich, chocolatey crunch of Oreos meets the creamy sweetness of peanut butter, all wrapped in a smooth chocolate coating. Moreover, imagine creating this heavenly combination in your own kitchen with just a few simple ingredients. Reese’s Oreo Truffles represent the perfect marriage of two beloved treats that have captured hearts for generations.
These decadent bite-sized desserts bring together everything we love about homemade confections. Additionally, they’re surprisingly easy to make, requiring no special equipment or advanced baking skills. Furthermore, the combination of textures and flavors creates an unforgettable experience that will have your family and friends begging for the recipe.
Print
Reese’s Oreo Truffles: The Ultimate Guide to Making These Irresistible Treats
- Total Time: 1 hour
- Yield: 30 truffles 1x
- Diet: Vegetarian
Description
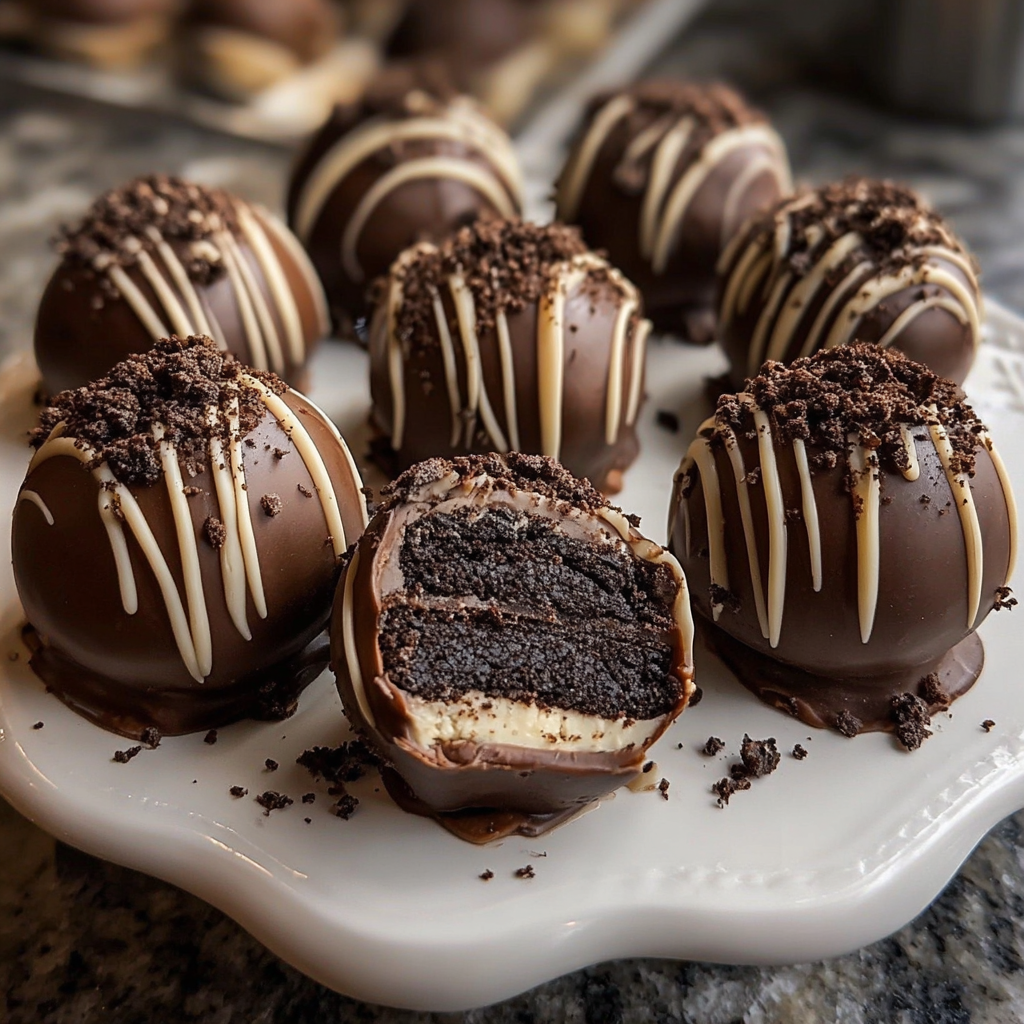
Reese’s Oreo Truffles are a rich and indulgent no-bake treat that brings together the irresistible combo of chocolate, peanut butter, and Oreos. Creamy, crunchy, and perfect for parties or gifting, these bite-sized delights are always a hit.
Ingredients
- 1 package (14.3 oz) Oreo cookies
- 1 package (8 oz) cream cheese, softened
- 1 cup creamy peanut butter
- 12 oz semi-sweet chocolate, chopped or chocolate chips
- 6 oz white chocolate, chopped (optional, for drizzling)
Instructions
- Place Oreos in a food processor and pulse until finely crushed.
- In a large bowl, mix crushed Oreos, softened cream cheese, and peanut butter until smooth and well combined.
- Roll mixture into 1-inch balls and place on a parchment-lined baking sheet. Refrigerate for 30 minutes to firm.
- In a microwave-safe bowl, melt semi-sweet chocolate in 30-second intervals, stirring in between, until smooth.
- Dip each truffle into melted chocolate using a fork or toothpick. Tap off excess and return to the baking sheet.
- Optional: Melt white chocolate and drizzle over truffles for decoration.
- Refrigerate for at least 15 minutes to allow chocolate to set.
- Serve chilled or store in an airtight container in the fridge.
Notes
- Use crunchy peanut butter for a textured bite.
- Decorate with crushed peanuts, Oreo crumbs, or sprinkles before the chocolate sets.
- These truffles freeze well—perfect for make-ahead treats.
- Prep Time: 45 mins
- Cook Time: 0 mins (no-bake)
- Category: Dessert
- Method: No-bake
- Cuisine: American
Nutrition
- Serving Size: 1 truffle
- Calories: 170 kcal
- Sugar: 13 g
- Sodium: 85 mg
- Fat: 11 g
- Saturated Fat: 5 g
- Unsaturated Fat: 5 g
- Trans Fat: 0 g
- Carbohydrates: 16 g
- Fiber: 1 g
- Protein: 3 g
- Cholesterol: 10 mg
Keywords: Oreo truffles, peanut butter truffles, no-bake dessert, chocolate truffles, Reese’s dessert, easy party treats
Why You’ll Love These Reese’s Oreo Truffles
Creating these incredible Reese’s Oreo Truffles offers numerous benefits that make them stand out from other dessert options. Moreover, they combine convenience with gourmet taste in ways that few recipes can match.
Unmatched Convenience and Simplicity
• No-bake preparation: Perfect for beginners or anyone without access to an oven • Simple ingredient list: Uses common pantry items you likely already have • Quick assembly: Takes less than an hour of active preparation time • Make-ahead friendly: Can be prepared days in advance for stress-free entertaining
Incredible Versatility
• Customizable flavors: Swap different cookie varieties or add extracts • Dietary adaptations: Easy to modify for various dietary needs • Portion control: Small size makes them perfect for portion-conscious enjoyment • Gift-worthy presentation: Looks professionally made with minimal effort
Crowd-Pleasing Appeal
• Universal favorites: Combines two of America’s most beloved treats • All-age enjoyment: Appeals to both kids and adults equally • Party perfect: Ideal size for buffets, potlucks, and celebrations • Instagram-worthy: Beautiful presentation that photographs beautifully
Furthermore, these truffles offer the satisfaction of homemade treats without requiring professional pastry skills. Additionally, they store well and actually improve in flavor after a day or two in the refrigerator.
Essential Ingredients for Perfect Reese’s Oreo Truffles
Understanding your ingredients is crucial for creating the best possible Reese’s Oreo Truffles. Moreover, choosing quality components ensures your finished product will taste amazing and have the perfect texture.
Core Ingredients Breakdown
Oreo Cookies (14.3 oz package) The foundation of these truffles comes from classic Oreo cookies. Additionally, the chocolate wafers provide structure while the cream filling adds sweetness. Furthermore, crushing them properly creates the ideal texture base.
Cream Cheese (8 oz, softened) This ingredient acts as the binding agent that holds everything together. Moreover, it adds richness and helps create that smooth, truffle-like texture. Additionally, using softened cream cheese ensures easy mixing and prevents lumps.
Creamy Peanut Butter (1 cup) The star flavor that makes these truffles truly special. Furthermore, creamy peanut butter blends seamlessly with other ingredients. However, crunchy peanut butter can be substituted for added texture.
Semi-Sweet Chocolate (12 oz, chopped) This creates the beautiful outer coating that seals in all the flavors. Moreover, chopping chocolate ensures even melting. Additionally, chocolate chips can be substituted for convenience.
White Chocolate (6 oz, optional) Used for decorative drizzling that adds visual appeal. Furthermore, it provides a nice flavor contrast to the dark chocolate coating.
Quality Tips for Best Results
Choosing high-quality ingredients makes a noticeable difference in your final product. Additionally, room temperature ingredients blend more easily and create smoother textures. Furthermore, investing in good chocolate pays off in both taste and appearance.
Step-by-Step Guide to Making Reese’s Oreo Truffles
Creating perfect Reese’s Oreo Truffles requires attention to detail and proper technique. Moreover, following each step carefully ensures consistent results every time.
Step 1: Preparation and Setup
Begin by gathering all your ingredients and equipment. Additionally, line a baking sheet with parchment paper for easy cleanup. Furthermore, ensure your cream cheese is properly softened to room temperature.
Essential Equipment: • Food processor for crushing cookies • Large mixing bowl for combining ingredients • Baking sheet lined with parchment paper • Microwave-safe bowls for melting chocolate • Fork or toothpicks for dipping
Moreover, having everything ready before you start makes the process much smoother. Additionally, proper preparation prevents rushing and potential mistakes.
Step 2: Creating the Truffle Base
Crushing the Oreos: Place the entire package of Oreos in your food processor. Additionally, pulse in short bursts until the cookies are finely crushed. Furthermore, avoid over-processing, which can create powder instead of small pieces.
The ideal texture resembles coarse breadcrumbs with some slightly larger pieces. Moreover, this creates interesting texture variations in your finished truffles. Additionally, uniform crushing ensures even distribution throughout the mixture.
Mixing the Base: In your large mixing bowl, combine the crushed Oreos with softened cream cheese and peanut butter. Additionally, mix thoroughly until the mixture becomes smooth and well-combined. Furthermore, proper mixing ensures every bite has balanced flavors.
The mixture should hold together when pressed but not be overly sticky. Moreover, if it seems too dry, add a small amount of additional cream cheese. Conversely, if it’s too wet, add more crushed cookies.
Step 3: Shaping and Chilling
Rolling the Truffles: Using clean hands or a small cookie scoop, form the mixture into 1-inch balls. Additionally, rolling between your palms creates perfectly round shapes. Furthermore, consistent sizing ensures even coating and professional appearance.
Place each ball on your prepared baking sheet, leaving space between them. Moreover, this prevents sticking and makes handling easier. Additionally, work quickly to prevent the mixture from becoming too warm.
Chilling Process: Refrigerate the shaped truffles for at least 30 minutes. Additionally, this firming step is crucial for successful chocolate coating. Furthermore, well-chilled truffles hold their shape better during dipping.
Properly chilled truffles also absorb less chocolate coating, creating the ideal thickness. Moreover, this step can be done hours or even days ahead of time.
Step 4: Chocolate Coating Mastery
Melting the Chocolate: Place chopped semi-sweet chocolate in a microwave-safe bowl. Additionally, microwave in 30-second intervals, stirring between each heating. Furthermore, this gentle method prevents burning and ensures smooth melting.
Continue heating and stirring until the chocolate is completely smooth. Moreover, properly melted chocolate should coat a spoon evenly. Additionally, overheating can cause chocolate to seize and become unusable.
Dipping Technique: Remove truffles from refrigerator just before dipping. Additionally, work with a few at a time to prevent warming. Furthermore, use a fork or toothpicks to dip each truffle completely.
Gently tap the fork against the bowl edge to remove excess chocolate. Moreover, this creates the perfect coating thickness. Additionally, place coated truffles back on the parchment-lined baking sheet immediately.
Optional White Chocolate Drizzle: Melt white chocolate using the same method as the dark chocolate. Additionally, transfer to a small piping bag or zip-lock bag with a corner snipped off. Furthermore, drizzle in decorative patterns over the set dark chocolate.
This step adds visual appeal and flavor contrast. Moreover, it creates a professional bakery appearance. Additionally, different drizzle patterns can match various occasions or themes.
Pro Tips for Perfect Reese’s Oreo Truffles
Mastering Reese’s Oreo Truffles becomes easier with these professional techniques. Moreover, these tips help avoid common pitfalls and ensure consistently excellent results.
Temperature Control Secrets
Maintaining proper temperatures throughout the process is crucial for success. Additionally, room temperature ingredients blend more easily and create smoother textures. Furthermore, proper chilling prevents shape loss during coating.
Key Temperature Guidelines: • Cream cheese should be truly soft, not cold • Truffle balls must be well-chilled before dipping • Melted chocolate should be warm but not hot • Work in cool kitchen conditions when possible
Moreover, temperature affects both texture and appearance of finished truffles. Additionally, rushing the chilling process often leads to coating problems.
Texture Optimization
Achieving the perfect texture requires attention to ingredient ratios and mixing techniques. Additionally, proper crushing of Oreos creates the ideal base consistency. Furthermore, thorough mixing ensures uniform distribution of flavors.
Texture Tips: • Don’t over-process Oreos into powder • Ensure cream cheese is lump-free before mixing • Mix until just combined to avoid tough texture • Taste and adjust ratios if needed
Moreover, the final mixture should hold together without being sticky or dry. Additionally, proper texture makes rolling and coating much easier.
Storage and Serving Strategies
Proper storage maintains freshness and texture of your Reese’s Oreo Truffles. Additionally, these treats actually improve in flavor after a day of storage. Furthermore, proper serving temperature enhances the eating experience.
Storage Guidelines: • Refrigerate in airtight containers • Layer between parchment paper sheets • Store up to one week for best quality • Freeze for longer storage up to three months
Moreover, bringing truffles to cool room temperature before serving enhances flavor. Additionally, cold storage keeps chocolate coating crisp and attractive.
Creative Variations for Reese’s Oreo Truffles
Experimenting with different flavors and techniques keeps Reese’s Oreo Truffles exciting and fresh. Moreover, variations allow you to customize treats for different preferences and occasions.
Cookie Base Alternatives
Golden Oreos: Creates a lighter, vanilla-flavored base that pairs beautifully with peanut butter. Additionally, the golden cookies provide a different visual appeal. Furthermore, this variation works especially well for spring and summer occasions.
Chocolate Chip Cookies: Substitute store-bought chocolate chip cookies for a different texture profile. Moreover, this creates a more homestyle flavor combination. Additionally, using soft cookies eliminates the crushing step.
Nutter Butter Cookies: Double down on peanut butter flavor by using peanut butter cookies. Furthermore, this creates an ultra-rich peanut butter experience. Additionally, it appeals to serious peanut butter enthusiasts.
Peanut Butter Modifications
Almond Butter Substitute: Creates a more sophisticated flavor profile with subtle nuttiness. Additionally, almond butter provides similar texture with different taste. Furthermore, this variation appeals to those seeking alternatives to peanut products.
Crunchy Peanut Butter: Adds textural interest with small peanut pieces throughout. Moreover, the added crunch creates more complex eating experience. Additionally, it provides visual appeal when truffles are cut.
Flavored Peanut Butter: Try honey-roasted or chocolate peanut butter for unique twists. Furthermore, these variations add subtle flavor layers. Additionally, they create conversation starters at gatherings.
Coating Innovations
Milk Chocolate Coating: Provides sweeter, milder chocolate flavor that many prefer. Additionally, milk chocolate pairs exceptionally well with peanut butter. Furthermore, it creates a more approachable flavor profile for children.
Dark Chocolate Coating: Offers sophisticated, less sweet flavor that balances rich filling. Moreover, dark chocolate provides antioxidant benefits. Additionally, it appeals to adult palates seeking complex flavors.
Candy Coating Options: Roll truffles in chopped nuts, coconut, or sprinkles instead of chocolate. Furthermore, these options create different textures and appearances. Additionally, they allow for seasonal customization.
Troubleshooting Common Reese’s Oreo Truffle Issues
Even experienced bakers encounter challenges when making Reese’s Oreo Truffles. Moreover, understanding common problems and solutions ensures successful results every time.
Mixture Too Soft or Sticky
This common issue usually stems from temperature problems or ingredient ratios. Additionally, warm conditions can make the mixture difficult to handle. Furthermore, too much cream cheese creates overly soft consistency.
Solutions: • Chill mixture longer before shaping • Add more crushed Oreos gradually • Work in cooler kitchen conditions • Use less cream cheese in future batches
Moreover, properly chilled mixture is much easier to work with. Additionally, adjusting ratios slightly can fix consistency problems.
Chocolate Coating Problems
Coating issues often result from temperature mismatches or improper melting techniques. Additionally, seized chocolate creates thick, lumpy coatings. Furthermore, overheated chocolate becomes difficult to work with.
Chocolate Coating Solutions: • Ensure truffles are properly chilled before dipping • Melt chocolate gently in short intervals • Add small amount of coconut oil if chocolate is too thick • Work quickly with small batches
Moreover, practice makes perfect when it comes to chocolate coating technique. Additionally, having backup chocolate ready prevents panic if batches seize.
Shape and Size Inconsistencies
Uneven truffles result from inconsistent shaping or measuring. Additionally, warming mixture makes uniform shapes difficult to achieve. Furthermore, rushing the shaping process leads to irregularities.
Shape Solutions: • Use small cookie scoop for consistent portions • Keep mixture chilled while working • Roll between palms gently but firmly • Take time to create uniform shapes
Moreover, consistent sizing ensures even coating coverage. Additionally, uniform truffles look more professional and appealing.
FAQs About Reese’s Oreo Truffles
Understanding frequently asked questions helps ensure success with Reese’s Oreo Truffles. Moreover, these answers address common concerns and provide helpful guidance.
Can I Make These Truffles Without a Food Processor?
Absolutely! Additionally, you can crush Oreos using alternative methods. Furthermore, placing cookies in a sealed plastic bag and crushing with a rolling pin works well.
However, achieving consistently fine pieces requires more effort without a food processor. Moreover, hand-crushing may result in less uniform texture. Additionally, this method takes more time but produces acceptable results.
How Long Do Reese’s Oreo Truffles Stay Fresh?
Properly stored truffles maintain quality for up to one week in the refrigerator. Additionally, freezing extends storage life to three months. Furthermore, airtight containers prevent flavor absorption and maintain texture.
Moreover, these truffles actually improve in flavor after the first day of storage. Additionally, the flavors meld together beautifully over time. Furthermore, making them ahead actually enhances the final product.
Can I Use Different Types of Chocolate for Coating?
Certainly! Additionally, different chocolates create unique flavor profiles. Furthermore, white chocolate, milk chocolate, or dark chocolate all work beautifully.
Moreover, you can even mix different chocolates for variety in a single batch. Additionally, candy melts provide easier handling for beginners. Furthermore, each chocolate type offers different melting and setting characteristics.
What’s the Best Way to Store Leftover Truffles?
Store Reese’s Oreo Truffles in airtight containers in the refrigerator. Additionally, layer them between parchment paper sheets to prevent sticking. Furthermore, avoid storing them with strong-smelling foods.
Moreover, individual paper cups make storage and serving easier. Additionally, glass containers work better than plastic for maintaining freshness. Furthermore, proper storage prevents chocolate bloom and maintains appearance.
Can I Make These Truffles Dairy-Free?
Yes, with some substitutions, you can create dairy-free versions. Additionally, use dairy-free cream cheese and ensure your chocolate is dairy-free. Furthermore, many brands now offer excellent dairy-free alternatives.
Moreover, the taste remains surprisingly similar with quality substitutions. Additionally, this modification makes the treats accessible to more people. Furthermore, dairy-free versions often store just as well as traditional ones.
How Far in Advance Can I Make These Truffles?
Reese’s Oreo Truffles can be made up to one week ahead when stored properly. Additionally, freezing allows for even longer advance preparation. Furthermore, making them ahead actually improves flavor development.
Moreover, advance preparation reduces stress for special occasions. Additionally, frozen truffles thaw quickly to serving temperature. Furthermore, having homemade treats ready makes entertaining much easier.
Health and Nutrition Considerations
While Reese’s Oreo Truffles are undeniably indulgent treats, understanding their nutritional profile helps with mindful enjoyment. Moreover, small modifications can make them slightly healthier without sacrificing taste.
Nutritional Awareness
These truffles are rich in calories, fats, and sugars due to their chocolate and peanut butter content. Additionally, they provide some protein from the peanut butter and nuts. Furthermore, enjoying them in moderation fits into balanced eating patterns.
Moreover, the small serving size naturally promotes portion control. Additionally, their rich flavor means a little goes a long way in satisfaction. Furthermore, homemade versions allow control over ingredient quality.
Healthier Modification Options
Reduced Sugar Versions: Use sugar-free chocolate and reduced-sugar cookies to lower overall sugar content. Additionally, these substitutions maintain taste while reducing calories. Furthermore, many people can’t detect significant differences.
Added Nutrition: Incorporate chopped nuts or seeds for additional protein and healthy fats. Moreover, these additions provide textural interest. Additionally, they boost the nutritional value per serving.
Smaller Portions: Make mini truffles for automatic portion control. Furthermore, smaller sizes allow people to enjoy the treat without overindulging. Additionally, mini versions are perfect for party platters.
Gift-Giving and Presentation Ideas
Reese’s Oreo Truffles make exceptional homemade gifts that show thoughtfulness and care. Moreover, their professional appearance impresses recipients. Additionally, proper packaging ensures they arrive in perfect condition.
Packaging Suggestions
Individual Paper Cups: Place each truffle in decorative paper cups for elegant presentation. Additionally, this prevents handling and maintains appearance. Furthermore, cups come in colors to match any occasion.
Decorative Boxes: Arrange truffles in gift boxes lined with tissue paper. Moreover, this creates a bakery-quality presentation. Additionally, boxes can be reused by recipients.
Clear Containers: Show off the beautiful truffles in clear plastic containers with ribbons. Furthermore, this allows the treats to be the star of the presentation. Additionally, recipients can see exactly what they’re receiving.
Occasion-Specific Presentations
Holiday Themes: Use colored drizzles and seasonal decorations to match holidays. Additionally, themed packaging creates perfect seasonal gifts. Furthermore, different colors work for various celebrations.
Wedding Favors: Package individual truffles as elegant wedding favors. Moreover, they provide a premium alternative to traditional candy. Additionally, they can be customized to match wedding colors.
Teacher Gifts: Present truffles in small boxes with thank-you notes for meaningful appreciation gifts. Furthermore, homemade treats show extra thoughtfulness. Additionally, they’re perfect for end-of-year recognition.
Conclusion
Reese’s Oreo Truffles represent the perfect intersection of beloved flavors, simple techniques, and impressive results. Moreover, this comprehensive guide provides everything needed to create these exceptional treats successfully. Additionally, the versatility and make-ahead nature make them ideal for any occasion.
Throughout this guide, we’ve explored the essential techniques, creative variations, and professional tips that ensure perfect results every time. Furthermore, understanding common troubleshooting solutions prevents frustration and guarantees success. Additionally, the numerous customization options allow for personal creativity and dietary accommodations.


