Nothing beats the satisfaction of creating a perfect pie pastry from scratch. Moreover, homemade pie crusts offer unmatched flavor and texture that store-bought versions simply cannot match. Additionally, mastering this fundamental baking skill opens doors to countless delicious possibilities.
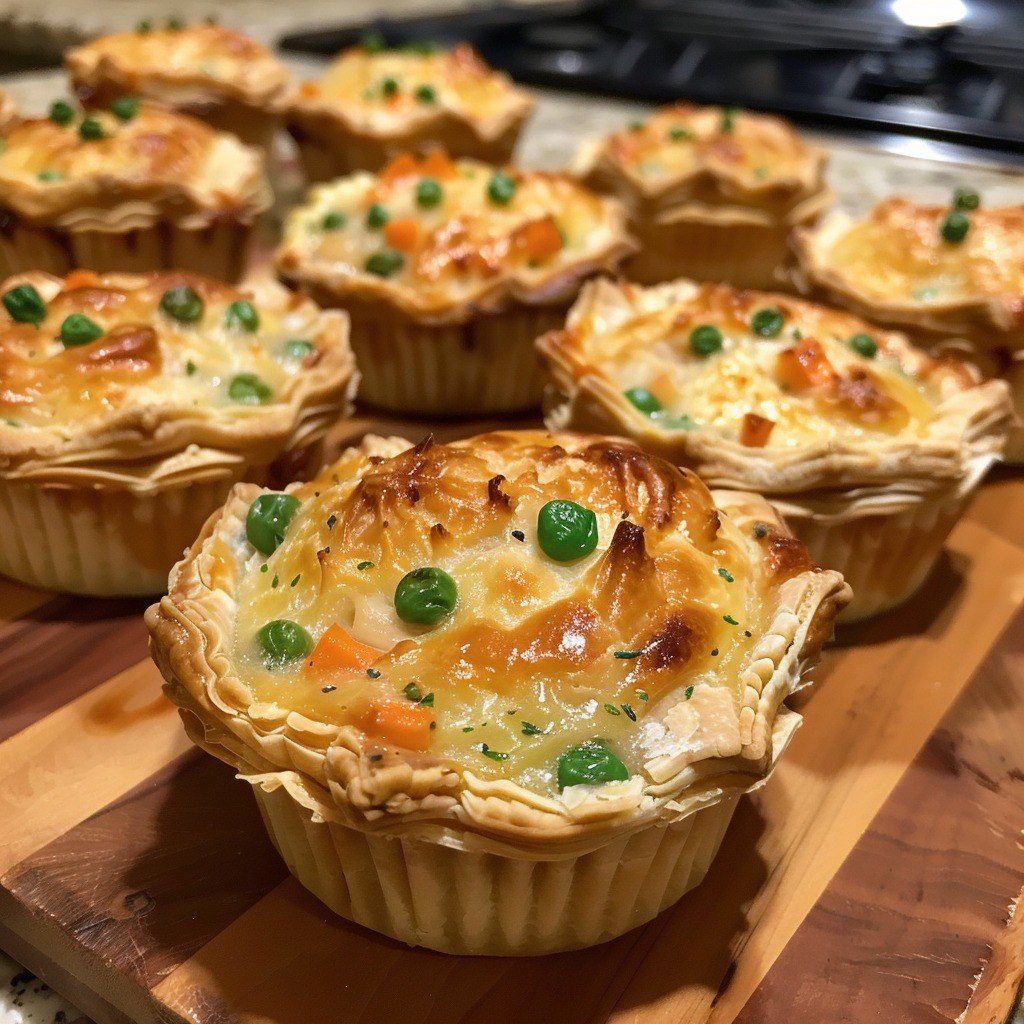
Furthermore, pie pastry serves as the foundation for both sweet and savory creations. Whether you’re planning apple pie for dessert or chicken pot pie for dinner, the perfect crust makes all the difference. Therefore, investing time in learning proper technique pays dividends in your future baking endeavors.
Creating flaky, buttery pie pastry may seem intimidating at first. However, with the right ingredients, techniques, and patience, anyone can master this essential skill. Moreover, understanding the science behind pastry-making helps ensure consistent, professional results every time.
Why You’ll Love This Pie Pastry Recipe
This tried-and-true pie pastry recipe offers numerous advantages that make it a kitchen staple. Furthermore, these benefits explain why countless bakers rely on this method:
• It’s incredibly versatile: Perfect for sweet dessert pies, savory dinner pies, tarts, and quiches.
• It’s budget-friendly: Uses simple, affordable ingredients that most home cooks already have.
• It’s make-ahead friendly: Dough can be prepared days in advance and refrigerated or frozen.
• It’s foolproof: Clear instructions and techniques that work for beginners and experts alike.
• It’s superior in taste: Homemade pastry offers rich, buttery flavor that surpasses commercial alternatives.
• It’s customizable: Easy to modify with different fats, flours, or seasonings to suit your preferences.
Additionally, this recipe yields enough dough for two crusts, making it perfect for double-crust pies. Moreover, having extra pastry on hand allows for spontaneous baking projects. Furthermore, the satisfaction of creating something from scratch enhances the overall baking experience.
The Science Behind Perfect Pie Pastry
Understanding the chemistry of pastry-making helps you achieve consistent results. Moreover, knowing why each ingredient matters allows you to troubleshoot issues and make informed adjustments.
Cold butter creates the flaky texture that defines excellent pie pastry. Additionally, when butter melts during baking, it creates steam pockets that lift the dough layers. Furthermore, keeping ingredients cold prevents the butter from melting prematurely during mixing.
Flour provides structure through gluten development. However, too much gluten makes pastry tough rather than tender. Therefore, gentle mixing and proper hydration balance structure with tenderness. Moreover, the protein content in all-purpose flour offers the ideal balance for pie pastry.
Ice water hydrates the flour while maintaining cold temperatures. Furthermore, water activates gluten development, but cold water slows this process. Additionally, using just enough water prevents the dough from becoming soggy or difficult to handle.
Essential Ingredients for Perfect Pie Pastry
Selecting quality ingredients significantly impacts your pastry’s final texture and flavor. Moreover, understanding each component’s role helps you make informed substitutions when necessary.
All-Purpose Flour (2 1/2 cups): Forms the pastry’s structure and provides stability. Additionally, all-purpose flour contains the ideal protein content for tender yet sturdy crusts. Furthermore, measuring flour accurately ensures consistent results every time.
Salt (1 teaspoon): Enhances flavor and strengthens gluten structure. Moreover, salt balances the richness of butter and adds depth to the overall taste. Additionally, it helps preserve the dough during storage.
Unsalted Butter (1 cup, cold): Creates flakiness and provides rich flavor. Furthermore, cold butter is essential for proper texture development. Additionally, unsalted butter allows you to control the pastry’s salt content precisely.
Ice Water (6-8 tablespoons): Binds ingredients while maintaining cold temperatures. Moreover, the exact amount depends on humidity and flour absorption. Additionally, ice water prevents premature butter melting during mixing.
Step-by-Step Guide to Making Pie Pastry
Creating perfect pie pastry requires attention to detail and proper technique. Furthermore, following these steps carefully ensures professional results every time.
Step 1: Preparing for Perfect Pie Pastry
Proper preparation sets the foundation for pastry success. Moreover, having everything ready before you start prevents mistakes and ensures smooth progress.
Begin by chilling your butter in the freezer for 15 minutes before starting. Additionally, prepare a bowl of ice water and set it aside. Furthermore, measure your flour and salt accurately using proper measuring techniques.
Cut the cold butter into small, uniform cubes approximately 1/2 inch in size. Moreover, smaller pieces incorporate more easily into the flour mixture. Additionally, return the cubed butter to the refrigerator while you prepare other ingredients.
Gather your mixing bowl, pastry cutter, and plastic wrap. Furthermore, clear adequate counter space for rolling later. Additionally, having everything organized prevents delays that could warm your ingredients.
Step 2: Creating the Perfect Pie Pastry Base
The mixing process determines your pastry’s final texture. Moreover, proper technique creates the ideal balance between flakiness and tenderness.
Whisk together flour and salt in a large mixing bowl. Additionally, this ensures even distribution of salt throughout the mixture. Furthermore, use a bowl large enough to accommodate vigorous mixing without spillage.
Add the cold butter cubes to the flour mixture. Moreover, toss them lightly to coat with flour. Additionally, this coating prevents the butter pieces from sticking together during cutting.
Using a pastry cutter or your fingertips, work the butter into the flour mixture. Furthermore, cut the butter into progressively smaller pieces until the mixture resembles coarse crumbs. Additionally, some butter pieces should remain visible for optimal flakiness.
The ideal texture shows butter pieces ranging from pea-sized to breadcrumb-sized. Moreover, avoid overworking the mixture, as this can develop tough gluten. Additionally, work quickly to maintain cold temperatures throughout the process.
Step 3: Hydrating Your Pie Pastry Dough
Proper hydration brings the dough together without compromising texture. Moreover, this step requires patience and attention to avoid over-mixing.
Sprinkle one tablespoon of ice water over the flour-butter mixture. Additionally, use a fork to gently toss and distribute the moisture. Furthermore, avoid stirring vigorously, as this can develop unwanted gluten.
Continue adding ice water one tablespoon at a time. Moreover, mix gently after each addition to assess the dough’s hydration level. Additionally, the dough should gradually begin clumping together without being sticky.
Test the dough’s readiness by gently pressing it together. Furthermore, properly hydrated dough holds together when squeezed but doesn’t feel wet or sticky. Additionally, you may need slightly more or less water depending on environmental conditions.
Stop adding water as soon as the dough coheres. Moreover, over-hydrated dough becomes difficult to roll and may shrink during baking. Additionally, under-hydrated dough cracks and tears during rolling.
Step 4: Shaping and Chilling Pie Pastry
Proper shaping and chilling develop the pastry’s final characteristics. Moreover, this resting period allows gluten to relax and flavors to meld.
Gather the dough into a cohesive mass using your hands. Additionally, avoid kneading or overworking the dough at this stage. Furthermore, the dough should feel slightly rough and show visible butter pieces.
Divide the dough into two equal portions. Moreover, this recipe yields enough pastry for two single crusts or one double-crust pie. Additionally, equal portions ensure consistent thickness when rolling.
Shape each portion into a flat disk approximately 1 inch thick. Furthermore, flattening the dough reduces rolling time and prevents edge cracking. Additionally, smooth any major cracks around the edges with your fingers.
Wrap each disk tightly in plastic wrap. Moreover, proper wrapping prevents surface drying and flavor absorption. Additionally, ensure the wrap contacts the dough’s entire surface.
Refrigerate the wrapped dough for at least 1 hour before rolling. Furthermore, longer chilling times improve the pastry’s handling characteristics. Additionally, well-chilled dough rolls more easily and maintains its shape better.
Advanced Techniques for Professional Pie Pastry
Mastering these professional techniques elevates your pastry from good to exceptional. Moreover, these methods come from years of professional baking experience and testing.
Temperature Control: Keep all ingredients as cold as possible throughout the process. Additionally, chill your bowl and utensils for extra insurance. Furthermore, work in a cool kitchen environment when possible.
Butter Distribution: Aim for varied butter piece sizes rather than uniform consistency. Moreover, larger pieces create dramatic flakes, while smaller pieces provide structure. Additionally, this variation creates the most appealing texture.
Minimal Handling: Touch the dough as little as possible with your hands. Furthermore, body heat can melt butter and compromise texture. Additionally, use tools whenever possible to minimize contact.
Flour Dusting: Lightly dust your work surface and rolling pin with flour. Moreover, this prevents sticking without adding excessive flour to the dough. Additionally, brush away excess flour before transferring pastry.
Rolling Technique: Roll from the center outward in different directions. Furthermore, rotate the dough frequently to maintain even thickness. Additionally, avoid rolling back and forth repeatedly over the same area.
Common Mistakes to Avoid When Making Pie Pastry
Learning from common pitfalls helps ensure success on your first attempt. Moreover, understanding these mistakes prevents frustration and disappointing results.
Using Warm Ingredients: Room temperature butter creates dense, tough pastry instead of flaky layers. Additionally, warm water melts butter prematurely. Furthermore, always prioritize cold temperatures throughout the process.
Overworking the Dough: Excessive mixing develops gluten, creating tough, chewy pastry. Moreover, handle the dough gently and minimally. Additionally, stop mixing as soon as the dough comes together.
Adding Too Much Water: Excess moisture makes dough sticky and difficult to handle. Furthermore, wet dough often shrinks during baking. Additionally, add water gradually and stop when the dough barely holds together.
Insufficient Chilling: Skipping or shortening the chilling time leads to difficult rolling and shrinkage. Moreover, proper chilling relaxes gluten and firms the butter. Additionally, plan ahead to allow adequate resting time.
Incorrect Flour Measurement: Too much flour creates dry, crumbly pastry. Moreover, too little flour results in sticky, difficult-to-handle dough. Additionally, measure flour by weight when possible for consistency.
Rolling Too Thin: Overly thin pastry tears easily and may not support heavy fillings. Furthermore, aim for consistent 1/8-inch thickness. Additionally, thicker pastry provides better structure and appearance.
Delicious Variations of Pie Pastry
Customizing your basic pie pastry recipe keeps baking interesting and accommodates different preferences. Moreover, these variations offer unique flavors and textures for specific applications.
Sweet Pie Pastry: Add 2 tablespoons of sugar to the flour mixture for dessert pies. Additionally, sugar enhances browning and adds subtle sweetness. Furthermore, this variation pairs perfectly with fruit fillings.
Savory Herb Pastry: Incorporate dried herbs like thyme, rosemary, or sage into the flour. Moreover, herbs complement savory fillings beautifully. Additionally, start with 1 teaspoon and adjust to taste.
Whole Wheat Pastry: Substitute up to half the all-purpose flour with whole wheat pastry flour. Furthermore, this adds nutty flavor and nutritional value. Additionally, whole wheat pastry flour maintains tenderness better than regular whole wheat.
Lard Pastry: Replace half the butter with cold lard for extra flakiness. Moreover, lard creates exceptionally tender pastry. Additionally, this traditional method produces superior texture for savory applications.
Vodka Pastry: Replace half the ice water with vodka for easier rolling. Furthermore, alcohol evaporates during baking, preventing gluten development. Additionally, vodka creates more tender pastry with less shrinkage.
Cream Cheese Pastry: Add 2 ounces of cold cream cheese to the butter for tangy richness. Moreover, cream cheese creates incredibly tender pastry. Additionally, this variation works well for both sweet and savory applications.
Rolling and Shaping Pie Pastry Like a Pro
Proper rolling technique transforms your chilled dough into perfectly shaped crusts. Moreover, mastering these skills ensures professional-looking results every time.
Remove one disk from the refrigerator and let it soften slightly at room temperature. Additionally, the dough should yield to gentle pressure without cracking. Furthermore, overly hard dough cracks during rolling.
Lightly flour your work surface and rolling pin. Moreover, dust the dough’s surface lightly as well. Additionally, use just enough flour to prevent sticking without adding excess to the dough.
Begin rolling from the center outward in all directions. Furthermore, rotate the dough quarter-turns frequently to maintain even thickness. Additionally, lift and move the dough occasionally to prevent sticking.
Aim for a circle approximately 12 inches in diameter for standard pie pans. Moreover, the pastry should be about 1/8 inch thick throughout. Additionally, slightly thicker pastry provides better structure and appearance.
Check thickness by gently lifting the pastry and looking through it. Furthermore, consistent thickness ensures even baking and professional appearance. Additionally, patch any thin spots with small pieces of dough.
Troubleshooting Common Pie Pastry Issues
Even experienced bakers encounter challenges with pie pastry occasionally. Furthermore, knowing how to fix common problems saves time and prevents waste.
Dough Too Dry and Crumbly: Add ice water one teaspoon at a time until it holds together. Moreover, work quickly to prevent warming. Additionally, press the dough gently to test cohesion.
Dough Too Sticky: Flour your hands and work surface generously. Furthermore, chill the dough for 30 minutes if it becomes unmanageable. Additionally, avoid adding too much flour, which can make pastry tough.
Dough Cracks While Rolling: Let it warm slightly at room temperature. Moreover, press cracks together with your fingers. Additionally, very cold dough often cracks but becomes more pliable as it warms.
Pastry Shrinks During Baking: Ensure adequate chilling time before baking. Furthermore, avoid stretching the dough when placing it in the pan. Additionally, dock the pastry with a fork to prevent puffing.
Tough, Chewy Texture: This usually results from overworking or too much water. Moreover, handle the dough more gently next time. Additionally, ensure ingredients remain cold throughout mixing.
Uneven Browning: Rotate the pie halfway through baking. Furthermore, use glass or light-colored pans for even heat distribution. Additionally, tent with foil if edges brown too quickly.
Storing and Freezing Pie Pastry
Proper storage extends your pastry’s usability and saves time on future baking projects. Moreover, understanding storage methods helps you plan ahead effectively.
Refrigerator Storage: Wrapped pastry keeps for up to 3 days in the refrigerator. Additionally, ensure tight wrapping to prevent drying. Furthermore, label with the date for easy identification.
Freezer Storage: Pastry dough freezes beautifully for up to 3 months. Moreover, double-wrap in plastic wrap and aluminum foil. Additionally, thaw overnight in the refrigerator before rolling.
Pre-rolled Storage: Roll pastry between parchment paper sheets before freezing. Furthermore, this saves time when you’re ready to bake. Additionally, stack rolled pastry with parchment separators.
Baked Shell Storage: Fully baked shells can be frozen for up to 1 month. Moreover, wrap carefully to prevent breaking. Additionally, thaw at room temperature before filling.
Portion Control: Divide large batches into meal-sized portions before freezing. Furthermore, this prevents waste and allows for flexible usage. Additionally, smaller portions thaw more quickly.
FAQs About Pie Pastry
Q: Can I use salted butter instead of unsalted for pie pastry? A: Yes, you can use salted butter successfully. Additionally, reduce the added salt to 1/2 teaspoon to compensate. Moreover, taste the dough and adjust seasoning if needed. Furthermore, unsalted butter provides more control over the final flavor.
Q: Why is my pie pastry tough instead of flaky? A: Tough pastry usually results from overworking or using warm ingredients. Moreover, excessive mixing develops gluten, creating chewy texture. Additionally, ensure all ingredients remain cold throughout the process. Furthermore, handle the dough as little as possible.
Q: How do I know when I’ve added enough water to pie pastry? A: The dough should hold together when gently pressed but not feel wet or sticky. Additionally, it should look slightly shaggy rather than smooth. Moreover, stop adding water as soon as the dough coheres. Furthermore, you can always add more water, but you can’t remove excess.
Q: Can I make pie pastry without a pastry cutter? A: Absolutely! Use your fingertips to rub butter into flour until it resembles coarse crumbs. Additionally, two knives worked in opposite directions can substitute for a pastry cutter. Moreover, a food processor works well for quick mixing, but pulse carefully to avoid overworking.
Q: How long should I chill pie pastry before rolling? A: Minimum chilling time is 1 hour, but longer is better. Additionally, overnight chilling improves texture and handling characteristics. Moreover, well-chilled pastry rolls more easily and maintains its shape better. Furthermore, you can chill wrapped dough for up to 3 days.
Q: Why does my pie pastry shrink during baking? A: Shrinkage usually occurs from inadequate chilling or stretching during placement. Moreover, ensure the pastry is well-chilled before baking. Additionally, avoid stretching the dough when fitting it into the pan. Furthermore, allow some overhang to account for natural shrinkage.
Q: Can I repair tears in rolled pie pastry? A: Yes, small tears can be patched with pieces of dough. Additionally, brush the area with water and press the patch gently. Moreover, larger tears may require re-rolling the pastry. Furthermore, avoid patches in areas that will be highly visible.
Q: What’s the best way to transfer rolled pastry to the pie pan? A: Roll the pastry loosely around your rolling pin, then unroll it over the pan. Additionally, you can fold it in quarters and unfold in the pan. Moreover, work quickly to prevent warming. Furthermore, gently press the pastry into the pan without stretching.
Conclusion
Mastering the art of pie pastry opens endless possibilities in your baking repertoire. Moreover, this fundamental skill provides the foundation for countless sweet and savory creations. Additionally, the satisfaction of creating perfect pastry from scratch enhances every baking experience.
The techniques and principles outlined in this guide ensure consistent, professional results. Furthermore, understanding the science behind pastry-making helps you troubleshoot issues and make informed adjustments. Additionally, practice with these methods builds confidence and expertise over time.
Print
The Complete Guide to Perfect Pie Pastry: Master the Art of Flaky, Buttery Crusts
- Total Time: 1 hr 15 mins
- Yield: 2 crusts (for two 9-inch pies or one double-crust pie) 1x
- Diet: Vegetarian
Description
This classic Pie Pastry recipe creates a buttery, flaky crust perfect for both sweet and savory pies. Simple ingredients and easy steps make it ideal for beginners and experienced bakers alike!
Ingredients
- 2 1/2 cups all-purpose flour
- 1 teaspoon salt
- 1 cup unsalted butter, cold and cut into cubes
- 6–8 tablespoons ice water
Instructions
- In a large bowl, whisk together the flour and salt.
- Add the cold butter cubes to the flour mixture. Using a pastry cutter or your fingers, cut the butter into the flour until the mixture resembles coarse crumbs with some pea-sized bits.
- Gradually add ice water, one tablespoon at a time, mixing gently with a fork after each addition until the dough starts to clump together.
- Gather the dough into a ball, divide it into two equal portions, and flatten each into a disk.
- Wrap each disk tightly in plastic wrap and refrigerate for at least 1 hour before rolling out and using.
Notes
- Keep all ingredients as cold as possible for the flakiest crust.
- If the dough feels too dry, add a bit more ice water, one teaspoon at a time.
- Dough can be made ahead and stored in the refrigerator for up to 3 days or frozen for up to 2 months.
- Prep Time: 15 mins
- Cook Time: undefined
- Category: Baking / Basics
- Method: Mix + Chill
- Cuisine: American / Classic
Nutrition
- Serving Size: 1 slice (1/8 of a double-crust pie)
- Calories: 130 kcal
- Sugar: 0 g
- Sodium: 90 mg
- Fat: 9 g
- Saturated Fat: 6 g
- Unsaturated Fat: 3 g
- Trans Fat: 0 g
- Carbohydrates: 11 g
- Fiber: 0.5 g
- Protein: 2 g
- Cholesterol: 24 mg
Keywords: pie crust, homemade pastry, easy pie dough, flaky crust, baking basics