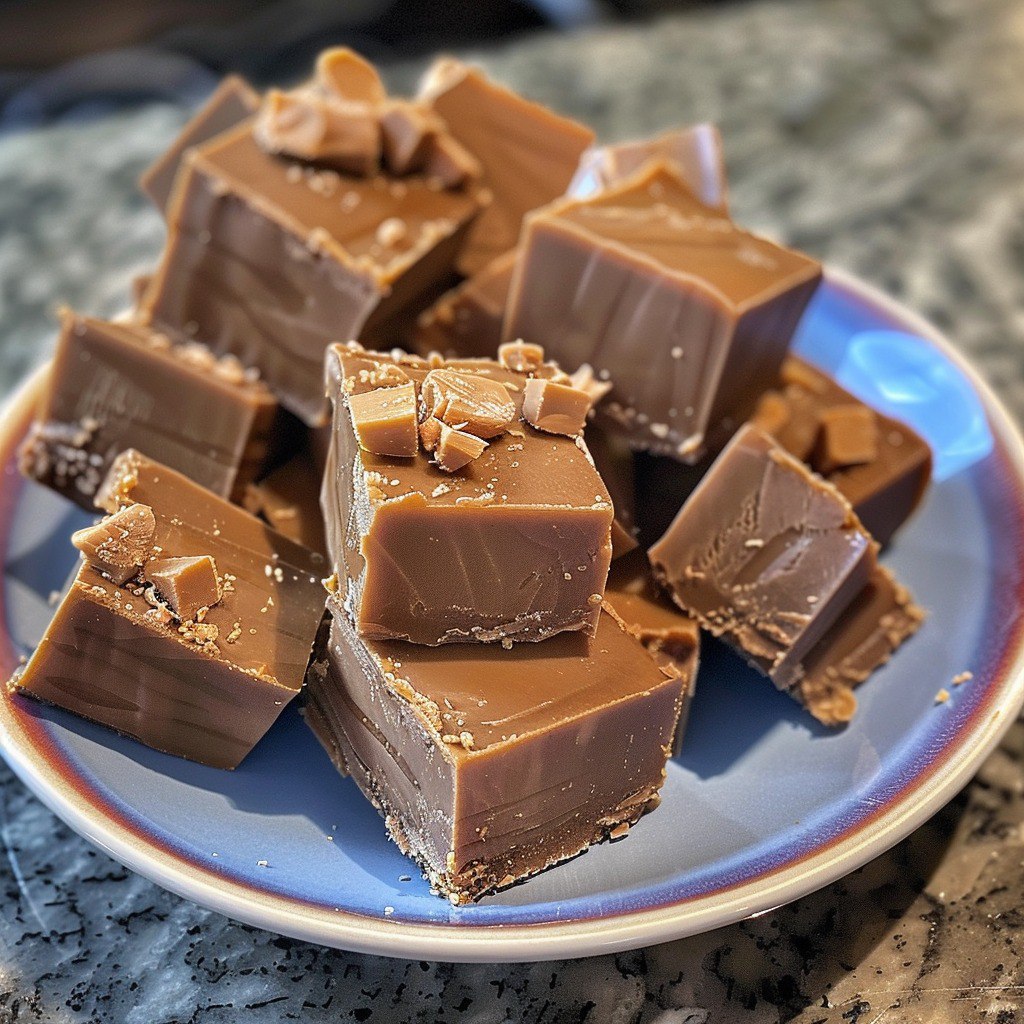
Have you ever craved a sweet treat that perfectly balances rich peanut butter flavor with decadent chocolate? Moreover, wouldn’t it be amazing if you could create this indulgence in your own kitchen? Creamy peanut butter fudge is the answer to all your dessert dreams. Furthermore, this homemade confection delivers restaurant-quality results without requiring professional baking skills.
Additionally, this recipe combines simple ingredients to create something truly extraordinary. For instance, with just six basic pantry staples, you can craft squares of pure bliss. Therefore, whether you’re planning a special occasion or simply want to satisfy your sweet tooth, this guide will walk you through every step.
Print
The Ultimate Guide to Making Creamy Peanut Butter Fudge at Home
- Total Time: 2 hours 20 minutes (includes chilling)
- Yield: 25 squares 1x
- Diet: Vegetarian
Description
This Creamy Peanut Butter Fudge is rich, smooth, and packed with peanut butter and chocolate flavor. A quick and easy dessert perfect for holidays, parties, or everyday indulgence.
Ingredients
- 1 cup creamy peanut butter
- 1 cup powdered sugar
- ½ cup unsalted butter
- 1 teaspoon vanilla extract
- ¼ teaspoon salt
- 2 cups semi-sweet chocolate chips
Instructions
- Line pan: Line an 8×8-inch square baking dish with parchment paper or foil, leaving an overhang for easy removal.
- Cook mixture: In a large saucepan over medium-low heat, combine peanut butter, powdered sugar, butter, vanilla, and salt. Stir constantly until smooth and well combined.
- Cool slightly: Remove from heat and let the mixture cool for 5 minutes, stirring occasionally.
- Add chocolate chips: Stir in the chocolate chips until melted and mixture is smooth.
- Pour into pan: Spread the mixture evenly in the prepared pan.
- Chill: Refrigerate for at least 2 hours or until firm.
- Serve: Lift out of the pan and cut into squares. Serve and enjoy!
Notes
- Crunchy peanut butter: Can be used for a nutty texture.
- Storage: Store in an airtight container in the fridge for up to 1 week or freeze for up to 2 months.
- Optional add-ins: Try adding chopped nuts or mini marshmallows for variety.
- Prep Time: 15 minutes
- Cook Time: 5 minutes
- Category: Dessert
- Method: Stovetop + Chilling
- Cuisine: American
Nutrition
- Serving Size: 1 square
- Calories: 180 kcal
- Sugar: 16 g
- Sodium: 60 mg
- Fat: 12 g
- Saturated Fat: undefined
- Unsaturated Fat: undefined
- Trans Fat: undefined
- Carbohydrates: 17 g
- Fiber: 1 g
- Protein: 3 g
- Cholesterol: 10 mg
Keywords: peanut butter fudge, chocolate fudge, no bake dessert, easy fudge recipe, creamy fudge
Why You’ll Love This Creamy Peanut Butter Fudge
Creating homemade peanut butter fudge offers numerous advantages that store-bought versions simply can’t match. Additionally, the satisfaction of making your own confections brings a special joy to the kitchen experience.
It’s Incredibly Easy to Make
Unlike complex dessert recipes, this peanut butter fudge requires no special equipment or advanced techniques. Moreover, the entire process takes less than 20 minutes of active preparation time. Furthermore, beginners can achieve professional-looking results on their first attempt.
Perfect for Any Occasion
Whether you’re hosting a holiday gathering or need a last-minute gift, this fudge delivers every time. Additionally, it stores well for weeks when properly wrapped. Therefore, you can make batches ahead of time without worrying about freshness.
Completely Customizable
The base recipe serves as an excellent foundation for creative variations. For example, you can add crushed cookies, chopped nuts, or different chocolate varieties. Furthermore, dietary modifications are simple to incorporate without sacrificing flavor.
Budget-Friendly Indulgence
Compared to artisanal fudge shops, making your own saves significant money. Additionally, you probably already have most ingredients in your pantry. Therefore, this recipe offers luxury taste without the premium price tag.
Crowd-Pleasing Appeal
Few desserts generate as much enthusiasm as homemade fudge. Moreover, the combination of peanut butter and chocolate appeals to virtually every palate. Consequently, this recipe becomes a go-to option for potluck dinners and family gatherings.
Essential Ingredients for Perfect Peanut Butter Fudge
Understanding your ingredients is crucial for achieving the best results. Additionally, quality components directly impact the final texture and flavor of your fudge.
Creamy Peanut Butter Selection
Choose a high-quality creamy peanut butter for optimal smoothness. However, avoid natural varieties that separate, as they can affect texture consistency. Furthermore, brands with added sugar work particularly well in this recipe. Therefore, stick with conventional creamy peanut butter for best results.
Powdered Sugar Importance
Powdered sugar dissolves more easily than granulated varieties. Moreover, it creates the signature smooth texture that defines quality fudge. Additionally, sifting the powdered sugar beforehand prevents lumps in your final product.
Butter Quality Matters
Unsalted butter allows you to control the salt content precisely. Furthermore, room temperature butter incorporates more easily into the mixture. Therefore, remove your butter from refrigeration about an hour before cooking.
Vanilla Extract Enhancement
Pure vanilla extract elevates the overall flavor profile significantly. Moreover, it balances the richness of peanut butter and chocolate beautifully. However, imitation vanilla works as an acceptable substitute if needed.
Salt for Balance
A small amount of salt enhances all the other flavors in the recipe. Additionally, it prevents the fudge from tasting overly sweet. Therefore, don’t skip this crucial ingredient even though the quantity seems minimal.
Chocolate Chip Considerations
Semi-sweet chocolate chips provide the perfect balance of sweetness and cocoa flavor. However, you can substitute milk chocolate for a sweeter result. Furthermore, dark chocolate creates a more sophisticated taste profile for adult palates.
Step-by-Step Guide to Making Creamy Peanut Butter Fudge
Creating perfect fudge requires attention to detail and proper timing. Moreover, following each step carefully ensures consistent results every time you make this recipe.
Step 1: Preparation and Setup
Gathering Your Tools Before beginning, assemble all necessary equipment and ingredients. Additionally, having everything ready prevents rushed moments during cooking. Furthermore, preparation ensures smooth execution throughout the entire process.
Essential Equipment:
- 8×8 inch square baking pan
- Large heavy-bottomed saucepan
- Wooden spoon for stirring
- Measuring cups and spoons
- Parchment paper or aluminum foil
Preparing Your Pan Line your 8×8 inch pan with parchment paper, leaving overhang for easy removal. Alternatively, use aluminum foil if parchment isn’t available. Moreover, lightly grease the lining to prevent any sticking issues.
Ingredient Preparation Measure all ingredients before starting the cooking process. Additionally, ensure your butter is at room temperature for easier mixing. Furthermore, have your chocolate chips ready for quick incorporation later.
Step 2: Creating the Base Mixture
Combining Wet Ingredients Place the peanut butter, powdered sugar, butter, vanilla extract, and salt in your large saucepan. Moreover, combining everything at once ensures even heating and prevents scorching. Additionally, use medium-low heat to maintain control over the cooking process.
Stirring Technique Stir constantly with a wooden spoon to prevent burning. Furthermore, wooden spoons don’t conduct heat like metal utensils, protecting your mixture. Additionally, consistent stirring creates the smooth texture that defines quality fudge.
Recognizing Proper Consistency The mixture is ready when it becomes completely smooth and well combined. Moreover, all ingredients should be fully incorporated without any lumps or streaks. Additionally, the mixture will have a glossy appearance when properly heated.
Temperature Control Maintain medium-low heat throughout the cooking process. However, if the mixture begins to bubble rapidly, reduce heat immediately. Furthermore, patience during this step prevents grainy texture in your finished fudge.
Step 3: Adding Chocolate and Final Assembly
Cooling Period Remove the saucepan from heat and allow cooling for exactly 5 minutes. Moreover, this cooling period prevents the chocolate from seizing when added. Additionally, stir occasionally during cooling to prevent skin formation on top.
Incorporating Chocolate Chips Add chocolate chips to the warm peanut butter mixture all at once. Furthermore, stir continuously until the chocolate melts completely and creates a smooth consistency. Additionally, the residual heat from the mixture will melt the chips perfectly.
Achieving Smooth Texture Continue stirring until no chocolate chunks remain visible. Moreover, the mixture should have a glossy, uniform appearance throughout. Additionally, taste the mixture at this point to ensure proper flavor balance.
Pan Assembly Pour the completed fudge mixture into your prepared pan immediately. Furthermore, use a spatula to spread the mixture evenly into all corners. Additionally, gently tap the pan on your counter to release any air bubbles.
Surface Smoothing Use an offset spatula or the back of a spoon to create a perfectly smooth surface. Moreover, taking time with this step creates professional-looking squares when cut. Additionally, you can create decorative patterns on top if desired.

Expert Tips for Perfect Peanut Butter Fudge Every Time
Mastering fudge-making requires understanding subtle techniques that separate good results from exceptional ones. Additionally, these professional tips will elevate your homemade creations significantly.
Temperature Management
Never rush the heating process with high temperatures. Moreover, medium-low heat allows ingredients to combine properly without burning. Furthermore, burnt fudge develops an unpleasant bitter taste that ruins the entire batch.
Stirring Consistency
Maintain constant stirring motion throughout the cooking process. Additionally, scrape the bottom and sides of the pan regularly to prevent sticking. However, avoid over-stirring once chocolate is added, as this can cause seizing.
Timing Precision
Follow cooling times exactly as specified in the recipe. Moreover, adding chocolate too early can cause it to seize and become grainy. Furthermore, proper timing ensures smooth texture and easy cutting later.
Storage Techniques
Store finished fudge in airtight containers to maintain freshness. Additionally, place parchment paper between layers to prevent sticking. Moreover, properly stored fudge maintains quality for up to two weeks at room temperature.
Cutting Strategies
Use a sharp knife for clean, straight cuts through the fudge. Furthermore, warm the knife slightly under hot water for easier cutting. Additionally, clean the blade between cuts for the most professional appearance.
Common Mistakes to Avoid When Making Peanut Butter Fudge
Learning from common errors saves time and ingredients while ensuring better results. Moreover, understanding these pitfalls helps you troubleshoot issues if they arise.
Overheating the Mixture
High heat causes peanut butter to separate and creates grainy texture. Additionally, burnt flavors develop quickly and cannot be reversed. Therefore, patience with medium-low heat produces superior results every time.
Inadequate Stirring
Insufficient stirring leads to uneven heating and potential burning. Moreover, ingredients won’t combine properly without consistent agitation. Furthermore, lumpy texture results from inadequate mixing during the cooking process.
Improper Chocolate Addition
Adding chocolate to mixture that’s too hot causes seizing and graininess. Additionally, chocolate chips need residual heat, not active cooking heat, to melt properly. Therefore, the five-minute cooling period is absolutely crucial.
Pan Preparation Shortcuts
Skipping proper pan lining makes removal nearly impossible. Moreover, inadequate greasing causes sticking that ruins the fudge’s appearance. Furthermore, taking time with preparation prevents frustration later.
Impatient Cooling
Cutting fudge before it’s completely set results in messy, crumbly pieces. Additionally, proper refrigeration time allows the texture to firm properly. Therefore, resist the temptation to cut early for best results.
Creative Variations for Peanut Butter Fudge
Once you master the basic recipe, exploring variations keeps the dessert exciting and fresh. Moreover, creative additions allow customization for different preferences and dietary needs.
Crunchy Peanut Butter Fudge
Substitute crunchy peanut butter for the creamy variety to add delightful texture. Additionally, the nuts provide pleasant contrast to the smooth chocolate base. Furthermore, this variation appeals particularly to those who enjoy textural variety in desserts.
Double Chocolate Version
Replace half the chocolate chips with white chocolate for visual appeal. Moreover, this creates beautiful marbled patterns throughout each square. Additionally, the flavor combination offers something special for chocolate enthusiasts.
Nutty Add-ins
Incorporate chopped walnuts, pecans, or almonds for extra crunch and flavor. Furthermore, toasted nuts provide deeper, more complex taste profiles. Additionally, nuts add nutritional value while maintaining the indulgent nature of the treat.
Holiday Variations
Add seasonal ingredients like crushed candy canes for Christmas versions. Moreover, orange zest creates perfect Halloween-themed fudge with appropriate coloring. Furthermore, themed variations make excellent gifts during holiday seasons.
Healthier Alternatives
Use sugar-free chocolate chips and natural peanut butter for reduced sugar content. Additionally, coconut oil can replace some butter for different nutritional profiles. However, texture may vary slightly with these substitutions.
Proper Storage and Serving Suggestions
Maintaining freshness and presenting your peanut butter fudge properly enhances the overall experience. Moreover, proper storage techniques extend shelf life significantly.
Short-term Storage
Keep fudge at room temperature in airtight containers for up to one week. Additionally, separate layers with parchment paper to prevent sticking. Furthermore, avoid storing in warm areas where the fudge might soften excessively.
Long-term Preservation
Refrigerate fudge for extended storage up to one month. Moreover, bring refrigerated fudge to room temperature before serving for optimal texture. Additionally, freezing is possible for up to three months with proper wrapping.
Gift Presentation
Package individual squares in small boxes or bags for attractive gifts. Furthermore, decorative tins create elegant presentations for special occasions. Additionally, homemade labels add personal touches that recipients appreciate.
Serving Size Recommendations
Cut fudge into 1-inch squares for appropriate portion sizes. Moreover, rich desserts like fudge are satisfying in smaller quantities. Additionally, smaller pieces allow guests to sample without overindulging.
Nutritional Information and Dietary Considerations
Understanding the nutritional content helps with meal planning and dietary management. Additionally, knowing caloric information allows for informed portion control decisions.
Caloric Content
Each square contains approximately 180 calories, making portion awareness important. Moreover, the high fat content from peanut butter and chocolate provides satiety. Therefore, small portions typically satisfy sweet cravings effectively.
Macronutrient Breakdown
The fudge provides protein from peanut butter along with carbohydrates and fats. Additionally, the combination creates lasting energy rather than quick sugar spikes. Furthermore, peanut butter contributes healthy fats and plant-based protein.
Allergen Information
This recipe contains peanuts and dairy, which are common allergens. Moreover, some chocolate chips may contain soy or other allergens. Therefore, check all ingredient labels carefully if serving to those with food sensitivities.
Modification Options
Sunflower seed butter can replace peanut butter for nut-free versions. Additionally, dairy-free chocolate chips accommodate lactose-intolerant individuals. Furthermore, these modifications maintain similar texture and flavor profiles.
FAQs About Creamy Peanut Butter Fudge
Can I use crunchy peanut butter instead of creamy?
Absolutely! Crunchy peanut butter adds delightful texture contrast to the smooth fudge base. Moreover, the nuts provide pleasant crunch that many people prefer. However, the overall texture will be less uniform than with creamy varieties.
How do I make peanut butter fudge healthier?
Several modifications can reduce calories and improve nutritional value. For instance, use sugar-free chocolate chips and natural peanut butter. Additionally, reduce butter content slightly and add chopped nuts for healthy fats.
Why did my fudge turn out grainy?
Grainy texture typically results from overheating or adding chocolate too early. Moreover, insufficient stirring during cooking can cause similar problems. Furthermore, using low-quality chocolate chips sometimes contributes to texture issues.
Can I double this peanut butter fudge recipe?
Yes, doubling works well, but use a larger pan to maintain proper thickness. Additionally, cooking time may increase slightly for larger batches. Moreover, ensure your saucepan is large enough to accommodate double ingredients safely.
How long does homemade peanut butter fudge last?
Properly stored fudge maintains quality for one week at room temperature. Moreover, refrigeration extends life to one month. Furthermore, frozen fudge keeps for up to three months with minimal quality loss.
What’s the best way to cut clean squares?
Use a sharp knife warmed under hot water for cleanest cuts. Additionally, wipe the blade between cuts to prevent dragging. Moreover, allowing fudge to reach room temperature makes cutting easier.
Can I add other mix-ins to this recipe?
Certainly! Popular additions include chopped nuts, crushed cookies, or candy pieces. However, add mix-ins after removing from heat to prevent melting. Furthermore, limit additions to about 1/2 cup to maintain proper consistency.
Is it normal for the mixture to look oily while cooking?
Some oil separation is normal, especially with natural peanut butters. Moreover, continued stirring usually resolves this issue as ingredients combine. However, if separation persists, the heat may be too high.
Troubleshooting Common Peanut Butter Fudge Problems
Even experienced cooks encounter occasional issues when making fudge. Moreover, understanding solutions helps salvage batches and prevent future problems.
Fixing Grainy Texture
If your fudge turns grainy, try adding a tablespoon of warm cream while stirring vigorously. Additionally, gentle reheating while stirring sometimes smooths the texture. However, prevention through proper temperature control works better than fixing.
Dealing with Soft Fudge
Fudge that won’t set properly often needs longer refrigeration time. Moreover, ensure your pan size matches the recipe specifications for proper thickness. Additionally, softer fudge can be repurposed as ice cream topping or cake frosting.
Addressing Separation Issues
Oil separation usually indicates overheating or incompatible ingredients. Furthermore, natural peanut butters are more prone to separation than processed varieties. Therefore, stick with conventional creamy peanut butter for most consistent results.
Handling Chocolate Seizing
If chocolate seizes and becomes lumpy, add small amounts of warm cream while stirring. Moreover, gentle heat and patience often resolve minor seizing issues. However, severely seized chocolate may require starting the chocolate portion over.
Conclusion
Creamy peanut butter fudge represents the perfect intersection of simplicity and indulgence in homemade confections. Moreover, this recipe delivers professional-quality results using basic ingredients and straightforward techniques. Furthermore, the versatility allows endless customization possibilities to suit any preference or occasion.
Additionally, mastering this fundamental fudge recipe opens doors to countless variations and creative experiments. Therefore, whether you’re baking for family gatherings, holiday gifts, or personal treats, this guide provides everything needed for success.


