
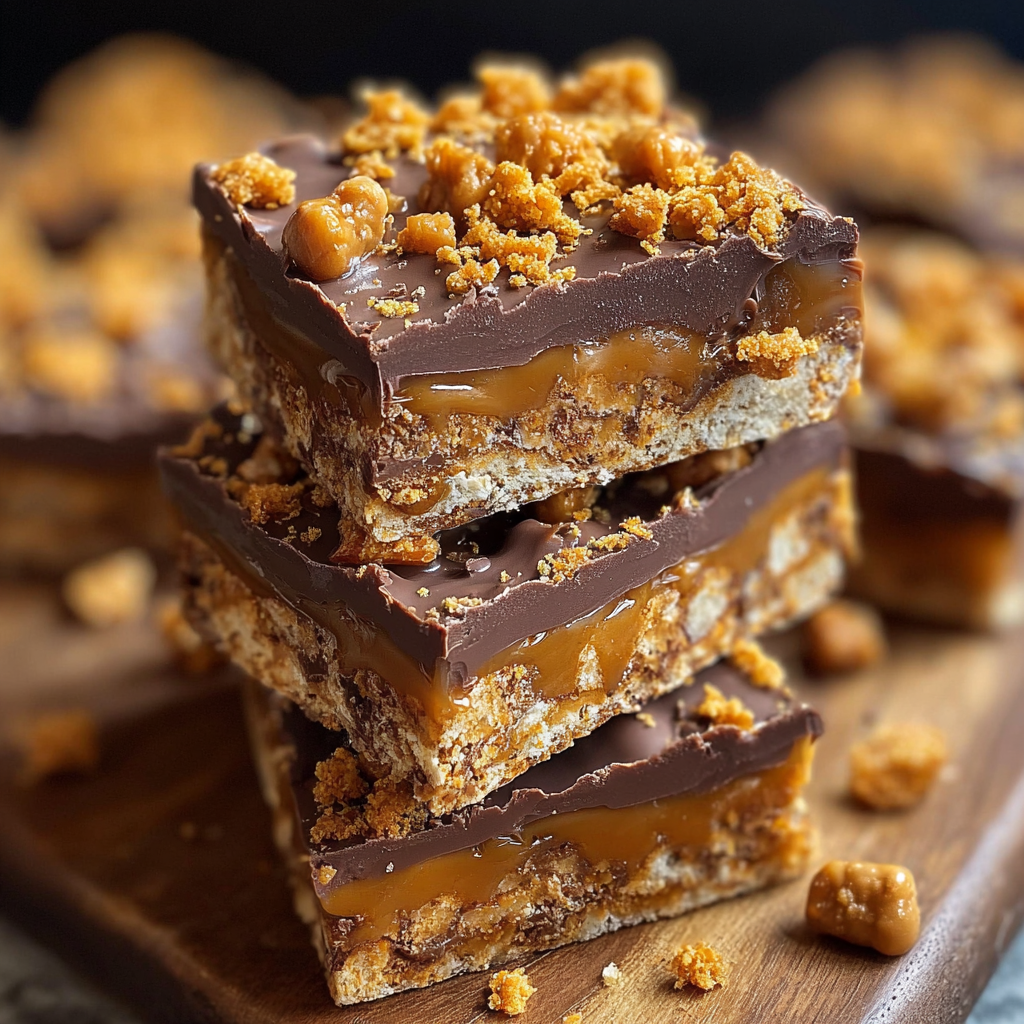
Sweet tooth calling for something extraordinary? Butterfinger caramel crunch bars deliver the perfect combination of crispy candy, gooey caramel, and rich chocolate in every bite. Moreover, these decadent treats transform simple ingredients into a dessert that rivals any high-end confection.
Additionally, this recipe creates layers of flavor and texture that satisfy every craving. Furthermore, the contrast between crunchy Butterfinger pieces and smooth caramel creates an unforgettable taste experience. Therefore, these bars will become your go-to recipe for special occasions and everyday indulgences.
Print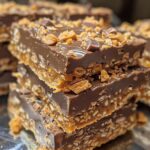
The Ultimate Guide to Making Irresistible Butterfinger Caramel Crunch Bars
- Total Time: 2 hours 20 mins
- Yield: Makes about 16 bars 1x
- Diet: Vegetarian
Description
Butterfinger Caramel Crunch Bars are a no-bake dessert dream—loaded with crushed Butterfinger candy bars, buttery graham cracker crust, gooey caramel, and silky chocolate ganache. These layered bars are sweet, crunchy, and completely irresistible.
Ingredients
- 2 cups crushed Butterfinger candy bars (about 8 regular-size bars)
- 1/2 cup unsalted butter, melted
- 1 cup graham cracker crumbs
- 1 cup caramel sauce or melted caramel candies
- 1 cup semi-sweet chocolate chips
- 1/4 cup heavy cream
- Sea salt flakes (optional)
Instructions
- Line an 8×8-inch baking dish with parchment paper and lightly grease it.
- In a bowl, mix crushed Butterfinger bars, melted butter, and graham cracker crumbs until well combined.
- Press the mixture into the bottom of the prepared baking dish to form the crust.
- Pour the caramel sauce over the crust and spread evenly with a spatula.
- In a microwave-safe bowl, combine chocolate chips and heavy cream. Microwave in 30-second intervals, stirring each time, until smooth.
- Spread the chocolate mixture evenly over the caramel layer.
- Sprinkle with sea salt flakes, if using.
- Refrigerate for at least 2 hours or until set. Lift out using the parchment overhang and cut into bars.
Notes
- Use a food processor for evenly crushed Butterfingers.
- For thicker bars, double the recipe and use a 9×13-inch pan.
- Store leftovers in the refrigerator for up to 1 week.
- Bars are easier to cut cleanly when chilled and sliced with a sharp knife.
- Prep Time: 20 mins
- Cook Time: 0 mins
- Category: Dessert
- Method: No-bake
- Cuisine: American
Nutrition
- Serving Size: 1 bar
- Calories: 270 kcal
- Sugar: 20 g
- Sodium: 160 mg
- Fat: 17 g
- Saturated Fat: 9 g
- Unsaturated Fat: 6 g
- Trans Fat: 0 g
- Carbohydrates: 29 g
- Fiber: 1 g
- Protein: 2 g
- Cholesterol: 20 mg
Keywords: butterfinger bars, caramel crunch bars, no-bake dessert, easy candy bars, chocolate caramel bars, sweet treat, party dessert
Why You’ll Love These Butterfinger Caramel Crunch Bars
These incredible Butterfinger caramel crunch bars offer countless reasons to make them your new favorite dessert. Here’s what makes this recipe absolutely irresistible:
• They’re incredibly easy to make: No baking required – just mix, layer, and chill for perfect results.
• They’re perfectly balanced: Sweet caramel, crunchy candy, and rich chocolate create the ideal flavor combination.
• They’re crowd-pleasing favorites: Perfect for parties, potlucks, or any gathering where you want to impress.
• They’re customizable: Add sea salt, nuts, or different candy bars to create your own signature version.
• They’re make-ahead friendly: Prepare days in advance for stress-free entertaining or meal prep treats.
Furthermore, these bars use easily accessible ingredients you can find at any grocery store. Additionally, the no-bake method means you can make them even when it’s too hot to turn on the oven. Therefore, you’ll have a sophisticated dessert ready in just over two hours.
Essential Ingredients for Perfect Butterfinger Caramel Crunch Bars
Creating exceptional Butterfinger caramel crunch bars starts with understanding each ingredient’s role. Moreover, quality ingredients make a significant difference in the final result.
Candy Bar Foundation
The star ingredient is 2 cups of crushed Butterfinger candy bars, which equals about 8 regular-size bars. Additionally, the unique peanut butter crunch provides both flavor and texture. Furthermore, crushing them to the right size ensures even distribution throughout the crust.
Moreover, consistent pieces about the size of small peas work best. Additionally, you can use a food processor or place bars in a sealed bag and crush with a rolling pin. Therefore, you’ll achieve the perfect texture for your base layer.
Binding Elements
Half a cup of melted unsalted butter acts as the binding agent for the crust. Additionally, this amount provides enough moisture without making the mixture greasy. Furthermore, unsalted butter allows you to control the salt content precisely.
Meanwhile, 1 cup of graham cracker crumbs adds structure and a subtle honey flavor. Moreover, the crumbs help absorb excess butter and create a firm foundation. Additionally, they complement the Butterfinger pieces perfectly.
Caramel Layer Magic
One cup of caramel sauce creates the gooey middle layer that makes these bars special. Additionally, you can use high-quality store-bought sauce or melt caramel candies yourself. Furthermore, the caramel should be smooth and spreadable but not too thin.
Moreover, homemade caramel provides superior flavor and texture control. Additionally, if making your own, ensure it’s completely smooth before using. Therefore, you’ll achieve professional-quality results.
Chocolate Topping Perfection
One cup of semi-sweet chocolate chips combined with 1/4 cup heavy cream creates a silky ganache topping. Additionally, this ratio produces the perfect consistency for spreading. Furthermore, the cream adds richness and prevents the chocolate from becoming too hard when chilled.
Moreover, high-quality chocolate chips make a noticeable difference in taste. Additionally, the heavy cream should be at room temperature for best mixing results. Therefore, your chocolate layer will be smooth and glossy.
Step-by-Step Guide to Making Butterfinger Caramel Crunch Bars
Creating these Butterfinger caramel crunch bars involves careful layering and proper chilling. Additionally, each step builds upon the previous one to create the perfect final product.
Step 1: Preparation and Setup
Begin by lining an 8×8-inch baking dish with parchment paper, leaving an overhang for easy removal. Additionally, grease the parchment lightly with cooking spray to prevent sticking. Furthermore, this preparation step saves time and frustration later.
Meanwhile, crush your Butterfinger candy bars to the appropriate size. Moreover, aim for pieces that range from fine crumbs to small chunks. Additionally, reserve a few larger pieces for optional topping if desired.
Step 2: Creating the Crust Layer
Combine crushed Butterfinger candy bars, melted butter, and graham cracker crumbs in a medium bowl. Additionally, mix until the ingredients are well combined and hold together when pressed. Furthermore, the mixture should feel like wet sand that clumps when squeezed.
Next, press the mixture evenly into the bottom of your prepared baking dish. Moreover, use the bottom of a measuring cup or your hands to create an even, compact layer. Additionally, pay special attention to the corners and edges for uniform thickness.
Furthermore, the crust should be firm enough to support the subsequent layers. Therefore, press down with moderate pressure to ensure it holds together well.
Step 3: Adding the Caramel Layer
Pour melted caramel sauce evenly over the crust layer. Additionally, start from the center and work outward to ensure even coverage. Furthermore, use an offset spatula to spread the caramel to all edges and corners.
Moreover, work quickly as caramel can start to set as it cools. Additionally, if the caramel becomes too thick, warm it slightly to restore spreadability. Therefore, you’ll achieve a smooth, even layer every time.
Meanwhile, tap the dish gently on the counter to eliminate air bubbles. Furthermore, this ensures a smooth caramel layer without imperfections.
Step 4: Preparing the Chocolate Topping
Heat semi-sweet chocolate chips and heavy cream in a microwave-safe bowl using 30-second intervals. Additionally, stir between each heating to prevent burning. Furthermore, continue until the mixture is completely smooth and glossy.
Moreover, the chocolate should be warm but not hot when you pour it over the caramel. Additionally, if it becomes too thick, add a teaspoon of cream at a time. Therefore, you’ll achieve the perfect consistency for spreading.
Alternatively, you can melt the chocolate using a double boiler for more controlled heating. Furthermore, this method reduces the risk of overheating and ensures smooth results.
Step 5: Final Assembly and Chilling
Pour the melted chocolate mixture over the caramel layer, spreading it evenly with a spatula. Additionally, work from the center outward to avoid disturbing the caramel below. Furthermore, ensure complete coverage to all edges.
Moreover, if desired, sprinkle sea salt flakes over the top for a gourmet touch. Additionally, the salt enhances both the chocolate and caramel flavors. Therefore, you’ll create a sophisticated flavor profile.
Finally, refrigerate for at least 2 hours, or until the bars are completely set and firm. Moreover, longer chilling time makes cutting cleaner and easier. Additionally, these bars can chill overnight for best results.
Expert Tips for Perfect Butterfinger Caramel Crunch Bars
Creating bakery-quality Butterfinger caramel crunch bars requires attention to detail. Moreover, these professional techniques will elevate your results significantly.
Crushing Candy Bars Effectively
Room temperature candy bars crush more evenly than cold ones. Additionally, remove them from the refrigerator 30 minutes before crushing. Furthermore, this prevents the chocolate from shattering into tiny pieces.
Moreover, use a food processor with pulse setting for most consistent results. Additionally, pulse in short bursts to avoid creating powder. Therefore, you’ll maintain the desired chunky texture.
Alternatively, place candy bars in a sealed plastic bag and crush with a rolling pin. Furthermore, this method gives you more control over piece size. Moreover, it’s perfect if you don’t have a food processor.
Achieving Perfect Caramel Consistency
The ideal caramel should coat a spoon but still pour easily. Additionally, if using melted caramel candies, add a tablespoon of cream for smoother consistency. Furthermore, strain the mixture to remove any lumps.
Moreover, test the temperature by dipping your finger – it should be warm, not hot. Additionally, caramel that’s too hot will melt the crust layer below. Therefore, let it cool slightly before pouring.
Meanwhile, work quickly once the caramel reaches the right consistency. Furthermore, it will continue to thicken as it cools. Therefore, have your spatula ready before you start pouring.
Creating Silky Chocolate Ganache
Room temperature cream mixes more easily with chocolate than cold cream. Additionally, heat the cream slightly if it’s been refrigerated. Furthermore, this prevents the chocolate from seizing when combined.
Moreover, stir the mixture gently to avoid incorporating air bubbles. Additionally, use a whisk for the smoothest texture. Therefore, your ganache will be perfectly glossy and smooth.
Furthermore, if the ganache becomes too thick, add cream one teaspoon at a time. Moreover, if it’s too thin, let it cool slightly before pouring. Therefore, you’ll achieve the perfect spreading consistency.
Common Mistakes to Avoid with Butterfinger Caramel Crunch Bars
Even experienced bakers can encounter issues with these Butterfinger caramel crunch bars. Moreover, understanding these common pitfalls helps ensure success every time.
Over-Crushing the Candy Bars
Many people crush Butterfinger bars too finely, losing the signature crunch. Additionally, powder-fine pieces don’t provide the textural contrast that makes these bars special. Furthermore, aim for a mix of small chunks and fine pieces.
Moreover, stop crushing when you achieve pieces ranging from fine crumbs to pea-sized chunks. Additionally, some larger pieces add pleasant texture surprises. Therefore, resist the urge to make everything uniform.
Using Caramel at Wrong Temperature
Hot caramel can melt the butter in the crust layer, creating a soggy bottom. Additionally, it may also make the chocolate layer difficult to spread evenly. Furthermore, caramel that’s too cool won’t spread properly.
Moreover, test the temperature by touching the bowl – it should feel warm but comfortable to touch. Additionally, if it’s too hot, let it cool for 2-3 minutes. Therefore, you’ll maintain distinct, beautiful layers.
Insufficient Chilling Time
Cutting bars before they’re completely set results in messy, uneven pieces. Additionally, the layers need time to firm up and bond together. Furthermore, rushing this step ruins the visual appeal and makes serving difficult.
Moreover, chill for at least 2 hours, but overnight is even better. Additionally, well-chilled bars cut more cleanly and hold their shape better. Therefore, patience in this step pays off with professional-looking results.
Creative Variations of Butterfinger Caramel Crunch Bars
This versatile Butterfinger caramel crunch bars recipe adapts beautifully to different flavors and preferences. Moreover, these variations keep the dessert exciting for regular enjoyment.
Salted Caramel Butterfinger Bars
Enhance the caramel layer by adding 1/2 teaspoon of sea salt to the melted caramel. Additionally, sprinkle flaky sea salt generously over the chocolate layer before chilling. Furthermore, the salt enhances both chocolate and caramel flavors dramatically.
Moreover, use salted butter instead of unsalted in the crust for extra depth. Additionally, consider using salted caramel sauce if available in your area. Therefore, you’ll create a gourmet salted caramel experience.
Peanut Butter Butterfinger Bars
Add 1/4 cup of creamy peanut butter to the melted butter for the crust layer. Additionally, swirl peanut butter into the caramel layer for extra richness. Furthermore, top with chopped peanuts along with the sea salt.
Moreover, use peanut butter chips mixed with chocolate chips in the topping. Additionally, drizzle melted peanut butter over the finished bars before serving. Therefore, you’ll amplify the peanut butter flavor throughout.
Dark Chocolate Butterfinger Bars
Replace semi-sweet chocolate chips with dark chocolate for a more sophisticated flavor. Additionally, use 70% cacao chocolate for the perfect balance of bitter and sweet. Furthermore, the darker chocolate complements the sweet caramel beautifully.
Moreover, add a tablespoon of espresso powder to the chocolate mixture for mocha notes. Additionally, consider using graham crackers made with chocolate for the crust. Therefore, you’ll create a rich, adult-oriented dessert.
Mixed Candy Bar Crunch Bars
Combine Butterfinger pieces with crushed Heath bars or Snickers for variety. Additionally, use equal amounts of each candy for balanced flavor. Furthermore, this creates interesting texture and flavor combinations in every bite.
Moreover, try seasonal candy bars like peppermint bark during holidays. Additionally, crush different candy bars in separate bowls and layer them for visual appeal. Therefore, you’ll create custom bars for any occasion.
Storage and Serving Your Butterfinger Caramel Crunch Bars
Proper storage ensures your Butterfinger caramel crunch bars maintain their quality and texture. Moreover, following these guidelines maximizes freshness and enjoyment.
Optimal Storage Conditions
Store completed bars in an airtight container in the refrigerator for up to one week. Additionally, place parchment paper between layers to prevent sticking. Furthermore, cold storage maintains the firm texture that makes these bars special.
Moreover, bring bars to room temperature for 10-15 minutes before serving for best texture. Additionally, this slight warming enhances the caramel’s chewiness. Therefore, you’ll experience the perfect texture contrast.
Freezing Instructions
These bars freeze beautifully for up to three months. Additionally, wrap individual bars in plastic wrap, then place in freezer bags. Furthermore, remove as much air as possible to prevent freezer burn.
Moreover, freeze bars on a baking sheet first, then transfer to containers once solid. Additionally, this prevents them from sticking together. Therefore, you can remove individual portions as needed.
Cutting and Serving Tips
Use a sharp knife warmed under hot water for clean cuts. Additionally, wipe the blade clean between cuts to maintain neat edges. Furthermore, cut with a sawing motion rather than pressing straight down.
Moreover, dip the knife in warm water and dry it between each cut for professional results. Additionally, cut into 16 squares for standard serving sizes. Therefore, you’ll achieve bakery-quality presentation.
Perfect Occasions for Butterfinger Caramel Crunch Bars
These delectable Butterfinger caramel crunch bars suit numerous occasions and celebrations. Moreover, their rich flavor and impressive appearance make them perfect for special events.
Holiday Celebrations
These bars make excellent additions to holiday cookie exchanges and dessert tables. Additionally, their festive appearance and crowd-pleasing flavor satisfy diverse tastes. Furthermore, they transport well to family gatherings and parties.
Moreover, customize them with seasonal decorations like colored sprinkles or holiday-themed candy pieces. Additionally, package individual bars in cellophane bags for perfect party favors. Therefore, you’ll create memorable treats for any celebration.
Birthday Parties and Special Events
The rich, indulgent flavor makes these bars perfect for birthday celebrations. Additionally, they’re easier to serve than traditional cake in casual settings. Furthermore, both kids and adults appreciate the familiar candy bar flavors.
Moreover, create custom versions using the birthday person’s favorite candy bars. Additionally, add candles to bars for an alternative birthday presentation. Therefore, you’ll create personalized celebrations everyone remembers.
Potluck and Office Gatherings
These bars travel exceptionally well and serve easily without utensils. Additionally, their rich flavor means small portions satisfy completely. Furthermore, they’re conversation starters that help break ice at social gatherings.
Moreover, prepare them in disposable pans for easy cleanup at potluck events. Additionally, include recipe cards for guests who request the recipe. Therefore, you’ll share joy while building connections.
FAQs About Butterfinger Caramel Crunch Bars
Q: Can I use store-bought caramel sauce instead of melting caramel candies for these Butterfinger caramel crunch bars?
A: Absolutely! Store-bought caramel sauce works perfectly and saves time. Moreover, choose high-quality brands for best flavor results. Additionally, if the sauce seems too thin, simmer it briefly to thicken before using. Furthermore, jarred caramel sauce often has better consistency than melted candies.
Q: How long do these Butterfinger caramel crunch bars need to chill before cutting?
A: These bars require at least 2 hours of chilling time for proper setting. Additionally, overnight chilling produces even better results and cleaner cuts. Furthermore, well-chilled bars hold their shape better when served. Moreover, the layers need time to bond together for the best texture.
Q: Can I make Butterfinger caramel crunch bars without graham crackers?
A: Yes, several alternatives work well in this recipe. Moreover, crushed vanilla wafers create a similar texture and flavor. Additionally, crushed digestive biscuits or shortbread cookies provide excellent bases. Furthermore, even crushed pretzels add interesting salty contrast to the sweet layers.
Q: What’s the best way to crush Butterfinger candy bars for this recipe?
A: Room temperature candy bars crush most evenly and consistently. Additionally, use a food processor with pulse setting for controlled crushing. Furthermore, aim for pieces ranging from fine crumbs to small chunks. Moreover, avoid over-processing, which creates too much powder and loses the signature crunch.
Q: How can I prevent the chocolate layer from cracking when I cut the bars?
A: Proper chilling and cutting technique prevent cracking issues. Additionally, let bars come to room temperature for 10-15 minutes before cutting. Furthermore, use a sharp knife warmed under hot water for clean cuts. Moreover, wipe the blade clean between cuts to maintain smooth edges.
Q: Can I double this Butterfinger caramel crunch bars recipe for larger crowds?
A: Certainly! This recipe doubles beautifully for larger gatherings. Moreover, use a 9×13-inch pan instead of 8×8-inch for doubled quantities. Additionally, increase chilling time slightly for the thicker layers to set properly. Furthermore, maintain the same ratios for all ingredients to ensure perfect results.
Q: What other candy bars work well in this recipe?
A: Many candy bars substitute successfully in this recipe. Moreover, Heath bars, Snickers, or Twix create delicious variations. Additionally, combine different candy bars for unique flavor combinations. Furthermore, choose bars with interesting textures rather than plain chocolate for best results.
Conclusion
These Butterfinger caramel crunch bars represent the perfect intersection of simplicity and decadence. Moreover, they transform everyday ingredients into an extraordinary dessert that rivals any professional confection. Additionally, the combination of crunchy candy pieces, smooth caramel, and rich chocolate creates an unforgettable taste experience.
Furthermore, this no-bake recipe proves that impressive desserts don’t require complicated techniques or specialized equipment. The straightforward method ensures success for bakers of all skill levels while producing consistently delicious results. Moreover, the make-ahead friendly nature makes them perfect for entertaining and meal prep.


