Are you craving a dessert that’s both incredibly delicious and amazingly simple to make? Look no further than the Cherry Cream Cheese Dump Cake! This heavenly treat combines the sweet tartness of cherries with the rich creaminess of cream cheese, all topped with a golden, buttery cake layer. Moreover, it’s called a “dump cake” because you literally dump the ingredients together – no complicated mixing or fancy techniques required.
Additionally, this dessert has become a favorite among home bakers for its foolproof nature and impressive results. Furthermore, it’s perfect for busy weeknights, potluck dinners, or special occasions when you want to wow your guests without spending hours in the kitchen. Therefore, let’s dive into everything you need to know about creating this irresistible dessert.
Print
The Ultimate Guide to Making Perfect Cherry Cream Cheese Dump Cake
- Total Time: 55 mins
- Yield: 12 servings 1x
- Diet: Vegetarian
Description
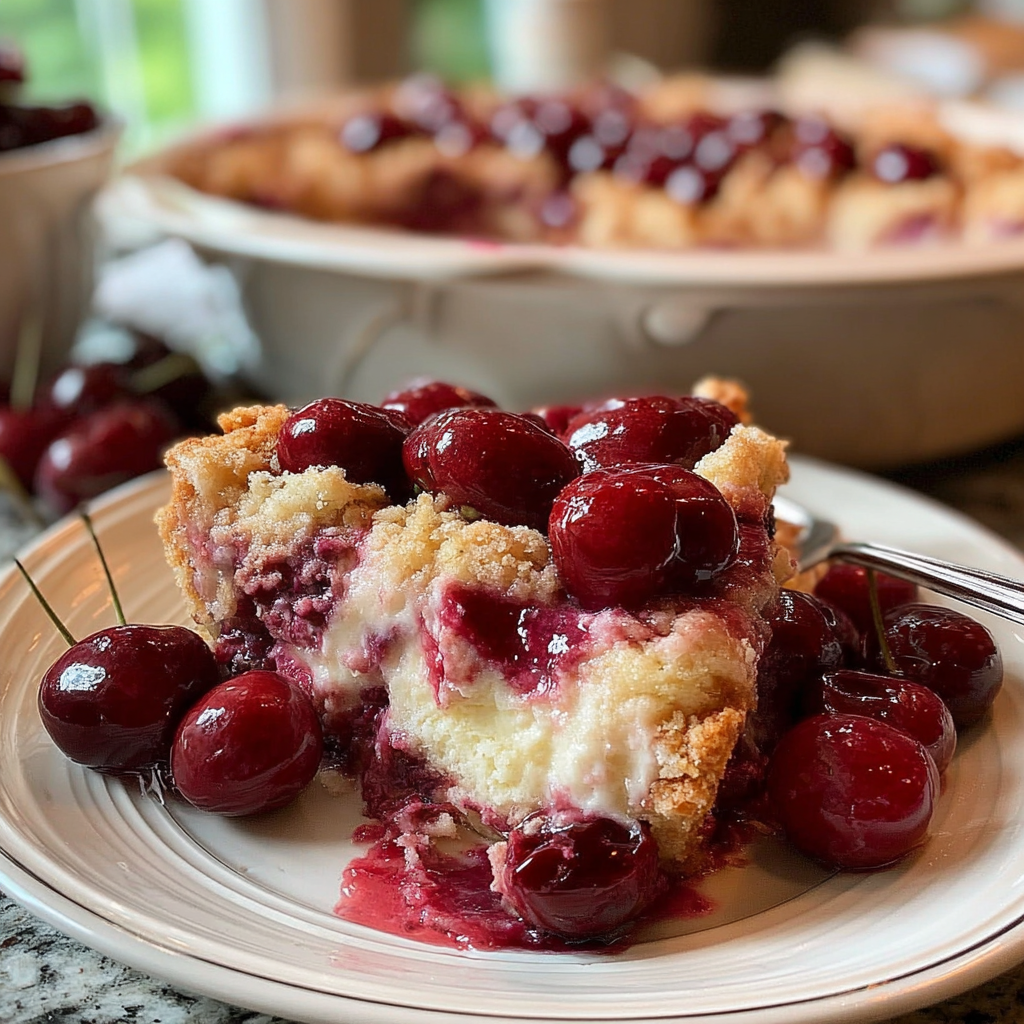
This Cherry Cream Cheese Dump Cake combines sweet cherry pie filling, creamy dollops of cream cheese, and a buttery cake topping for a warm, comforting dessert that couldn’t be easier to make.
Ingredients
- 1 box (15.25 oz) yellow cake mix
- 2 cans (21 oz each) cherry pie filling
- 8 oz cream cheese, softened
- 1/2 cup unsalted butter, melted
- 1 teaspoon vanilla extract
- Whipped cream or vanilla ice cream, for serving (optional)
Instructions
- Preheat oven to 350°F (175°C). Grease a 9×13 inch baking dish.
- Spread both cans of cherry pie filling evenly into the bottom of the dish.
- In a bowl, beat softened cream cheese until smooth; mix in vanilla extract.
- Spoon dollops of the cream cheese mixture over the cherry pie filling.
- Evenly sprinkle the dry yellow cake mix over the top.
- Drizzle melted butter over the cake mix, covering as much as possible.
- Bake for 40–45 minutes, until the top is golden brown and filling bubbles at the edges.
- Allow to cool slightly before serving. Enjoy warm with whipped cream or vanilla ice cream, if desired.
Notes
- Try swapping cherry pie filling for apple, blueberry, or peach for variety.
- For added crunch, sprinkle chopped pecans or walnuts on top before baking.
- Best enjoyed warm, but leftovers can be stored in the fridge and reheated.
- Prep Time: 10 mins
- Cook Time: 45 mins
- Category: Dessert
- Method: Bake
- Cuisine: American
Nutrition
- Serving Size: 1 slice
- Calories: 300 kcal
- Sugar: 28 g
- Sodium: 280 mg
- Fat: 13 g
- Saturated Fat: 8 g
- Unsaturated Fat: 4 g
- Trans Fat: 0 g
- Carbohydrates: 45 g
- Fiber: 1 g
- Protein: 3 g
- Cholesterol: 35 mg
Keywords: cherry dump cake, cream cheese dump cake, easy cherry dessert, cherry cobbler cake
Why You’ll Love This Cherry Cream Cheese Dump Cake
This delightful dessert offers numerous benefits that make it a standout choice for any baker. Here’s why you’ll fall in love with this recipe:
• It’s incredibly easy to make: Perfect for beginners or anyone short on time. No mixer required, and minimal prep work involved.
• It’s wonderfully versatile: You can customize it with different fruit fillings, cake mix flavors, or additional toppings to suit your taste preferences.
• It’s crowd-pleasing: Great for families, parties, or potluck gatherings. Additionally, it serves a large group and always receives rave reviews.
• It’s budget-friendly: Uses simple, affordable ingredients that you can find at any grocery store. Moreover, it makes excellent use of pantry staples.
• It’s foolproof: Even novice bakers can achieve perfect results every time. Furthermore, there’s very little that can go wrong with this forgiving recipe.
• It’s comforting: The combination of warm fruit, creamy cheese, and buttery cake creates the ultimate comfort food experience.
Essential Ingredients for Cherry Cream Cheese Dump Cake
Understanding each ingredient’s role will help you create the perfect dessert. Here’s what you’ll need:
Yellow Cake Mix (15.25 oz box): Forms the golden, buttery top layer. Additionally, it provides structure and sweetness to balance the tart cherries.
Cherry Pie Filling (2 cans, 21 oz each): Creates the fruity base layer. Moreover, the thick consistency prevents the cake from becoming soggy.
Cream Cheese (8 oz, softened): Adds richness and tangy flavor. Furthermore, it creates beautiful marbled swirls throughout the dessert.
Unsalted Butter (1/2 cup, melted): Helps the cake mix form a crispy, golden top. Additionally, it adds moisture and rich flavor.
Vanilla Extract (1 teaspoon): Enhances the overall flavor profile. Moreover, it complements both the cherry and cream cheese components.
Optional Toppings: Whipped cream or vanilla ice cream for serving. These additions provide extra indulgence and temperature contrast.
Step-by-Step Guide to Making Cherry Cream Cheese Dump Cake
Step 1: Preparation
First, preheat your oven to 350°F (175°C). This temperature ensures even baking and prevents the top from browning too quickly. Additionally, grease a 9×13 inch baking dish thoroughly with butter or cooking spray.
Next, gather all your ingredients and allow the cream cheese to soften at room temperature. This process typically takes 30-45 minutes. However, you can speed it up by cutting the cream cheese into small cubes.
Furthermore, have your measuring cups and mixing bowl ready. Organization is key to success with dump cake recipes.
Step 2: Building the Layers
Layer 1 – The Cherry Base: Begin by spreading both cans of cherry pie filling evenly across the bottom of your prepared baking dish. Moreover, use a spatula to ensure complete coverage from edge to edge. Additionally, the filling should create a uniform layer about 1-2 inches thick.
Layer 2 – The Cream Cheese: In a mixing bowl, beat the softened cream cheese until smooth and creamy. This process usually takes 2-3 minutes with an electric mixer. Furthermore, add the vanilla extract and mix until well combined.
Next, spoon dollops of the cream cheese mixture over the cherry pie filling. Don’t worry about perfect distribution – the rustic appearance adds to the charm. Additionally, use a knife to gently swirl the cream cheese for a marbled effect.
Layer 3 – The Cake Mix: Sprinkle the dry cake mix evenly over the entire surface. Moreover, ensure you cover all areas, including the edges. This layer will transform into a golden, crispy topping during baking.
Layer 4 – The Butter Finish: Finally, drizzle the melted butter over the cake mix, covering as much surface area as possible. Additionally, use a spoon to distribute the butter evenly. This step is crucial for achieving the perfect golden-brown top.
Step 3: Baking to Perfection
Place the baking dish in the preheated oven and bake for 40-45 minutes. However, start checking at the 35-minute mark to prevent over-browning. Additionally, the cake is done when the top is golden brown and the filling bubbles around the edges.
Moreover, the center should be set but still slightly jiggly. Furthermore, a toothpick inserted into the cake layer should come out with just a few moist crumbs attached.
Once baked, remove from the oven and allow to cool for 10-15 minutes before serving. This cooling period helps the layers set properly and prevents burns from the hot filling.
Expert Tips for the Best Cherry Cream Cheese Dump Cake
Use Room Temperature Cream Cheese: Cold cream cheese creates lumps and doesn’t distribute evenly. Additionally, softened cream cheese blends better with the vanilla extract.
Don’t Overmix the Cream Cheese: A few small lumps are perfectly fine. Moreover, overmixing can make the cream cheese tough and dense.
Distribute Butter Evenly: Uneven butter distribution leads to patchy browning. Furthermore, focus on areas that look dry or pale.
Check for Doneness: The edges should bubble vigorously, and the top should be golden brown. Additionally, the center should be set but not hard.
Let It Rest: Allow the cake to cool slightly before serving. This helps the flavors meld and prevents the filling from being too runny.
Common Mistakes to Avoid When Making Cherry Cream Cheese Dump Cake
Using Cold Cream Cheese: This creates lumps and uneven distribution. Moreover, it’s difficult to mix and doesn’t incorporate well with other ingredients.
Skipping the Butter: The butter is essential for creating the signature crispy top. Additionally, it prevents the cake mix from tasting dry or powdery.
Overbaking: This can make the top too dark and the filling too thick. Furthermore, it can cause the cream cheese to separate and become grainy.
Not Greasing the Pan: The cake can stick, making serving difficult. Moreover, proper greasing ensures easy cleanup and neat slices.
Rushing the Cooling Process: Serving too hot can result in runny filling and burned tongues. Additionally, the flavors need time to meld together.
Delicious Variations of Cherry Cream Cheese Dump Cake
Blueberry Cream Cheese Dump Cake: Replace cherry pie filling with blueberry filling. Additionally, add a teaspoon of lemon zest to the cream cheese mixture for extra brightness.
Apple Cinnamon Version: Use apple pie filling and add a teaspoon of cinnamon to the cake mix. Moreover, consider using spice cake mix instead of yellow for enhanced flavor.
Peach Cream Cheese Dump Cake: Substitute peach pie filling and add a touch of almond extract to the cream cheese. Furthermore, this combination creates a southern-inspired dessert.
Mixed Berry Delight: Combine different berry pie fillings for a complex flavor profile. Additionally, this variation provides beautiful color contrast.
Chocolate Cherry Version: Use chocolate cake mix with cherry filling for a decadent twist. Moreover, add mini chocolate chips for extra indulgence.
Serving Suggestions for Your Cherry Cream Cheese Dump Cake
Classic Presentation: Serve warm with a dollop of whipped cream or a scoop of vanilla ice cream. Additionally, the temperature contrast enhances the overall experience.
Elegant Garnish: Dust with powdered sugar and add fresh mint leaves. Moreover, a drizzle of chocolate sauce creates an upscale presentation.
Casual Serving: Cut into squares and serve on paper plates for informal gatherings. Furthermore, this approach works perfectly for potluck dinners.
Individual Portions: Bake in ramekins for personal-sized servings. Additionally, this method allows for portion control and elegant presentation.
Storage and Reheating Instructions
Refrigerator Storage: Cover tightly and refrigerate for up to 5 days. Additionally, the flavors actually improve after a day or two.
Freezer Storage: Wrap individual portions in plastic wrap and freeze for up to 3 months. Moreover, this makes it easy to enjoy a single serving anytime.
Reheating Methods: Microwave individual portions for 30-60 seconds, or reheat in a 350°F oven for 10-15 minutes. Furthermore, covering with foil prevents the top from over-browning.
Nutritional Information and Healthier Alternatives
Each serving contains approximately 300 calories. However, you can make healthier modifications without sacrificing taste:
Reduce Sugar: Use sugar-free pie filling to cut calories. Additionally, this modification works well for diabetic-friendly versions.
Lighten the Cream Cheese: Use reduced-fat cream cheese or Greek yogurt. Moreover, these substitutions maintain creaminess while reducing calories.
Add Nutrition: Incorporate chopped nuts or seeds for healthy fats and protein. Furthermore, these additions provide extra texture and flavor.
Portion Control: Cut smaller squares and serve with fresh fruit. Additionally, this approach helps manage calorie intake while satisfying sweet cravings.
Troubleshooting Your Cherry Cream Cheese Dump Cake
Soggy Top: This usually indicates insufficient butter or oven temperature too low. Additionally, ensure your oven is fully preheated before baking.
Dry Cake Mix: Add more melted butter or check that your pie filling has enough liquid. Moreover, covering with foil during the last 10 minutes can prevent over-drying.
Grainy Cream Cheese: This happens when the cream cheese isn’t properly softened or the oven temperature is too high. Furthermore, ensure gradual temperature increases.
Uneven Browning: Rotate the pan halfway through baking. Additionally, check that your oven racks are positioned correctly.
FAQs About Cherry Cream Cheese Dump Cake
Q: Can I use other fruit pie fillings instead of cherry? A: Absolutely! You can substitute with your favorite fruit pie filling such as blueberry, apple, or peach. Additionally, mixed berry combinations work wonderfully.
Q: How do I make Cherry Cream Cheese Dump Cake healthier? A: Use sugar-free pie filling, reduced-fat cream cheese, and add fresh fruit. Moreover, consider using a sugar-free cake mix if available.
Q: Can I make this dessert ahead of time? A: Yes, you can prepare it up to 24 hours in advance. Additionally, store covered in the refrigerator and reheat before serving.
Q: What’s the best way to serve Cherry Cream Cheese Dump Cake? A: Serve warm with whipped cream or vanilla ice cream. Furthermore, a light dusting of powdered sugar adds an elegant touch.
Q: Can I double the recipe? A: Yes, simply double all ingredients and use two 9×13 inch pans. Additionally, you may need to adjust baking time slightly.
Q: Why is my dump cake not browning on top? A: This usually means insufficient butter or oven temperature too low. Moreover, ensure even butter distribution across the surface.
Q: Can I use fresh cherries instead of pie filling? A: Yes, but you’ll need to cook them with sugar first to create a thick consistency. Additionally, fresh cherries may release more liquid during baking.
Q: How do I prevent the bottom from getting soggy? A: Ensure your pie filling isn’t too watery, and don’t overbake. Furthermore, let the cake cool properly before serving.
Conclusion
Cherry Cream Cheese Dump Cake truly represents the perfect marriage of simplicity and indulgence. Moreover, this dessert proves that you don’t need complicated techniques or expensive ingredients to create something absolutely delicious. Additionally, its forgiving nature makes it ideal for bakers of all skill levels.
Furthermore, the versatility of this recipe means you can adapt it to suit any season or preference. Whether you stick with the classic cherry version or experiment with different fruit combinations, success is virtually guaranteed. Therefore, the next time you need a crowd-pleasing dessert that requires minimal effort, remember this foolproof recipe.