Introduction
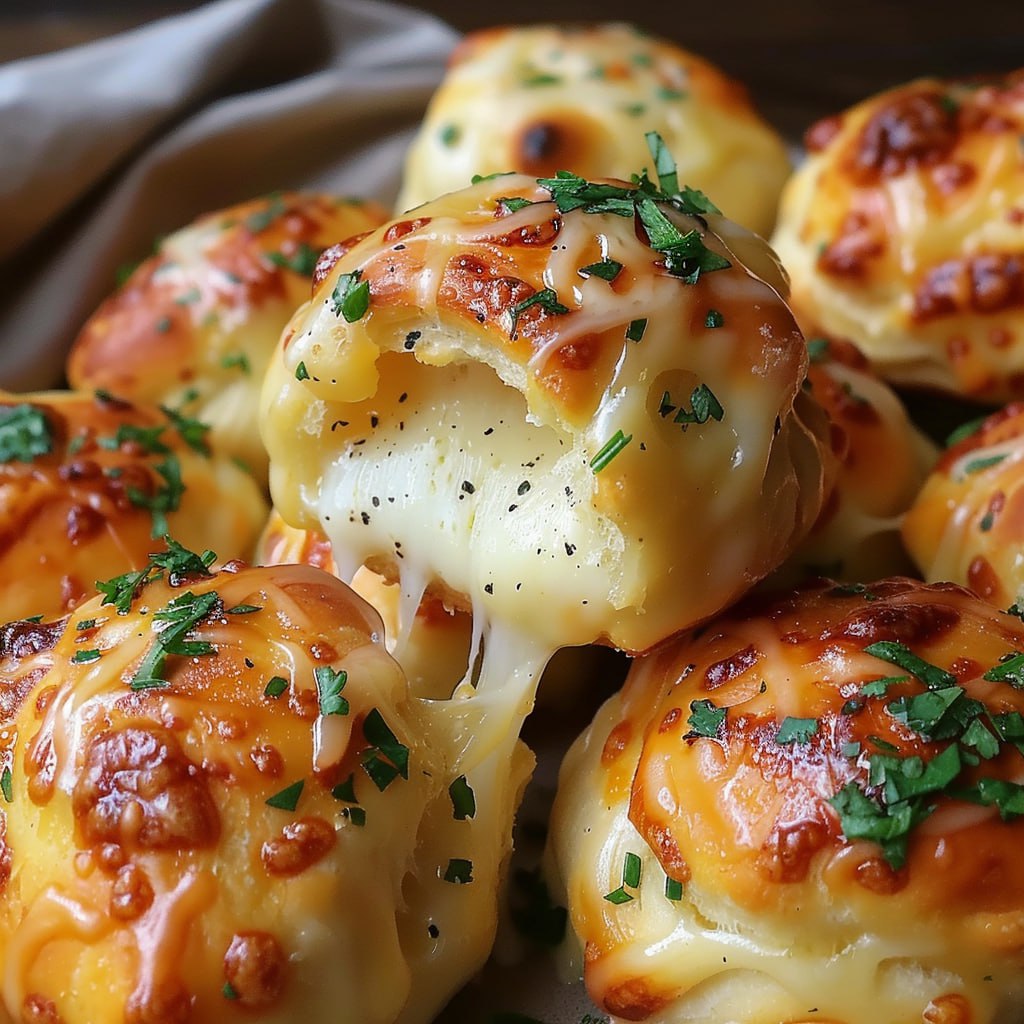
Nothing beats the irresistible combination of warm, flaky biscuits stuffed with gooey cheese and coated in aromatic garlic butter. Furthermore, Pillsbury Biscuit Garlic Butter Cheese Bombs have become the ultimate comfort food that brings families together around the dinner table. These delectable treats combine the convenience of store-bought biscuits with the homemade goodness of melted cheese and savory garlic butter.
Moreover, these cheese bombs are perfect for any occasion, from casual weeknight dinners to special gatherings with friends. Additionally, they require minimal ingredients and can be prepared in under 30 minutes. In fact, even novice cooks can master this recipe with ease.
The beauty of these garlic butter cheese bombs lies in their simplicity and versatility. On the other hand, their flavor profile is anything but simple. Each bite delivers a burst of melted mozzarella wrapped in tender, buttery biscuit dough that’s been infused with garlic and herbs.
Why You’ll Love These Pillsbury Biscuit Garlic Butter Cheese Bombs
These incredible garlic butter cheese bombs offer numerous benefits that make them a must-try recipe for any home cook. Furthermore, they’re designed to satisfy both beginners and experienced chefs alike.
Quick and Easy Preparation
• Perfect for busy schedules: Ready in just 22 minutes from start to finish • Minimal ingredients required: Only six simple ingredients needed • No special skills necessary: Even children can help with the preparation • One-bowl mixing: Less cleanup and hassle
Incredibly Versatile
• Customizable cheese options: Use different cheese varieties for unique flavors • Herb variations: Experiment with rosemary, thyme, or oregano • Size flexibility: Make them larger for main courses or smaller for appetizers • Dietary adaptations: Easily modified for different dietary needs
Crowd-Pleasing Appeal
• Universal favorite: Appeals to both kids and adults • Party-perfect: Ideal for gatherings, potlucks, and game day • Instagram-worthy: Beautiful golden appearance perfect for social media • Comfort food satisfaction: Delivers that warm, homey feeling everyone craves
Budget-Friendly Option
• Affordable ingredients: Uses common pantry staples • Cost-effective: Much cheaper than restaurant appetizers • Bulk preparation: Easy to make large batches for events • Leftover friendly: Reheats beautifully for next-day enjoyment
Step-by-Step Guide to Perfect Garlic Butter Cheese Bombs
Creating these delicious Pillsbury biscuit garlic butter cheese bombs involves three main phases. Additionally, each step builds upon the previous one to create the perfect final product.
Step 1: Preparation and Ingredient Setup
Before beginning the cooking process, proper preparation ensures smooth execution and better results. Moreover, having everything ready makes the assembly process much more enjoyable.
Essential Ingredients: • 1 can Pillsbury biscuits (8 count) • 8 cubes of mozzarella cheese • 1/4 cup melted butter • 2 cloves garlic, minced • 1 tbsp chopped fresh parsley • 1/4 cup grated Parmesan cheese
Preparation Steps:
- Preheat your oven to 375°F (190°C) for optimal baking temperature
- Line a baking sheet with parchment paper to prevent sticking
- Cut mozzarella into eight equal cubes for consistent filling
- Mince garlic finely to ensure even distribution of flavor
- Chop fresh parsley and set aside for the butter mixture
Furthermore, having all ingredients measured and ready streamlines the entire process. Additionally, this preparation method, known as mise en place, is used by professional chefs worldwide.
Step 2: Assembly and Shaping Process
The assembly phase requires gentle handling to maintain the biscuit’s integrity while ensuring proper cheese enclosure. Moreover, proper sealing techniques prevent cheese leakage during baking.
Detailed Assembly Instructions:
- Flatten each biscuit carefully: Use your palms to gently press each biscuit into a flat circle
- Center the cheese cube: Place one mozzarella cube in the exact center of each flattened biscuit
- Fold and seal properly: Bring the edges of the biscuit dough up and around the cheese
- Pinch edges firmly: Ensure all seams are completely sealed to prevent cheese escape
- Shape into balls: Roll each sealed biscuit gently between your palms
Additionally, the sealing process is crucial for preventing cheese leakage. Furthermore, take extra time to ensure each seam is properly closed. In fact, double-checking the seal prevents disappointing results.
Step 3: Garlic Butter Preparation and Final Touches
The garlic butter mixture transforms ordinary cheese-stuffed biscuits into extraordinary garlic butter cheese bombs. Moreover, this step adds the signature flavor that makes this recipe so special.
Garlic Butter Mixing Process:
- Melt butter completely: Use microwave or stovetop for smooth consistency
- Add minced garlic: Stir immediately to infuse maximum flavor
- Incorporate parsley: Mix fresh herbs evenly throughout the butter
- Let flavors meld: Allow mixture to sit for 2-3 minutes before using
Final Assembly Steps:
- Place on baking sheet: Arrange sealed biscuits with seam-side down
- Brush with garlic butter: Apply generous coating to each cheese bomb
- Sprinkle Parmesan cheese: Add final layer of cheesy goodness
- Bake to perfection: Cook for 10-12 minutes until golden brown
Advanced Tips for Perfect Garlic Butter Cheese Bombs
Cheese Selection and Preparation
Choosing the right cheese significantly impacts the final result of your garlic butter cheese bombs. Furthermore, different cheese varieties offer unique flavor profiles and melting characteristics.
Best Cheese Options: • Mozzarella: Classic choice with excellent melting properties • Cheddar: Adds sharp flavor and beautiful golden color when melted • Pepper Jack: Provides mild heat and creamy texture • Gouda: Offers smoky, nutty flavor profile • Cream cheese: Creates extra creamy, rich filling
Moreover, cheese temperature affects the baking process significantly. Additionally, room temperature cheese melts more evenly than cold cheese. Therefore, remove cheese from refrigerator 15-20 minutes before preparation.
Garlic Preparation Techniques
Proper garlic preparation enhances flavor distribution throughout your cheese bombs. Furthermore, different preparation methods yield varying intensity levels.
Garlic Preparation Methods: • Minced garlic: Provides strong, concentrated flavor bursts • Garlic powder: Offers milder, more evenly distributed taste • Roasted garlic: Creates sweet, mellow flavor profile • Garlic paste: Ensures smooth texture and even mixing
Additionally, fresh garlic provides the most vibrant flavor. However, garlic powder works well for those preferring milder taste. In contrast, roasted garlic adds sophisticated depth to the butter mixture.
Baking Temperature and Timing Optimization
Temperature control determines the success of your Pillsbury biscuit garlic butter cheese bombs. Moreover, proper timing ensures perfectly golden exteriors with fully melted interiors.
Temperature Guidelines: • 375°F (190°C): Standard temperature for even browning • 350°F (175°C): Lower temperature for thicker biscuits • 400°F (200°C): Higher temperature for crispier exteriors
Furthermore, oven calibration affects baking results significantly. Additionally, using an oven thermometer ensures accurate temperature readings. Therefore, invest in a reliable thermometer for consistent results.
Timing Considerations: • 10 minutes: Minimum time for cheese melting • 12 minutes: Standard baking time for golden brown color • 15 minutes: Extended time for extra crispy exteriors
Common Mistakes to Avoid When Making Cheese Bombs
Overstuffing with Cheese
Many home cooks make the mistake of using too much cheese filling. Furthermore, excessive cheese leads to messy leakage and uneven cooking. Additionally, overstuffed biscuits may not seal properly, resulting in disappointing final products.
Proper Cheese Portioning: • Use cube sizes approximately 1-inch square • Avoid cramming multiple cheese pieces into one biscuit • Leave adequate dough margin for proper sealing • Consider cheese expansion during melting process
Moreover, different cheese types expand differently when heated. Therefore, adjust portion sizes accordingly based on your chosen cheese variety.
Inadequate Sealing Techniques
Poor sealing represents the most common cause of garlic butter cheese bomb failures. Furthermore, improperly sealed biscuits result in cheese leakage and deflated final products.
Effective Sealing Methods: • Pinch seams firmly with fingertips • Use small amounts of water to help dough stick together • Twist seams for extra security • Press seam-side down on baking sheet
Additionally, dough temperature affects sealing success. Cold dough seals more effectively than warm dough. Therefore, work quickly during assembly to maintain optimal dough temperature.
Incorrect Garlic Butter Application
Many cooks either under-apply or over-apply the garlic butter mixture. Furthermore, improper application leads to uneven flavor distribution and poor browning results.
Optimal Application Techniques: • Use pastry brush for even coverage • Apply thin, consistent layer across entire surface • Avoid pooling butter in baking sheet • Save extra butter for serving alongside finished bombs
Creative Variations of Garlic Butter Cheese Bombs
International Flavor Profiles
Transform your basic cheese bombs into global cuisine experiences. Moreover, these variations introduce exciting new flavors while maintaining the core recipe structure.
Italian-Inspired Variations: • Add sun-dried tomatoes and basil for Mediterranean flair • Include pepperoni pieces for pizza-style bombs • Use Italian seasoning blend in garlic butter • Substitute mozzarella with ricotta and spinach mixture
Mexican-Style Adaptations: • Include jalapeño pieces for heat and flavor • Add cumin and chili powder to butter mixture • Use pepper jack cheese for authentic taste • Serve with salsa and sour cream for dipping
Asian Fusion Options: • Incorporate ginger and soy sauce in butter • Add sesame oil for nutty flavor enhancement • Include green onions for fresh crunch • Use cream cheese mixed with sriracha for spicy filling
Dietary Modification Options
Creating inclusive versions of garlic butter cheese bombs ensures everyone can enjoy this delicious treat. Furthermore, these modifications maintain flavor while accommodating various dietary needs.
Gluten-Free Alternatives: • Use gluten-free biscuit dough as base • Ensure all seasonings are gluten-free certified • Check cheese labels for gluten content • Use dedicated preparation surfaces to prevent cross-contamination
Vegetarian and Vegan Options: • Replace butter with plant-based alternatives • Use vegan cheese varieties for filling • Ensure biscuit dough contains no animal products • Add nutritional yeast for cheesy flavor enhancement
Low-Carb Modifications: • Substitute cauliflower dough for traditional biscuits • Use full-fat cheeses for increased satiety • Add herbs and spices for flavor without carbohydrates • Serve with vegetable-based sides instead of bread
Serving Suggestions and Pairing Ideas
Perfect Dipping Sauces
Complementary sauces enhance the garlic butter cheese bomb experience significantly. Moreover, different sauce options cater to various taste preferences and occasions.
Classic Dipping Options: • Marinara sauce: Traditional pairing with Italian flavors • Ranch dressing: Creamy complement to garlic and herbs • Honey mustard: Sweet and tangy contrast to rich cheese • Buffalo sauce: Spicy kick for heat lovers
Gourmet Sauce Alternatives: • Pesto: Fresh basil flavor that complements garlic perfectly • Aioli: Sophisticated garlic mayonnaise variation • Chimichurri: Fresh herb sauce with South American flair • Beer cheese: Rich, complex flavor perfect for adult gatherings
Meal Integration Strategies
Garlic butter cheese bombs work excellently as components of larger meals. Additionally, they can serve various roles depending on portion size and accompanying dishes.
Appetizer Presentations: • Arrange on wooden boards with complementary cheeses • Pair with fresh vegetables for color contrast • Include variety of dipping sauces for interactive dining • Garnish with fresh herbs for restaurant-quality presentation
Main Course Applications: • Serve alongside hearty soups for complete meals • Pair with large salads for balanced nutrition • Include with pasta dishes for Italian-themed dinners • Accompany grilled meats for outdoor gatherings
Storage and Reheating Guidelines
Proper Storage Techniques
Maintaining the quality of leftover cheese bombs requires proper storage methods. Furthermore, correct storage extends shelf life while preserving texture and flavor.
Short-Term Storage (1-2 Days): • Store in airtight containers at room temperature • Separate layers with parchment paper • Avoid refrigeration which can make biscuits soggy • Keep away from direct sunlight and heat sources
Long-Term Storage (Up to 1 Week): • Refrigerate in sealed containers for extended freshness • Wrap individually in plastic wrap for portion control • Label containers with preparation dates • Store garlic butter separately if preparing ahead
Optimal Reheating Methods
Proper reheating restores the original texture and temperature of garlic butter cheese bombs. Moreover, different methods produce varying results depending on available time and equipment.
Oven Reheating (Best Results): • Preheat oven to 350°F (175°C) • Place bombs on baking sheet lined with parchment • Heat for 5-7 minutes until warmed through • Brush with additional garlic butter if desired
Microwave Reheating (Quick Option): • Place on microwave-safe plate • Heat in 30-second intervals to prevent overcooking • Cover with damp paper towel to prevent drying • Let rest for 1 minute before serving
Air Fryer Method (Crispy Results): • Preheat air fryer to 350°F (175°C) • Cook for 3-4 minutes until heated through • Check frequently to prevent over-browning • Brush with fresh garlic butter after heating
Troubleshooting Common Issues
Cheese Leakage Problems
Cheese leakage represents the most frequent issue when making garlic butter cheese bombs. However, several techniques can prevent this frustrating problem.
Prevention Strategies: • Ensure cheese cubes are properly sized • Seal all edges thoroughly before baking • Use room temperature biscuit dough for better handling • Place seam-side down on baking sheet
Emergency Solutions: • If leakage occurs during baking, continue cooking normally • Remove excess cheese from baking sheet while still warm • Brush finished bombs with extra garlic butter to enhance flavor • Serve immediately while cheese is still melted
Texture and Consistency Issues
Achieving the perfect texture requires attention to several key factors. Furthermore, understanding these elements helps troubleshoot problems before they occur.
Dense or Heavy Results: • Avoid overworking the biscuit dough • Don’t compress biscuits too firmly when sealing • Ensure oven temperature is accurate • Check baking powder expiration date in biscuits
Dry or Overcooked Outcomes: • Reduce baking time by 1-2 minutes • Lower oven temperature by 25°F • Apply more garlic butter before baking • Cover with foil if browning too quickly
FAQs About Pillsbury Biscuit Garlic Butter Cheese Bombs
Can I Make Garlic Butter Cheese Bombs Ahead of Time?
Yes, you can prepare garlic butter cheese bombs several hours in advance. Additionally, advance preparation actually improves flavor development as ingredients have time to meld together.
Make-Ahead Instructions: • Assemble bombs completely but don’t apply garlic butter • Cover tightly with plastic wrap and refrigerate • Remove from refrigerator 15 minutes before baking • Apply garlic butter just before placing in oven
Furthermore, assembled bombs can be frozen for up to one month. Moreover, frozen bombs can be baked directly from freezer with additional 3-4 minutes cooking time.
What’s the Best Way to Prevent Cheese from Leaking?
Preventing cheese leakage requires proper technique and attention to detail. Additionally, several strategies work together to ensure success.
Key Prevention Methods: • Use appropriately sized cheese cubes (1-inch maximum) • Seal all edges thoroughly with pinching motion • Place seam-side down on baking sheet • Avoid overstuffing with excessive cheese
Moreover, cheese type affects leakage tendency. Low-moisture mozzarella performs better than fresh mozzarella for this application.
Can I Use Different Types of Biscuits?
Absolutely! Different biscuit varieties create unique textures and flavors in your cheese bombs. Furthermore, experimentation with various options can lead to personalized favorite versions.
Biscuit Alternatives: • Buttermilk biscuits: Create tangier flavor profile • Honey butter biscuits: Add subtle sweetness • Flaky layers biscuits: Provide extra texture dimension • Jumbo biscuits: Allow for larger cheese portions
Additionally, homemade biscuit dough works excellently for this recipe. However, store-bought options provide convenience without sacrificing quality.
How Do I Know When They’re Perfectly Done?
Determining doneness requires attention to visual and textural cues. Moreover, proper timing ensures optimal results every time.
Doneness Indicators: • Golden brown color: Surface should be evenly browned • Firm texture: Bombs should feel set when gently pressed • Melted cheese: Slight cheese bubbling at seams is normal • Internal temperature: Should reach 165°F (74°C) when measured
Furthermore, slight variations in oven performance may require timing adjustments. Therefore, use visual cues as primary doneness indicators rather than relying solely on timer.
Can I Make These Healthier?
Yes, several modifications can create healthier versions of garlic butter cheese bombs without sacrificing flavor. Additionally, these changes can accommodate various dietary preferences and restrictions.
Healthy Modification Options: • Reduce butter content: Use cooking spray plus minimal butter for flavor • Add vegetables: Include spinach, bell peppers, or onions in filling • Use low-fat cheese: Reduce overall calorie content • Whole grain options: Choose whole wheat biscuit varieties when available
Moreover, portion control helps manage calorie intake while still enjoying this delicious treat. Furthermore, serving with fresh salad or vegetables creates more balanced meals.
Conclusion
Pillsbury Biscuit Garlic Butter Cheese Bombs represent the perfect combination of convenience, flavor, and comfort food satisfaction. Moreover, this versatile recipe adapts easily to various tastes, dietary needs, and occasions while maintaining its core appeal.
Throughout this comprehensive guide, we’ve explored every aspect of creating perfect cheese bombs. From ingredient selection and preparation techniques to creative variations and troubleshooting tips, you now have all the knowledge needed for consistent success.
Print
The Ultimate Guide to Pillsbury Biscuit Garlic Butter Cheese Bombs
- Total Time: 35 mins
Description
Treat yourself to these Pillsbury Biscuit Garlic Butter Cheese Bombs! Warm, flaky biscuits filled with gooey cheese and coated in garlic butter – the perfect snack or appetizer for any occasion.
Ingredients
1 can Pillsbury biscuits (8 count)
8 cubes of mozzarella cheese
1/4 cup melted butter
2 cloves garlic, minced
1 tbsp chopped fresh parsley
1/4 cup grated Parmesan cheese
Instructions
Preheat your oven to 375°F (190°C). Line a baking sheet with parchment paper.
Flatten each biscuit and place a cube of mozzarella cheese in the center. Fold the biscuit dough around the cheese and pinch the edges to seal.
In a small bowl, mix melted butter, minced garlic, and chopped parsley.
Place the cheese-filled biscuits on the prepared baking sheet. Brush the tops with the garlic butter mixture and sprinkle with grated Parmesan cheese.
Bake for 10-12 minutes, or until the biscuits are golden brown and the cheese is melted.
Serve warm and enjoy the cheesy, garlicky goodness!
Prep Time: 10 minutes